Introduction
This is to get a large button for the Yoto G3. The same technique can be used with the Yoto G2. To open the Yoto G2 (which is quite different) please follow the official SD changing guide.
You will need these 3D printed objects https://www.printables.com/model/1078189...
Tools
Parts
-
-
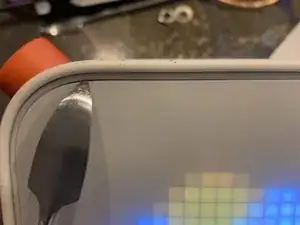
Gen 3 Specific- Gently peel the screen off the METAL splunger tool from ifixit. Run it around the inner plastic. Also turn your yoto off unless you want to be blinded
-
Gen 2- follow the SD guide provided online by Yoto. Return at the step after the rotary encoder is removed.
-
-
-
Keep your yoto off. There's about 200 screws. Unscrew them. Then pry off with the good ole metal spludger. Then gently pry up the green motherboard.
-
-
-
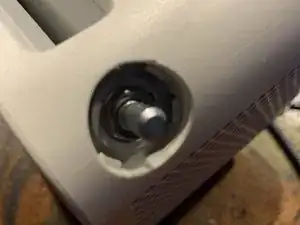
Pop off the button by gently wedging the spludger and wiggling the orange plastic. Then use pliars to unscrew the hex nut
-
-
-
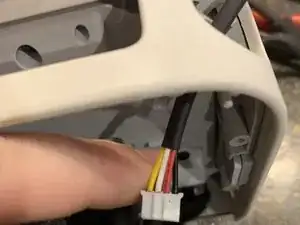
Unscrew the NFC card holder. Use the spludger to make sure there is no glue in the female connector socket on the motherboard for the NFC and the right hand button.
-
-
-
Thread your cable with shrink through the hole, Attach to motherboard. Put NFC back in and reassemble Yoto. This is the same for the Generation 2.
-
Now is the time to put the jacket back on.
-
-
-
Connect to female side of cable and insert the rotary encoder into the 3d printed part. it is a tight fit so be sure to go slow and secure tighlty
-
-
-
Connect the wires. Yellow to yellow, red to read, black to black and white to white. Coer with heat shrink tubing. You can solder or just twist.
-


To reassemble your device, follow these instructions in reverse order.

One comment
Thank you! This is the only set of instructions I've found for how to open up a 3rd gen Yoto! I order the spudger set and the tool worked perfectly.