Introduction

This is a prerequisite-only guide! This guide is part of another procedure and is not meant to be used alone.

  1. ByiiAO26RDQLNDGS
    ByiiAO26RDQLNDGS
    BdJkXeHW4RxNU42g
    • For your safety, discharge the battery below 25% before disassembling your phone. This reduces the risk of a dangerous thermal event if the battery is accidentally damaged during the repair. If your battery is swollen, take appropriate precautions.

    • Power off your iPhone before beginning disassembly.

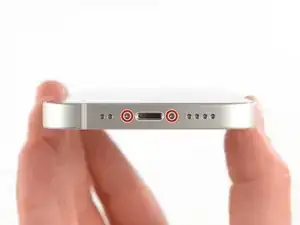
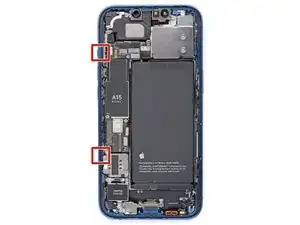
    • Remove the two 6.8 mm-long pentalobe P2 screws at the bottom edge of the iPhone.

    • Opening the iPhone's display will compromise its waterproof seals. Have replacement seals ready before you proceed past this step, or take care to avoid liquid exposure if you reassemble your iPhone without replacing the seals.

  2. pvyofbGR6QDZLwuT
    pvyofbGR6QDZLwuT
    uHpIXSCwsv5aX6k2
    qDfr6bv6XxVSWXYb
    • If your iPhone has a cracked screen, keep further breakage contained and prevent bodily harm during your repair by taping over the glass.

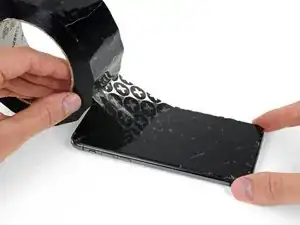
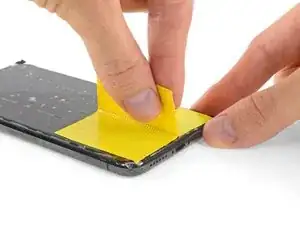
    • Lay overlapping strips of clear packing tape over the iPhone's screenuntil the whole face is covered.

    • Wear safety glasses to protect your eyes from any glass shaken free during the repair.

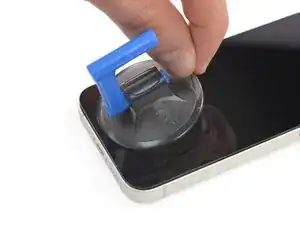
    • If you can't get the suction cup to stick in the next few steps, fold a strong piece of tape (such as duct tape) into a handle and lift the screen with that instead.

    • If all else fails, you can superglue the suction cup to the screen.

    Yes, tape to cover the cracks. Guess what also loses adhesion when you apply heat to it,&&^&^$^ tape.

    dylan brune -

  3. nomKPGPYQmVXKkY4
    nomKPGPYQmVXKkY4
    u2VWMGNpSNEWhWhn
    wdIbZZ2ZcndTbHWn
    • The next three steps demonstrate the Anti-Clamp, a tool we designed to make the opening procedure easier. If you aren't using the Anti-Clamp, skip down three steps for an alternate method.

    • For complete instructions on how to use the Anti-Clamp, check out this guide.

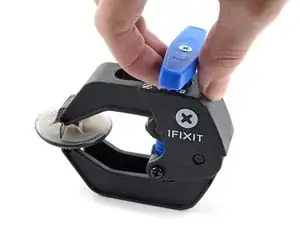
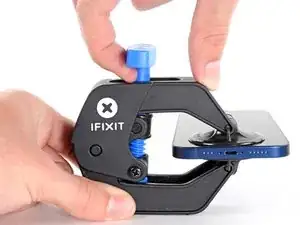
    • Pull the blue handle backwards to unlock the Anti-Clamp's arms.

    • Slide the arms over either the left or right edge of your iPhone.

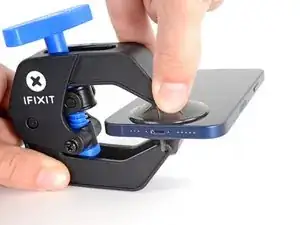
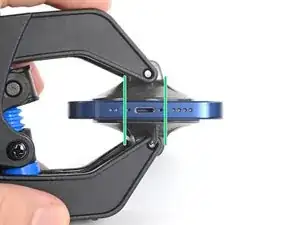
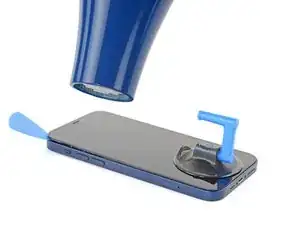
    • Position the suction cups near the bottom edge of the iPhone—one on the front, and one on the back.

    • Squeeze the cups together to apply suction to the desired area.

    • If you find that the surface of your iPhone is too slippery for the Anti-Clamp to hold onto, you can use tape to create a grippier surface.

  4. QAZAG12HZt4ymkfM
    QAZAG12HZt4ymkfM
    hqqQq1tU46iiXLQv
    XG1WOiVw4haPnbZL
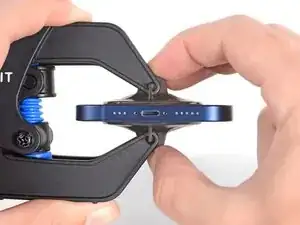
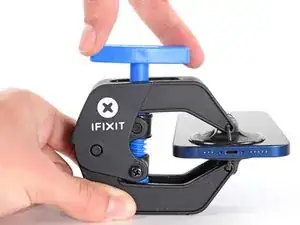
    • Pull the blue handle forwards to lock the arms.

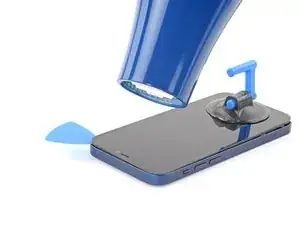
    • Turn the handle clockwise 360 degrees or until the cups start to stretch.

    • Make sure the suction cups remain aligned with each other. If they begin to slip out of alignment, loosen the suction cups slightly and realign the arms.

  5. QImf2HMVTecJsNYY
    QImf2HMVTecJsNYY
    PdUh3NIj6JOFRBEW
    x1dkLGaMEDFJ2MaR
    • Support your iPhone on something sturdy such as a hardcover book so it rests hands-free and parallel to the ground; this makes it easier to work with in the following steps.

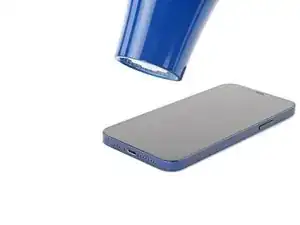
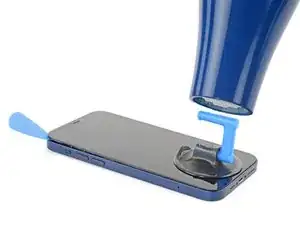
    • Use a hair dryer to heat along the bottom edge of the iPhone. The screen should feel slightly too hot to touch.

    • For complete instructions on how to use a hair dryer, check out this guide.

    • Wait one minute to give the adhesive a chance to release and present an opening gap.

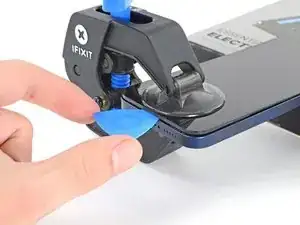
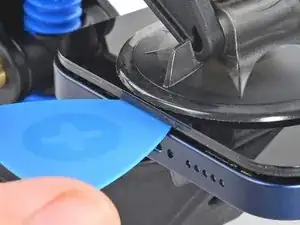
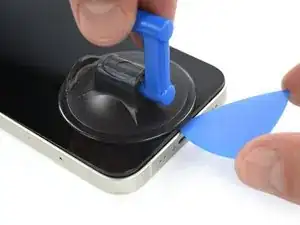
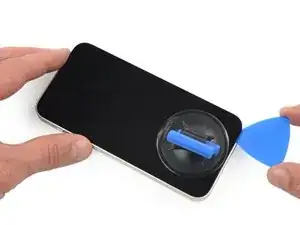
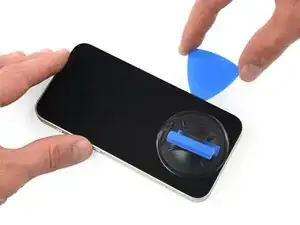
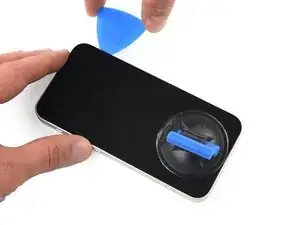
    • Insert an opening pick under the screen's plastic bezel when the Anti-Clamp creates a large enough gap.

    • If the Anti-Clamp doesn't create a sufficient gap, apply more heat to the area and rotate the handle a quarter turn.

    • Don't crank more than a quarter turn at a time, and wait one minute between turns. Let the Anti-Clamp and time do the work for you.

    • Skip the next three steps.

    Make sure as you are prying the screen that the thickness of the screen looks like it does in the picture. Be very careful to slice the adhesive between the bezel and the device not between the screen and the bezel as I did.

    Reed -

  6. DXVJqMSTNoNsgZmT
    • Use a hair dryer or a heat gun to heat the bottom edge of the iPhone for 90 seconds or until the screen is slightly too hot to touch.

    • Never leave your hair dryer in one spot for an extended period of time.

  7. gc1DbP6iqYjfWshi
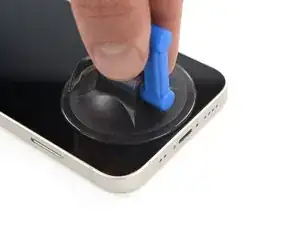
    • If you're using a single suction handle, apply it to the bottom edge of the phone, as close to the edge as possible.

  8. e1dK1xEJxTfcVLKq
    e1dK1xEJxTfcVLKq
    VPQXZHseIw6MBrKx
    6nnBtHV1qYbWeVbN
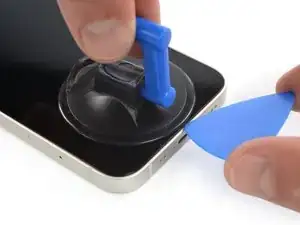
    • Pull up on the suction cup with firm, constant pressure to create a slight gap between the screen and the frame.

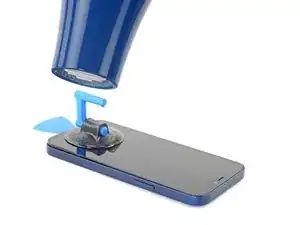
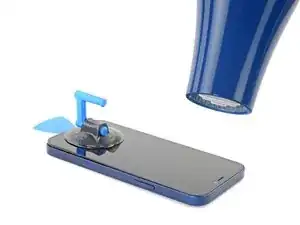
    • Insert an opening pick into the gap under the screen's plastic bezel.

    • The watertight adhesive holding the screen in place is very strong; creating this initial gap takes a significant amount of force. If you're having a hard time opening a gap, apply more heat, and gently rock the screen up and down to weaken the adhesive until you create enough of a gap to insert your tool.

    Take care on this step: it's possible to delaminate the glass from the frame holding the screen and vital components together. If you're not aware, you could continue working away (as I did) delaminating the entire glass from the frame only to discover you've messed up. The entire assembly is about 1mm thick and visually looks like two layers (as shown in the last photo here).

    Brent L -

    I broke my screen here. There is a seam in between the glass and the components. Don’t stick your pick in there or it will break. Stick it below the black bezel

    ecwskier -

  9. ZEWwUd1VKFpLNHnH
    ZEWwUd1VKFpLNHnH
    vxW4gGTiscfcZjjd
    • Use a hair dryer to heat the right edge of the iPhone (the edge with the power button) for 90 seconds or until the screen is slightly too hot to touch.

  10. utIUPTVOaPOp1Ifx
    utIUPTVOaPOp1Ifx
    O3sVLQxU3UtCbveS
    JyIfEVAZUhSNvJaA
    • Slide the opening pick around the bottom right corner and along the right edge of the iPhone, slicing through the adhesive holding the display in place.

    • Don't insert your pick more than 3 mm, and don't force it through unheated sections of adhesive, or it may slip and damage internal components.

    • Leave the pick in the top right corner before continuing.

    This procedure cracked my screen. Do not move too fast with the pick, and make sure to heat it before hand. Not sure what else can be done to prevent a cracked screen here

    Kristo Jorgenson -

    cracked my screen to. The pleck sliped cause I was to afraid to damage something intern so it sliped out and cracked the display.

    Tariguz -

  11. 3YUMT2CHgElg5VOQ
    • Use a hair dryer to heat the top edge of the iPhone for 90 seconds or until the screen is slightly too hot to touch.

  12. ZCG5NVqdocby1GPW
    ZCG5NVqdocby1GPW
    OMva3FZdafurBsCc
    FhZtShTebyNBx4BB
    • Slide the opening pick around the top right corner of the iPhone to separate the top adhesive.

    • Don't insert your pick more than 3 mm, as you may damage the top sensors.

    • Leave the pick in the top left corner before continuing.

  13. xO2l2HZJc1muXP11
    xO2l2HZJc1muXP11
    C5gwyDhXaAymJMeD
    • Use a hair dryer to heat the left edge of the iPhone for 90 seconds or until the screen is slightly too hot to touch.

  14. LeorCMl1FMcbETas
    • There are delicate cables along the left edge of your iPhone. Don't insert your pick here, as you may damage the cables.

    Wo ist die "linke Seite"? (Blick auf das Display?) Was bedeuten die roten Quadrate auf dem Bild vom geöffneten Gerät? Zur Orientierung wäre es passend, die Lage der Lautstärke + bzw. - Tasten anzugeben.

    anyone nobody -

    Immediately ripped left cable here. Have done iFixIt repairs many times. Very disappointed!!

    Seth Kaplan -

  15. yFckTkxJQV1LwVUA
    yFckTkxJQV1LwVUA
    DrfwXaAUvrJ3qpBH
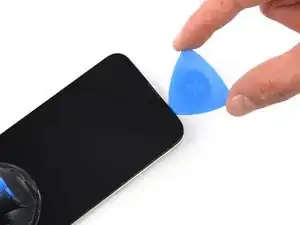
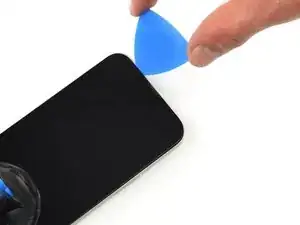
    • Insert a second opening pick in the bottom left corner of the iPhone.

    • Twist both picks simultaneously until the left edge clips release.

    • Apply the twisting force gradually.

    • If you're having trouble separating the adhesive, reheat the left edge.

  16. A6WHmMQGKB6oxNDa
    • Pull on the small nub on the suction cup to remove it from the front panel.

  17. GLQiEdBCG6FcV6lm
    GLQiEdBCG6FcV6lm
    3YqSYNiGN2RQrZrM
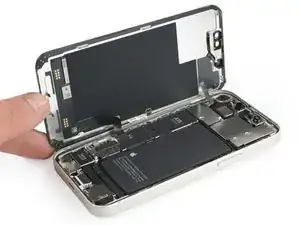
    • Rotate your iPhone so the right edge faces you.

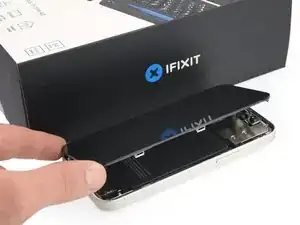
    • Open the iPhone by swinging the display up from the right side, like the front cover of a book.

    • Don't try to fully separate the display yet, as several fragile ribbon cables still connect it to the iPhone's logic board.

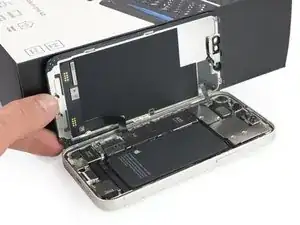
    • Lean the display against something to keep it propped up while you're working on the phone.

    • During reassembly, lay the display in position, align the clips along the top edge, and carefully press the top edge into place before snapping the rest of the display down. If it doesn't click easily into place, check the condition of the clips around the perimeter of the display and make sure they aren't bent.

Conclusion

To reassemble your device, follow these instructions in reverse order.

Adriana Zwink

Member since: 18/12/19

56498 Reputation

0 comments