Introduction

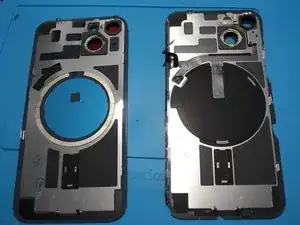
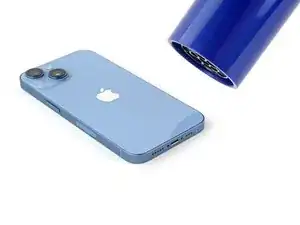
Here is what happened to me: I wanted to install a new battery to my iPhone 14 but whilst removing the backcover the thing broke and had to be replaced so I bought a new glass backcover with most parts already pre-installed on eBay.

Be aware: I am not a trained Apple technician, this was my first time doing this kind of repair.
This is a complicated repair for some people and requires taking your time, don't be hasty!

  1. cTy1O1XCTrDHYL2R
    cTy1O1XCTrDHYL2R
    mCCBQmrbD3jWtTQY
    • Power off your iPhone before beginning disassembly.

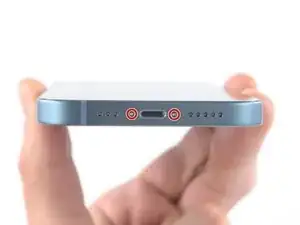
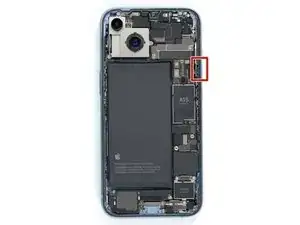
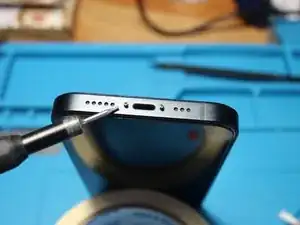
    • Remove the two 6.8 mm-long pentalobe P2 screws at the bottom edge of the iPhone.

    PLEASE remove back first and disconnect battery before taking cables off!! as per Apple instructions

    PC Technology Group -

  2. 6UPwoloGBO4tmVoS
    6UPwoloGBO4tmVoS
    BmSYPJmOy6dbHipF
    3EOdQPAGOmiuhoKU
    • If inserted too far, an opening pick can damage your device. Follow this step to mark your pick and prevent damage.

    • Measure 3 mm from the tip and mark the opening pick with a permanent marker.

    • You can also mark the other corners of the pick with different measurements.

    • Alternatively, tape a coin to a pick 3 mm from the tip.

    Got to step 2 and realized the fix kit doesn't include an opening pick! Looks like a guitar pick, and I have those lying around. Is that expected? Looks like the pick is used in many steps below. There's a little blue crowbar that isn't mentioned in the instructions. Perhaps that replaces the opening pick?

    Sloan Looney -

    Hi! I can't see which guide you were using when writing this comment. Can you reply here with which guide and fix kit you used?

    Clay Eickemeyer -

    I see you posted this in Meta. I hope it's resolved soon! In the meantime, a guitar pick may work well enough for your repair.

    Clay Eickemeyer -

    what fix kit?

    Meow Purr -

    My fix kit didn't include an opening pick either

    WILLIAM HARRIS -

    Make sure you check inside the black boxes after emptying them. My pick was stuck inside one of the boxes.

    AndyF -

    My AliExpress refurbished screen came with a pick that has a coin-like circle that pops out, so no modification was necessary

    Gijs Leegwater -

    the picture shows 3 cm but the description says 3 mm's. Which one is it?

    John Pena -

    That is a misunderstanding. It is a ruler with a scale for cm, it shows 0.3 cm, i.e. 3 mm.

    VauWeh -

    Oh, come ON!

    Big Ed -

    It will ALWAYS be millimeters on a phone, but this step is ridiculous, skip it!

    Leif DeWolf -

    It's not an Ifixit KIT if it doesn't include everything. You'll need to order the opening pic separately. Or head to Walmart like myself and look for guitar pics. Hopefully, this will work just as well.

    Jaleeljb97@icloud.com -

    No pick in mine as well. It’s really not clear that you have to order this separately when ordering an IPhone SE 202/2022 screen repair kit. Is this the case?

    Jackson Castiglione -

    Frustrated, I ordered a compact package where everything was encapsulated. Useless suction tools could not separate the screen. If it is unable to decouple the screen, then why sucking suction tools you have provided.

    Shourob Datta -

    For my kit the triangle pick was stuck inside the box with the screen not with the other tools maybe it's also there for you

    Henry Scheibehenne -

    Y’all are getting far, FAR too detailed with some of this stuff…. Measuring and marking the pick that you won’t actually use to open the device?!? lol that’s kinda funny. Just heat it up, grab a spudger, and the back just pops right off! The iFixit tech need to stick to the KISS method more often, you know KEEP IT SIMPLE STUPID!!! Like l, for reals, I’ve been doing this stuff for YEARS and using iFixit guides regularly and this is just ridiculous at this point!

    Leif DeWolf -

    Will the phone still work if the sensor assembly on the back of the screen is damaged?

    Mutshidzi Rambau -

  3. CRJr4yYO4kLaiPbI
    CRJr4yYO4kLaiPbI
    r63i3XuMPimGoJJV
    • If your iPhone has a cracked rear glass, keep further breakage contained and prevent bodily harm during your repair by taping over the glass.

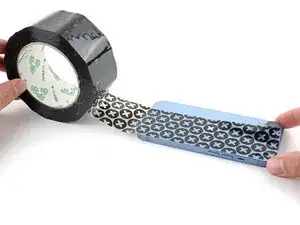
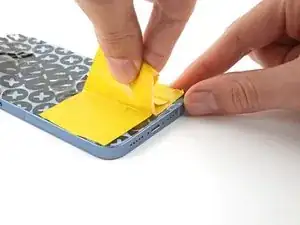
    • Lay overlapping strips of clear packing tape over the iPhone's rear glass until the whole face is covered.

    • Wear safety glasses to protect your eyes from any glass shaken free during the repair.

    • If you can't get the suction cup to stick in the next few steps, fold a strong piece of tape (such as duct tape) into a handle and lift the rear glass with that instead.

    • If all else fails, you can superglue the suction cup to the rear glass.

  4. MjiZyeWBDhmrh4F4
    MjiZyeWBDhmrh4F4
    TWlXKq6MxRf2HRUq
    VkaQaBKgIGLCHLa2
    • The next three steps demonstrate the Anti-Clamp, a tool we designed to make the opening procedure easier. If you aren't using the Anti-Clamp, skip down three steps for an alternate method.

    • For complete instructions on how to use the Anti-Clamp, check out this guide.

    • Follow this guide to secure your screen with the included tape.

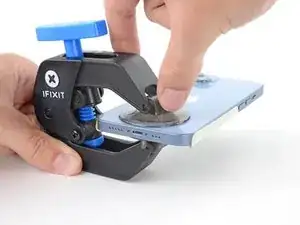
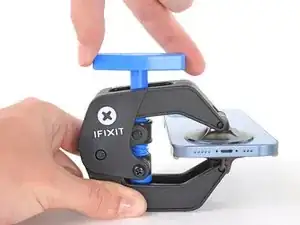
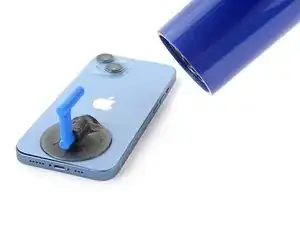
    • Pull the blue handle backwards to unlock the Anti-Clamp's arms.

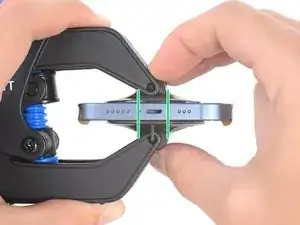
    • Slide the arms over either the left or right edge of your iPhone.

    • Position the suction cups near the bottom edge of the iPhone—one on the front, and one on the back.

    • Squeeze the cups together to apply suction to the desired area.

    • If you find that the surface of your iPhone is too slippery for the Anti-Clamp to hold onto, you can use tape to create a grippier surface.

  5. fNWFUadoWOdhb4Wg
    fNWFUadoWOdhb4Wg
    tiFjSmoBYZ5bFLuH
    Ig4WIwuIDybgCBoj
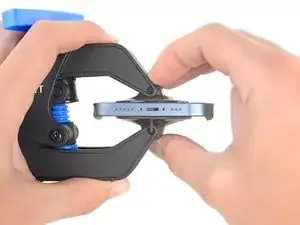
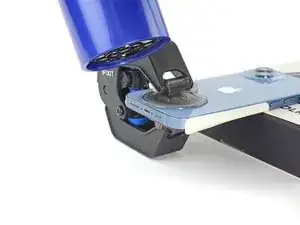
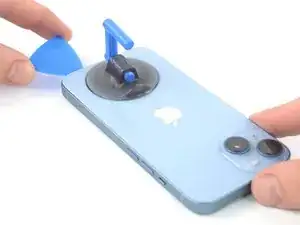
    • Pull the blue handle forwards to lock the arms.

    • Turn the handle clockwise 360 degrees or until the cups start to stretch.

    • Make sure the suction cups remain aligned with each other. If they begin to slip out of alignment, loosen the suction cups slightly and realign the arms.

  6. QwFsmurgRSXJ4q4q
    QwFsmurgRSXJ4q4q
    ipHQdMZZxFYjVJgW
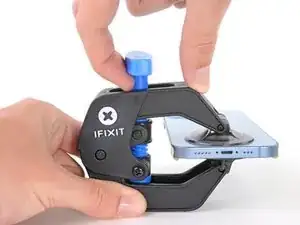
    • Support your iPhone on something sturdy such as a hardcover book so it rests hands-free and parallel to the ground; this makes it easier to work with in the following steps.

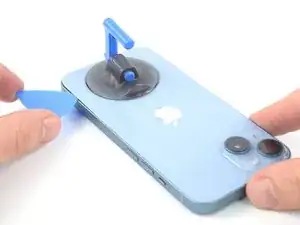
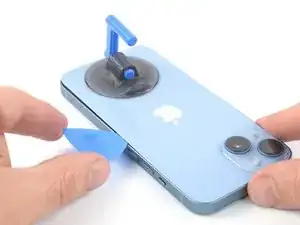
    • Use a hair dryer to heat along the bottom edge of the iPhone. The glass should feel slightly too hot to touch.

    • For complete instructions on how to use a hair dryer, check out this guide.

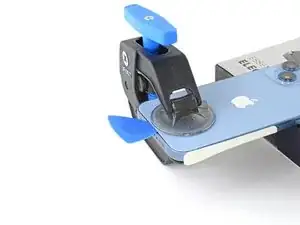
    • Wait one minute to give the adhesive a chance to release and present an opening gap.

    • Insert an opening pick under the rear glass when the Anti-Clamp creates a large enough gap.

    • If the Anti-Clamp doesn't create a sufficient gap, apply more heat to the area and rotate the handle a quarter turn.

    • Don't crank more than a quarter turn at a time, and wait one minute between turns. Let the Anti-Clamp and time do the work for you.

    • Skip the next two steps.

  7. IsVeuh3fPIWDO5K4
    • If you're using a suction handle, follow the next two steps to loosen the rear glass.

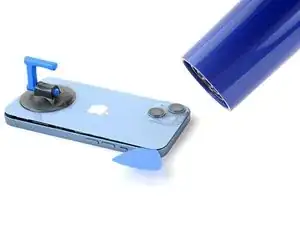
    • Use a hair dryer or a heat gun to heat the bottom edge of the iPhone for 90 seconds or until the rear glass is slightly too hot to touch.

    • Never leave your hair dryer in one spot for an extended period of time.

  8. YKWNfnMsnTfyimMF
    YKWNfnMsnTfyimMF
    ugMQRxpU4mnF1rgy
    EU5uqkFJtYotCIZP
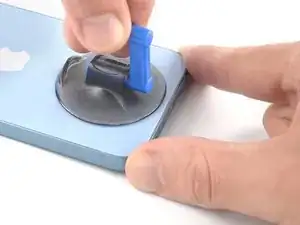
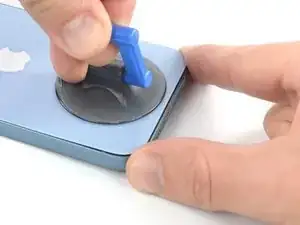
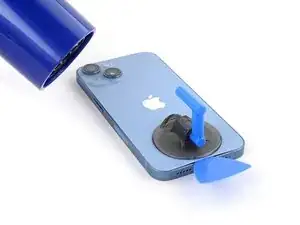
    • Apply a suction handle to the bottom edge of the rear glass, while avoiding the very edge of the glass.

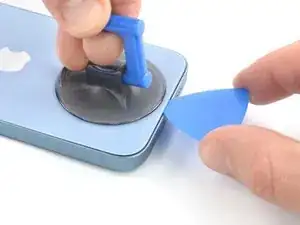
    • Pull up on the suction cup with firm, constant pressure to create a slight gap between the rear glass and the case.

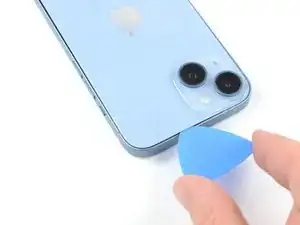
    • Insert an opening pick into the gap.

    • The adhesive holding the rear glass in place is very strong; creating this initial gap takes a significant amount of force. If you're having a hard time opening a gap, apply more heat, and gently rock the rear glass up and down to weaken the adhesive until you create enough of a gap to insert your opening pick.

  9. AHZmchOutg4xpAeZ
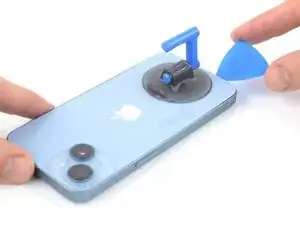
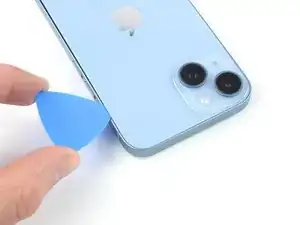
    • Use a hair dryer to heat the left edge of the iPhone for 90 seconds or until the rear glass is slightly too hot to touch.

  10. dFXLHGiDZ2XORDAp
    dFXLHGiDZ2XORDAp
    LDsYd22EGSSoLTmP
    vTD2ZoIkxvFqjIvR
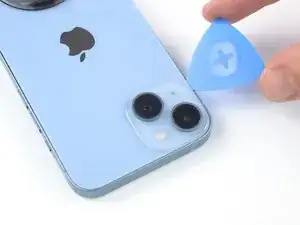
    • Slide the opening pick around the lower left corner and up the left edge of the iPhone, slicing through the adhesive holding the rear glass in place.

    • Don't insert your pick more than 3 mm, as you may damage internal components.

  11. vTOownKwjPTskAHV
    • There's a delicate cable along the right edge, next to the volume up button. Don't insert your pick here, as you may damage the cable.

  12. FSnOQlHHkxrMq5jU
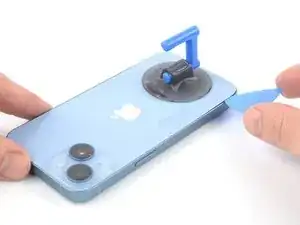
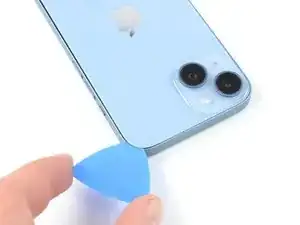
    • Use a hair dryer to heat the right edge of the iPhone (the edge with the power button) for 90 seconds or until the rear glass is slightly too hot to touch.

    This is the side with the volume buttons

    Jace -

  13. tTLkV1h3abGGDI2N
    tTLkV1h3abGGDI2N
    3oIY5VdjWvT6PesW
    YGTKwM6USPBvmwuB
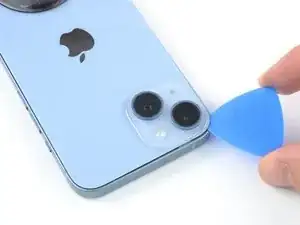
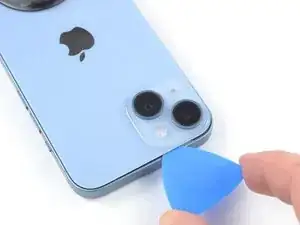
    • Re-insert your pick at the bottom edge of the iPhone, and slide it up the right side to continue separating the adhesive.

    • Don't insert your pick more than 3 mm, as you may damage the charging coil cable.

  14. ZDyLFnou4RJkJEXv
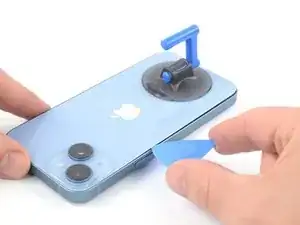
    • Use a hair dryer to heat the top edge of the iPhone for 90 seconds or until the rear glass is slightly too hot to touch.

  15. sKSmwfQuTAehnDR4
    sKSmwfQuTAehnDR4
    usaoZUCDGGLX6QHF
    byNSACWe3PHZJ32B
    • Insert your pick underneath the top right edge of the phone. Slide it around the top-right corner and halfway across the top edge.

  16. CYMVJsRsbpKIFhip
    CYMVJsRsbpKIFhip
    eGxOXSEE4LKsxmpC
    hlrQvDK5HgYkhpVU
    • Insert your pick underneath the top-left edge of the phone. Slide it around the top-left corner and halfway across the top edge.

    • Don't insert the pick more than 3 mm, as you may damage or smear the camera array.

    • Don't try to fully separate the rear glass yet, as a fragile ribbon cable still connects it to the iPhone's logic board.

  17. hWUphAGZ25pSFiTy
    hWUphAGZ25pSFiTy
    fCwk5yrImJtY1luW
    v3yB3XiaDHvNYMTD
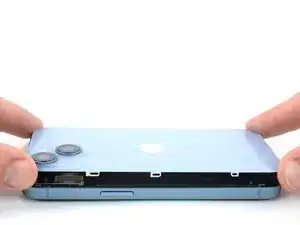
    • Remove your suction handle from the rear glass.

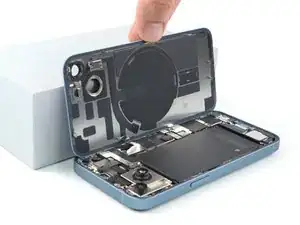
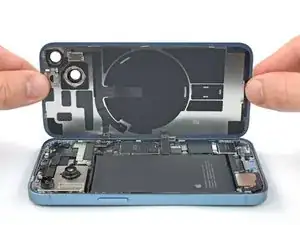
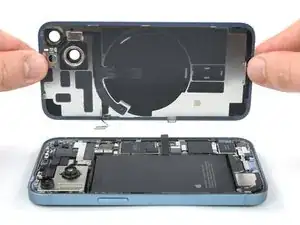
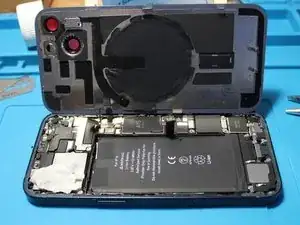
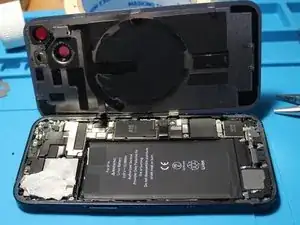
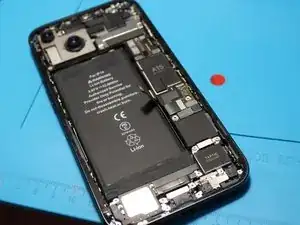
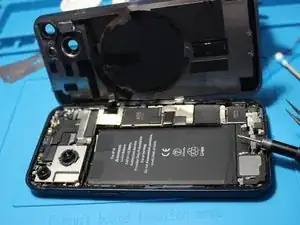
    • Slowly open your iPhone by swinging the rear glass up from the left side, like the back cover of a book.

    • Be careful not to strain the short charging coil flex cable.

    • Lean the rear glass against something to keep it propped up while you're working on the phone.

    • If you don't have anything at hand to lean the rear glass against, your suction handle can do the trick.

    • During reassembly, lay the rear glass in position, align the clips along the top edge, and carefully press the top edge into place before snapping the rest down. If it doesn't click easily into place, check the condition of the clips around the perimeter of the rear glass and make sure they aren't bent.

  18. BKiNNKIi22dMXwRe
    BKiNNKIi22dMXwRe
    J3n2JpKHfGTTf54W
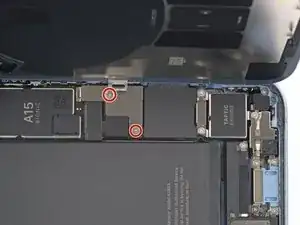
    • Use a Y000 screwdriver to remove the two 1.3 mm-long screws securing the battery connector cover.

    • Throughout this repair, keep track of each screw and make sure it goes back exactly where it came from to avoid damaging your iPhone.

    • During reassembly, this is a good point to power on your iPhone and test all functions before you seal the display in place. Be sure to power your iPhone back down completely before you continue working.

  19. NXxCWe1x6f6TKTH2
    NXxCWe1x6f6TKTH2
    BcXZNt4XQAPgnpEW
    fA2KLoQWY2qXTpGG
    • Grasp the battery connector cover with a pair of tweezers and slide it upwards (towards the A15 print) to unlatch the top hook.

    • Remove the battery connector cover.

  20. dEUTrKLkEh3v1Dt6
    dEUTrKLkEh3v1Dt6
    1kHIDmCLWCMGguI6
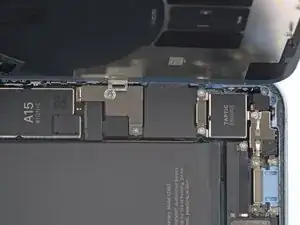
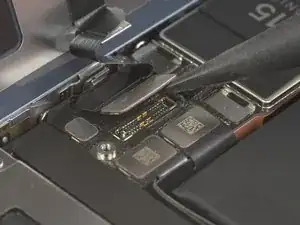
    • Use the pointed end of a spudger to disconnect the battery cable by prying the connector straight up from its socket.

    • Try not to damage the black silicone seal surrounding this and other board connections. These seals provide extra protection against water and dust intrusion.

    • Bend the connector slightly away from the logic board to prevent it from accidentally making contact with the socket and providing power to the phone during your repair.

  21. DHCUwk1mIhSCPaSG
    DHCUwk1mIhSCPaSG
    AKMKFfTbIRjTQyu3
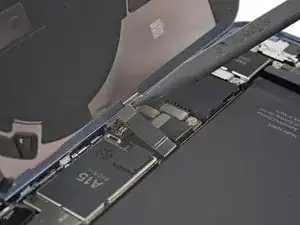
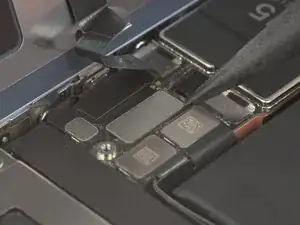
    • Use a Y000 screwdriver to remove the single 1.0 mm-long screw securing the charging coil connector cover.

  22. 4KJFDGZrxOfhwtYm
    4KJFDGZrxOfhwtYm
    ZmWXWxHFEdnjp3ot
    • Use a pair of tweezers to remove the charging coil connector cover.

  23. QxcPfdylORNxnQQ2
    QxcPfdylORNxnQQ2
    OeSyNfUPBsO6CKCD
    • Use the pointed end of a spudger to disconnect the charging coil cable by prying the connector straight up from its socket.

    I disconnected this one before the battery. Now the phone keeps turning off itself every five minutes.

    tanner85 -

  24. Pif4EsOujyX3dDyi
    Pif4EsOujyX3dDyi
    cO6yvGjGHMXTZgwm
    • Remove the rear glass assembly.

    • Apply new adhesive where it's necessary after cleaning the relevant areas with isopropyl alcohol (>90%).

    • During reassembly, pause here if you wish to replace the rear glass adhesives.

  25. DXuxT42EBQWKan2Y
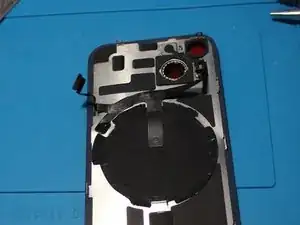
    • Start by removing any adhesive and pieces of glass from your iPhone frame.

    • The adhesive is very sticky so the method that worked for me best was using a razor and a pair of tweezers.

    • Take your time with this. All remaining glass and adhesive left will increase the chance of the backglass breaking again.

  26. JXtU3PqsuSLow5mL
    JXtU3PqsuSLow5mL
    HEgisR3BKVFCf1r3
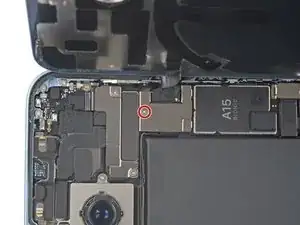
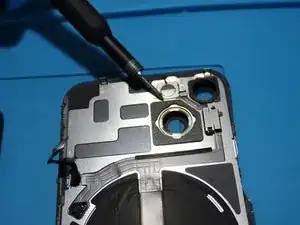
    • Unscrew the Y000 screw holding the flash clip into place.

    • Lift the clip up and store it somewhere safe along with the screws and other parts.

  27. gLu5dXmnHdOEyHX1
    gLu5dXmnHdOEyHX1
    xyNGim2uadOaYAhm
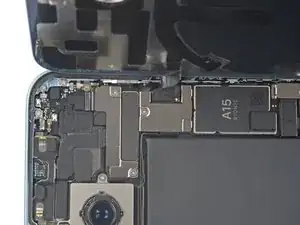
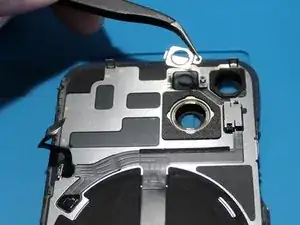
    • Remove the clip keeping the microphone in place.

    • To do so use a pair of tweezers and slide them under the openings to the side. Just be careful doing so.

    • When done you can see the small cushion between the clip and microphone.

  28. yIcTgsHSSagWNiaQ
    yIcTgsHSSagWNiaQ
    UwMDxKiaxbXpQWgX
    TOLdMdLGDPUHyCAS
    • You will have to move the microphone grill across to the new backcover before moving on. I had to use heaps of hot air and pry it from the old backcover.

    • Make sure you get the clip holder and the cylindrical grill.

    • You will need some adhesive to glue them back to the new cover. Apply enough the make it stick.

  29. HhHimvkLJnn4GEWV
    HhHimvkLJnn4GEWV
    bMLXKCNYWoUsOeKv
    LugTneDhcZeIHQOn
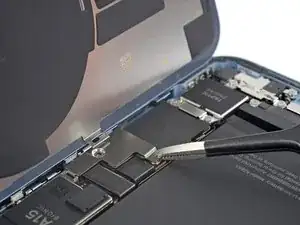
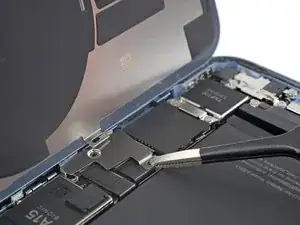
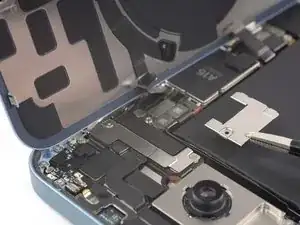
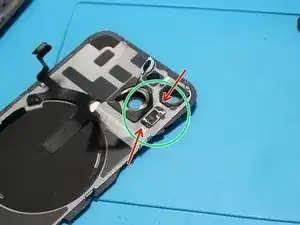
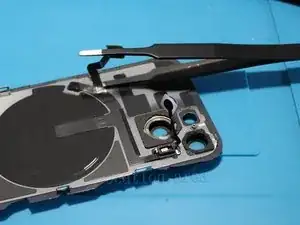
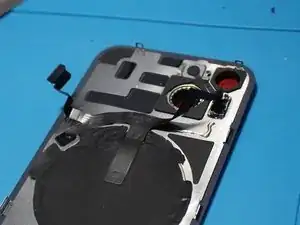
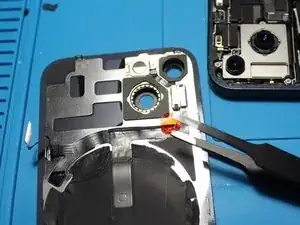
    • Use a hair dryer or a heat gun to apply heat to the backcover.

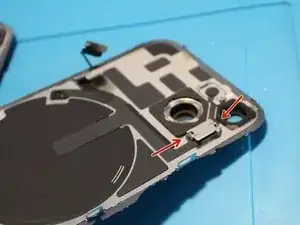
    • Lift up the ribbon cables carefully with a spudger or flat tweezers as shown in the image.

    • The flash can be pushed inwards from the back when the holding clip has been removed.

  30. 1DykChAgUBwICGCD
    1DykChAgUBwICGCD
    tsUYPuNP2RZsD5FH
    GGgLZjM5Y6ZwIyxN
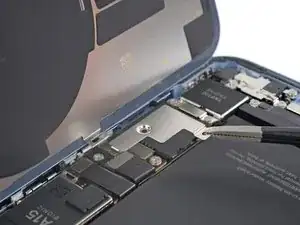
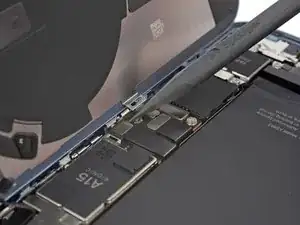
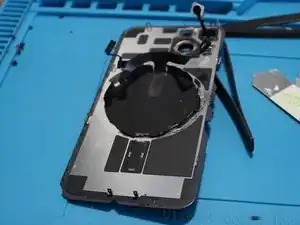
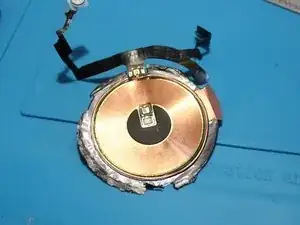
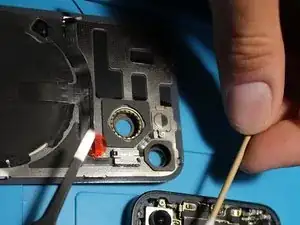
    • Use heat from the back and directly to the charging coil to loosen the adhesive of the charging coil.

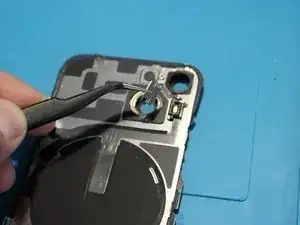
    • You can use a razor blade to lift up the adhesive flaps on the side. When you are really careful you should be able to do so without damage.

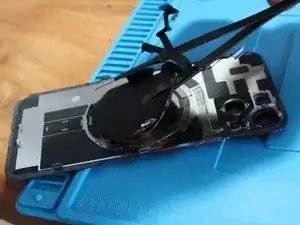
    • Apply heat to the coil again and you may insert flat tweezers between backcover and the coil. It is probably safer to insert it from the bottom part!

  31. IdKygYr1otfobJXU
    IdKygYr1otfobJXU
    cs6jWuDNkAtehHNs
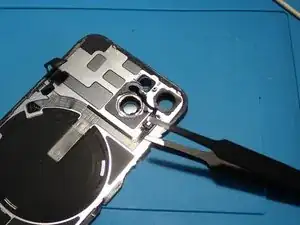
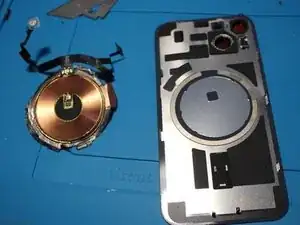
    • Inspect the coil to make sure there is no damage to the copper and connections.

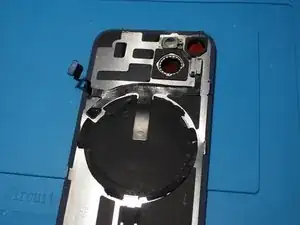
    • If your new backcover lacks the magnets you have to move them across from old to new in order to move on!

  32. X2CUKMUJM5SOXDFy
    X2CUKMUJM5SOXDFy
    ws3ZCHF3KOKOvqbY
    ZjWDAEalugCqILGF
    • Place the old assembly on the new backcover and align everything carefully. You probably won't need new adhesive as the old one is probably still strong enough.

    • Place the flash and microphone back into place, screw down the flash clip and add the clip for the microphone.

  33. NgP1u5QZcKEBAx3S
    NgP1u5QZcKEBAx3S
    kyUguAW6KrgDtoG1
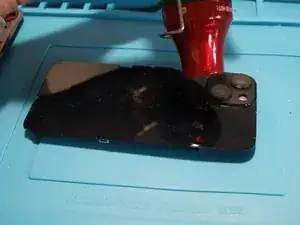
    • It is always recommended to test anything before resealing the backcover. Rest the new backglass against an object and reseat the coil and then the battery connector.

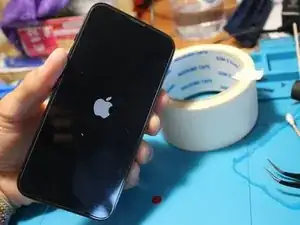
    • Close the backcover and start up your iPhone. Mine fortunately worked right away.

    • Test the video camera with sound as well as the wireless charging capabilities. If anything seems to be off you can inspect everything again before finalizing this repair.

  34. Jn3WkBDFPywUD4rU
    Jn3WkBDFPywUD4rU
    yqJZeXCkjDsD1vBS
    2aZVHES4S2ueLSVJ
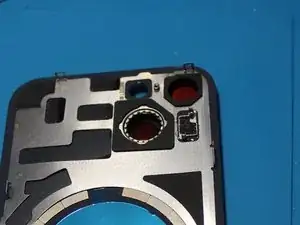
    • As you can see the camera glass is protected with a red film from the inside. Do not use hard objects to remove it as you could scratch the glass.

    • Use cotton swabs or something similar to clean your camera lenses as well as the camera glass. If you forget this step your photos and videos might look off.

    • Reapply glue to the frame again before closing everything down. My battery came with an adhesive gasket that I used.

  35. KpyalkyOJ5quSuQU
    KpyalkyOJ5quSuQU
    MIUR6fRsSHNTynsJ
    6ACfFRabWtjWklEE
    • With everything nice and clean and glue or a gasket added you may reconnect the coil and battery in this order and close the backcover.

    • Start up your iPhone and test everything again to make sure the repair is successful.

    • Screw the two P2 pentalobe screws back to the bottom of your iPhone. You're done!

Conclusion

To reassemble your device, follow these instructions in reverse order.

Fred

3522 Reputation

One comment

спасибо большое было все понятно !

Sergey Gridnev -