Introduction

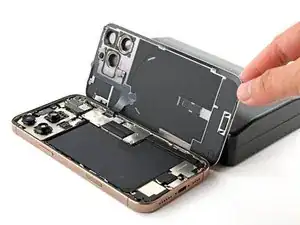
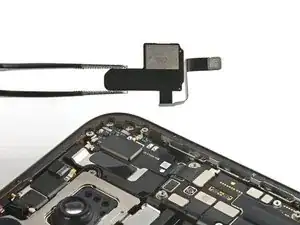
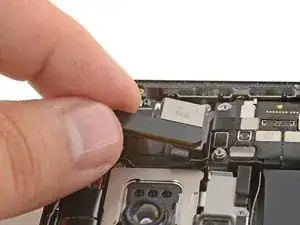
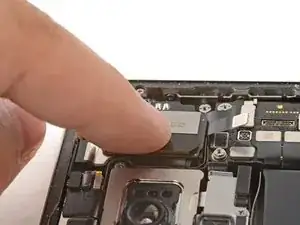
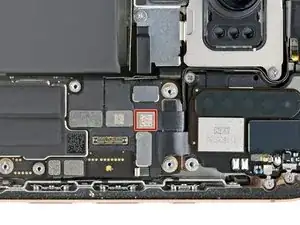
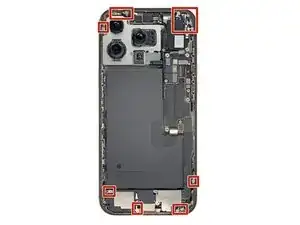
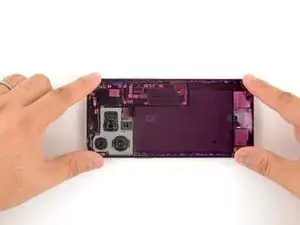
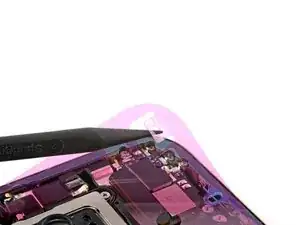
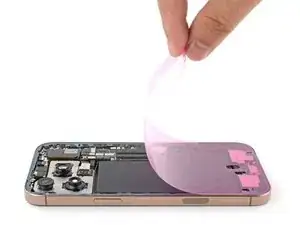
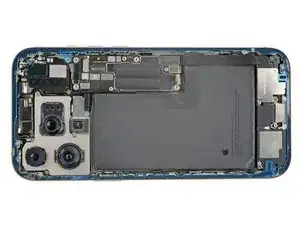
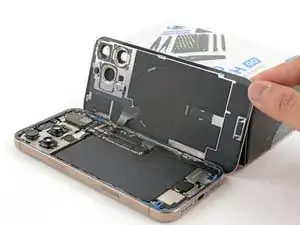
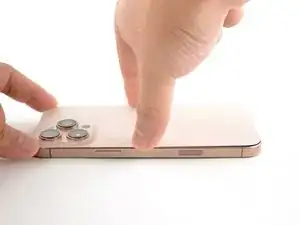
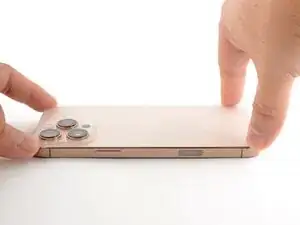
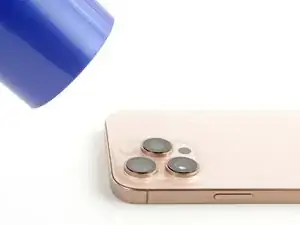
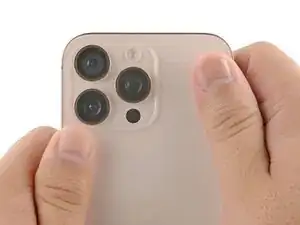
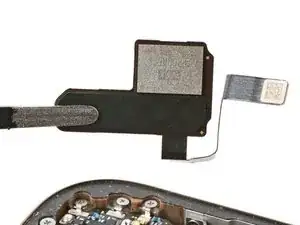
This guide shows how to remove and replace the 5G mmWave antenna in your iPhone 16 Pro Max.

You may need to replace the 5G mmWave antenna if your phone is having connectivity issues, but still connects to Wi-Fi.

You'll need replacement back glass and antenna adhesive (or double-sided tape such as Tesa tape) to complete this repair.

Some images in this guide may show minor discontinuities. They won't affect the overall guide procedure.

  1. EQ6V3NbcxXDY1KZ2
    EQ6V3NbcxXDY1KZ2
    NI2bBITCkKJytfoL
    RHtYtMhykdm1sElH
    • Allow your iPhone's battery to drain below 25%, as a charged lithium-ion battery is a potential safety hazard.

    • Unplug any cables from your iPhone.

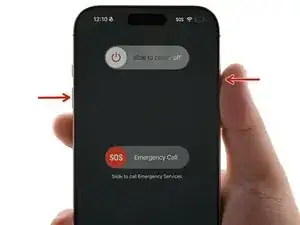
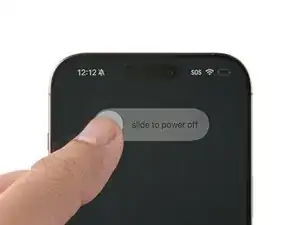
    • Hold the power and either volume buttons, and slide to power off your iPhone.

  2. JoFlV5aglHEVVt55
    JoFlV5aglHEVVt55
    oLtTIbXed4eEHRMD
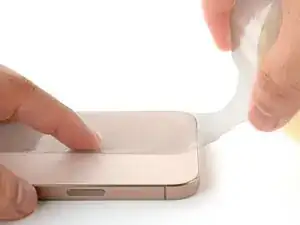
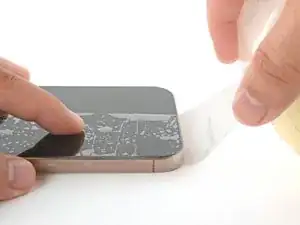
    • If your screen or back glass is badly cracked, lay overlapping strips of packing tape over the glass to protect yourself and make disassembly easier.

    • Make sure there's a smooth area near the bottom edge that's big enough for a suction cup to stick to.

  3. 5INSdODr1jIMTOAT
    5INSdODr1jIMTOAT
    Nks3xV3FOwdgkAf2
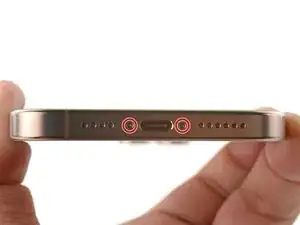
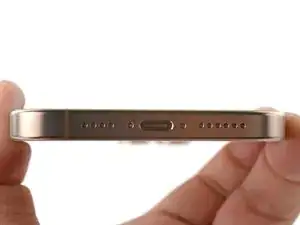
    • Use a P2 pentalobe driver to remove the two 7.4 mm-long screws on either side of the charge port.

  4. 6UPwoloGBO4tmVoS
    6UPwoloGBO4tmVoS
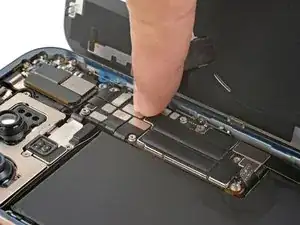
    BmSYPJmOy6dbHipF
    3EOdQPAGOmiuhoKU
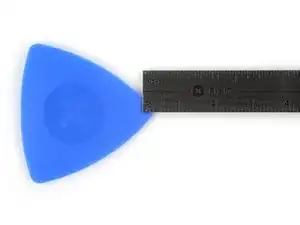
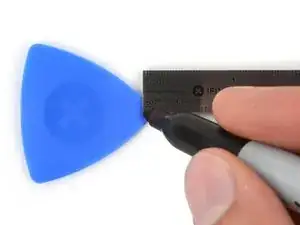
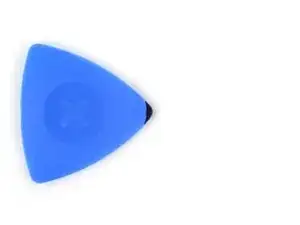
    • If inserted too far, an opening pick can damage your device. Follow this step to mark your pick and prevent damage.

    • Measure 3 mm from the tip and mark the opening pick with a permanent marker.

    • You can also mark the other corners of the pick with different measurements.

    • Alternatively, tape a coin to a pick 3 mm from the tip.

    Got to step 2 and realized the fix kit doesn't include an opening pick! Looks like a guitar pick, and I have those lying around. Is that expected? Looks like the pick is used in many steps below. There's a little blue crowbar that isn't mentioned in the instructions. Perhaps that replaces the opening pick?

    Sloan Looney -

    Hi! I can't see which guide you were using when writing this comment. Can you reply here with which guide and fix kit you used?

    Clay Eickemeyer -

    I see you posted this in Meta. I hope it's resolved soon! In the meantime, a guitar pick may work well enough for your repair.

    Clay Eickemeyer -

    what fix kit?

    Meow Purr -

    My fix kit didn't include an opening pick either

    WILLIAM HARRIS -

    Make sure you check inside the black boxes after emptying them. My pick was stuck inside one of the boxes.

    AndyF -

    My AliExpress refurbished screen came with a pick that has a coin-like circle that pops out, so no modification was necessary

    Gijs Leegwater -

    the picture shows 3 cm but the description says 3 mm's. Which one is it?

    John Pena -

    That is a misunderstanding. It is a ruler with a scale for cm, it shows 0.3 cm, i.e. 3 mm.

    VauWeh -

    Oh, come ON!

    Big Ed -

    It will ALWAYS be millimeters on a phone, but this step is ridiculous, skip it!

    Leif DeWolf -

    It's not an Ifixit KIT if it doesn't include everything. You'll need to order the opening pic separately. Or head to Walmart like myself and look for guitar pics. Hopefully, this will work just as well.

    Jaleeljb97@icloud.com -

    No pick in mine as well. It’s really not clear that you have to order this separately when ordering an IPhone SE 202/2022 screen repair kit. Is this the case?

    Jackson Castiglione -

    Frustrated, I ordered a compact package where everything was encapsulated. Useless suction tools could not separate the screen. If it is unable to decouple the screen, then why sucking suction tools you have provided.

    Shourob Datta -

    For my kit the triangle pick was stuck inside the box with the screen not with the other tools maybe it's also there for you

    Henry Scheibehenne -

    Y’all are getting far, FAR too detailed with some of this stuff…. Measuring and marking the pick that you won’t actually use to open the device?!? lol that’s kinda funny. Just heat it up, grab a spudger, and the back just pops right off! The iFixit tech need to stick to the KISS method more often, you know KEEP IT SIMPLE STUPID!!! Like l, for reals, I’ve been doing this stuff for YEARS and using iFixit guides regularly and this is just ridiculous at this point!

    Leif DeWolf -

    Will the phone still work if the sensor assembly on the back of the screen is damaged?

    Mutshidzi Rambau -

  5. Bb1aOK1QyTkRvL3g
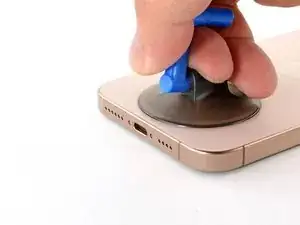
    • The next two steps show how to create an initial gap using a suction handle.

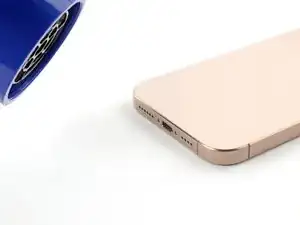
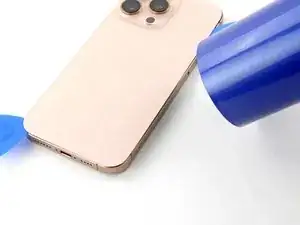
    • Use a hair dryer or heat gun to heat the bottom edge of the back glass until it's hot to the touch.

    • You can also use an iOpener to heat the back glass. Follow these instructions to heat and apply the iOpener properly.

  6. Y6g2vrlIupAV3GJd
    Y6g2vrlIupAV3GJd
    JhFdvMSnOJYkD6kY
    aHkBiCZRIITstC1J
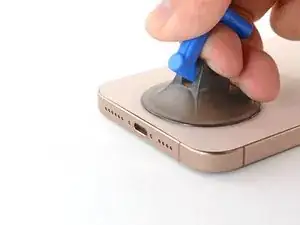
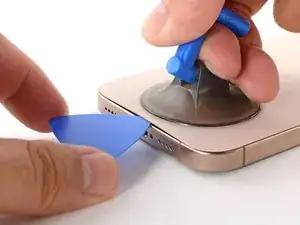
    • Apply a suction handle to the bottom edge of the back glass.

    • Pull up on the handle with strong, steady force to create a gap between the back glass and the frame.

    • If a gap doesn't appear, apply more heat to the edge and try again.

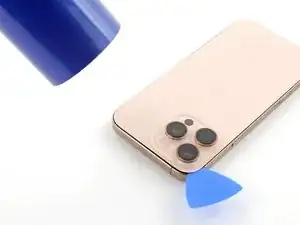
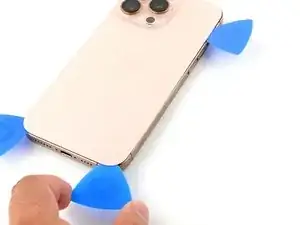
    • Insert the tip of an opening pick into the gap.

  7. fX2CWdYdrSlBLiIL
    • As you slice the adhesive securing the back glass in the following steps, don't insert your pick deeper than 3 mm to avoid damaging the following areas:

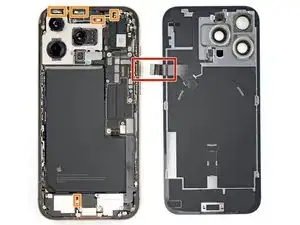
    • A delicate cable connecting the back glass to the iPhone, right next to the volume up button. Don't insert your pick here to avoid slicing the cable.

    • Multiple spring contacts around the perimeter of the iPhone.

  8. qSt2tZfb5lZGZU6a
    qSt2tZfb5lZGZU6a
    1PEYQLVBVIFQjTIw
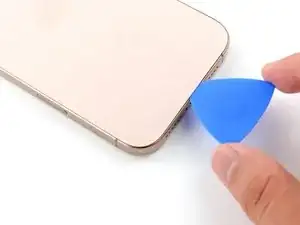
    • Slide the opening pick along the bottom edge to slice the adhesive.

    • If the adhesive feels difficult to slice, reheat the edge for a minute and try again.

    • Leave the opening pick in the bottom-left corner to prevent the adhesive from resealing.

  9. lNrONJlIQjaHCqXt
    • Use a hair dryer or heat gun to heat the left edge of the back glass until it's hot to the touch.

  10. PjK1XYH3YFlYeSX6
    PjK1XYH3YFlYeSX6
    GTZVOBYXjLFLy4yK
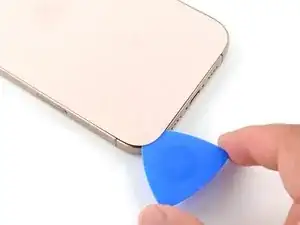
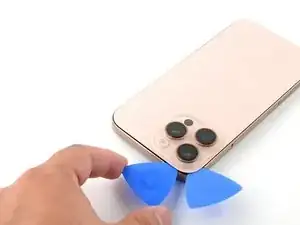
    • Insert a second opening pick into the bottom-left corner, close to the existing pick.

    • Don't insert your pick deeper than 3 mm to avoid damaging the spring contacts.

    • Slide your pick along the left edge to separate the adhesive and release the metal clips.

    • You'll hear and feel the metal clips release as you pass them.

    • Leave this pick inserted in the top-left corner to prevent the adhesive from resealing.

  11. OICohobP3jImIdVo
    • Use a hair dryer or heat gun to heat the top edge and top-right corner of the back glass until it's hot to the touch.

  12. lANHTsmeNmtalsOJ
    lANHTsmeNmtalsOJ
    pYwGMADxcBDcLU3M
    • Don't insert your pick deeper than 3 mm to avoid damaging the spring contacts.

    • Insert a third opening pick into the top-left corner.

    • Slide the opening pick along the top edge and around the top-right corner, stopping above the volume up button.

    • Leave this pick inserted to prevent the adhesive from resealing.

  13. naAJKFgcD3ErBIpT
    • Use a hair dryer or heat gun to heat the right edge of the back glass until it's hot to the touch.

  14. kIAapKaRMksMStFN
    kIAapKaRMksMStFN
    pIt1FLBHopYLlbdQ
    • Don't insert your pick deeper than 3 mm to avoid damaging the spring contacts.

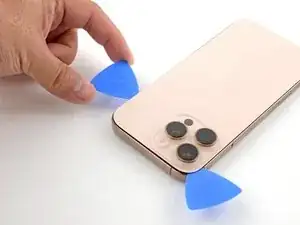
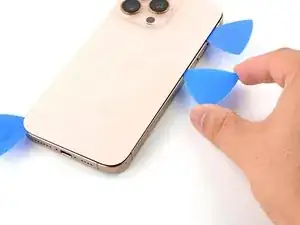
    • Insert a fourth opening pick into the bottom-right corner.

    • Slide the opening pick around the corner and up the right edge, stopping below the volume down button.

    • Leave this pick inserted to prevent the adhesive from resealing.

  15. EnNXVXLhDaHGJPvS
    EnNXVXLhDaHGJPvS
    EEqhWNkgto2DfIkL
    fKCwMJYZ4GedOn6l
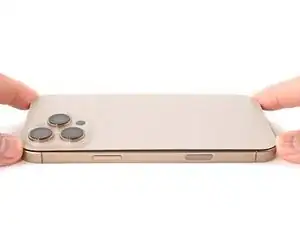
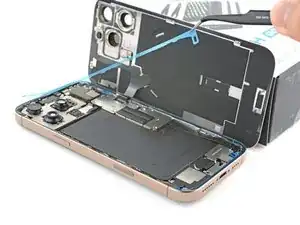
    • At this point, the back glass should be free from the frame. If the back glass feels stuck, go back around the perimeter with your pick to check for missed sections of adhesive or stuck clips.

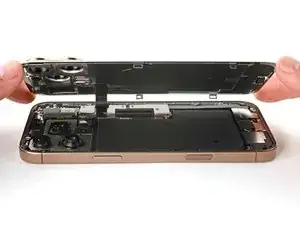
    • Swing open the back glass to the right of the iPhone to separate the remaining adhesive.

    • Support the back glass with a clean, sturdy object.

  16. NSndgZGgHfaidI5B
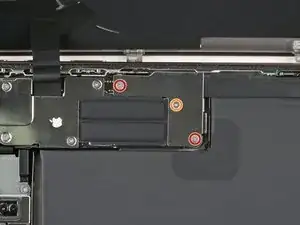
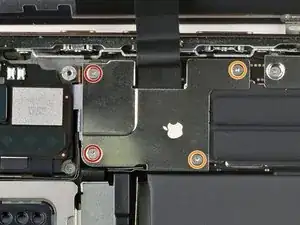
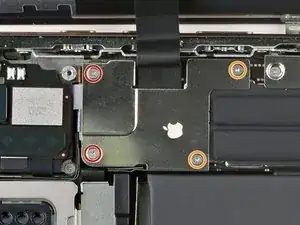
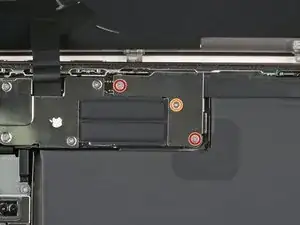
    • Use a tri-point Y000 driver to remove the three screws securing the battery connector cover:

    • Two 1.3 mm‑long screws

    • One 1.0 mm‑long screw

  17. cbyXBdSmGB6PdCrc
    cbyXBdSmGB6PdCrc
    M1KArm6ElnrMHixy
    • Lift and remove the battery connector cover.

  18. gxKrkjihsByPDNrg
    gxKrkjihsByPDNrg
    ny6rOxPo6FKFZfcG
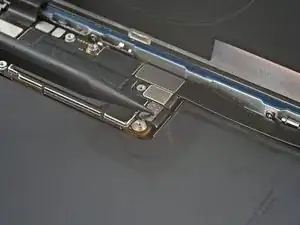
    • Use the point of a spudger to pry up and disconnect the battery press connector.

  19. KjnNh3Vqwe1Sb366
    • Use a tri-point Y000 driver to remove the four screws securing the back glass connector cover:

    • Two 1.3 mm‑long screws

    • Two 1.0 mm‑long screws

  20. clqgpKuufGJ25iFQ
    clqgpKuufGJ25iFQ
    2Mo1F53bGGZmBudV
    • Lift the back glass connector cover straight up and remove it.

  21. SpwiUDGCFoZUNKEu
    SpwiUDGCFoZUNKEu
    XgaSkwhHDRwmWOm3
    • Use the point of a spudger to pry up and disconnect the back glass connector.

  22. DHZT2mFNiUXubsHc
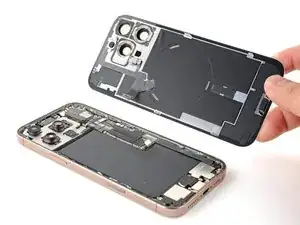
    • Remove the back glass.

  23. mKLZ4cUxGlpUJ4ks
    mKLZ4cUxGlpUJ4ks
    WNlU5xOerSXOaVRA
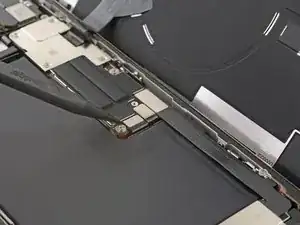
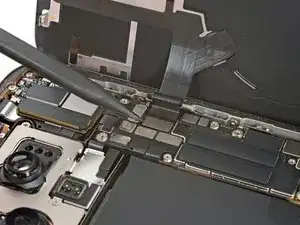
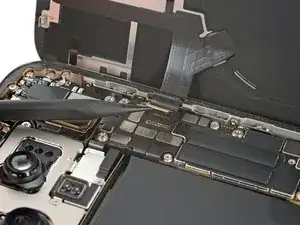
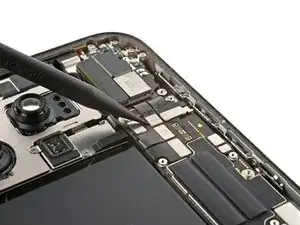
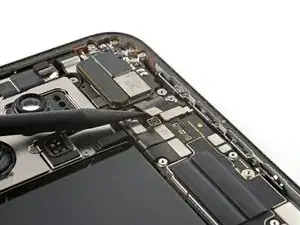
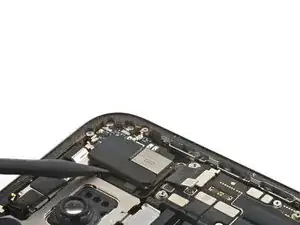
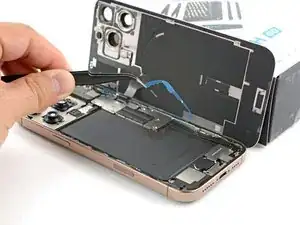
    • Use the point of a spudger to pry up and disconnect the 5G mmWave antenna connector.

  24. M24iqMR1xOL5CstG
    M24iqMR1xOL5CstG
    GT3VBKfYQqqG2GkR
    Ydatj6X1ZFfF2bPg
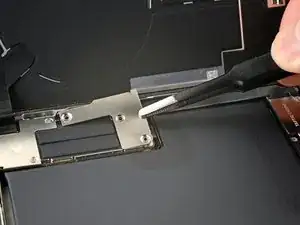
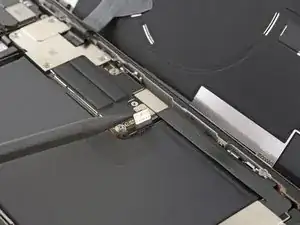
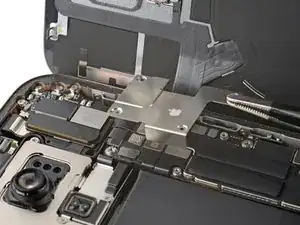
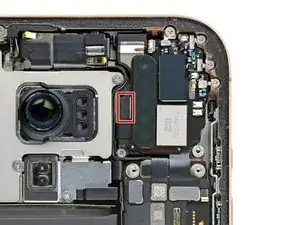
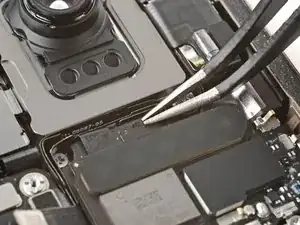
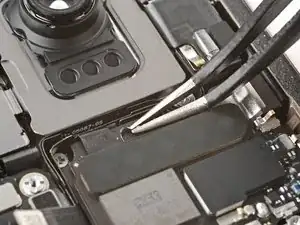
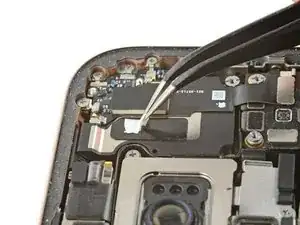
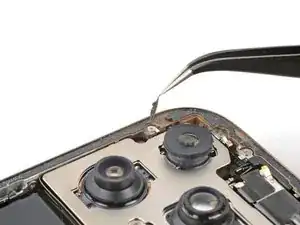
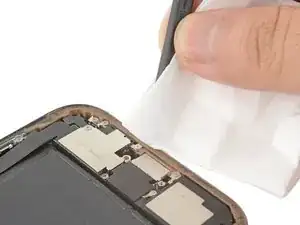
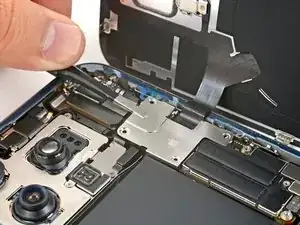
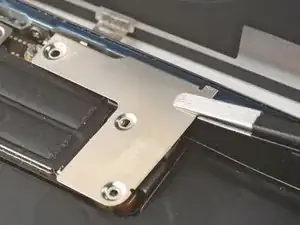
    • The 5G mmWave antenna is attached with a small piece of stretch-release adhesive.

    • Use tweezers to carefully peel up the antenna's black adhesive pull tab.

  25. qmglTDS4kZB62ZnB
    qmglTDS4kZB62ZnB
    WDhcjjJAIdg3aiWI
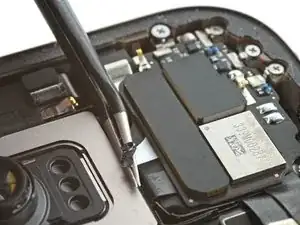
    • Use tweezers to firmly grasp the adhesive pull tab and pull at a shallow angle.

    • If the adhesive breaks, try to grip the broken end with tweezers and continue pulling.

    • If you're unable to pull the adhesive out in one piece, apply a drop of high concentration (>90%) isopropyl alcohol under the antenna and move to the next step.

  26. 5pOPHYosK3Y4UkBJ
    5pOPHYosK3Y4UkBJ
    rWdjIiwPZFUkwdCk
    hUtMxnHtjOysiTkZ
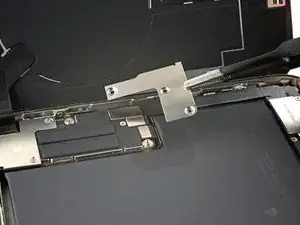
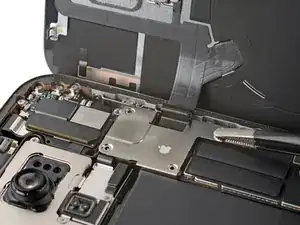
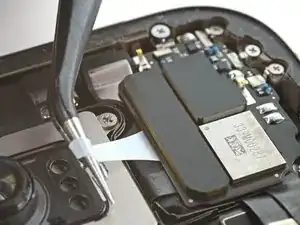
    • Use the point of a spudger to pry up and remove the 5G mmWave antenna.

  27. UXfQDDE2RLBMKl5e
    • Congratulations on completing disassembly! The remaining steps will show how to reassemble your iPhone.

    • Depending on your iPhone model, some reassembly photos may have minor visual discrepancies. The procedure, however, will be correct for your iPhone.

  28. ZItIrqKi514bHMSW
    ZItIrqKi514bHMSW
    1xTpamJd2DugYNVe
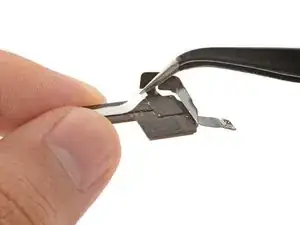
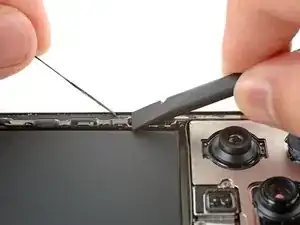
    • Use tweezers or a spudger to remove any adhesive residue from the top of the earpiece speaker and back of the antenna.

    • If your replacement part doesn't include new adhesive, use a small strip of double-sided tape to secure the antenna to the earpiece speaker.

  29. KPDpewXm2lnOd4Je
    KPDpewXm2lnOd4Je
    VZCbu6pvSo3hSHsl
    • Align the mmWave antenna over the earpiece speaker. Make sure the antenna's connector reaches its logic board socket.

    • Press the antenna onto the earpiece speaker to secure it.

  30. HDDKFMkGPsfqJFTJ
    • Use your finger or a spudger to press the antenna connector onto the logic board.

    • To re-attach press connectors like this one, carefully align and press down on one side until it clicks into place, then repeat on the other side. Don't press down in the middle. If the connector is misaligned, the pins can bend, causing permanent damage.

  31. 5wHZbNxDMwo3Rjtc
    5wHZbNxDMwo3Rjtc
    UypEI6nYYBnqm6cy
    KA3JennaLQmbf2DA
    • Work around the fragile grounding clips as you're cleaning the frame. If you bend one out of place, gently bend it back with your fingers or tweezers.

    • Use blunt nose tweezers or your fingers to remove large pieces of adhesive from the frame perimeter.

    • Use a spudger to scrape the adhesive residue off of the frame.

    • If the adhesive feels stubborn, apply some heat using a hair dryer or heat gun and try again.

  32. UehHJ3emCJAhkgYi
    UehHJ3emCJAhkgYi
    mmelEfmRgdCskQWO
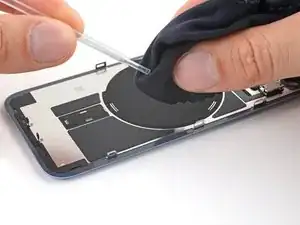
    • If you're reusing your back glass, apply a few drops of highly-concentrated isopropyl alcohol (over 90%) to a microfiber or lint-free cloth and wipe around the perimeter to prepare the surface for new adhesive.

  33. RqxSQ2LX3i4OrSY2
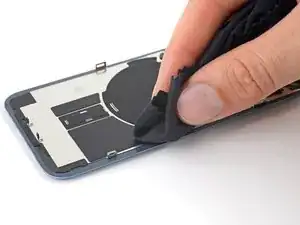
    • Wrap a lint-free cloth or a coffee filter over the point of a spudger and apply a few drops of highly-concentrated isopropyl alcohol (over 90%) to it.

    • Wipe in one direction along the perimeter of the frame to clean the adhesive residue.

    • Take your time doing this. A clean frame allows replacement adhesive to lay evenly, ensuring a better bond.

  34. XDNERJkJ3MONPrlC
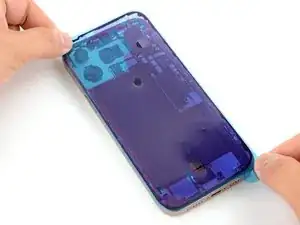
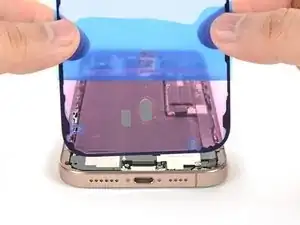
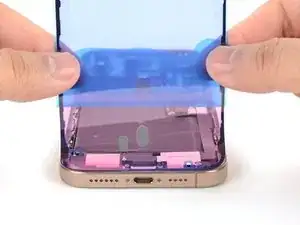
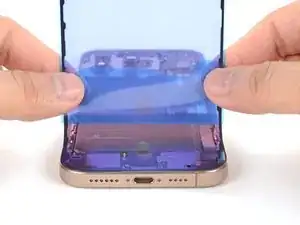
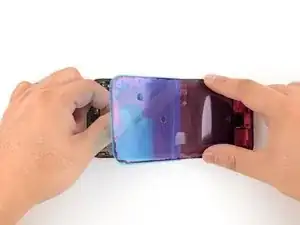
    • Lay the adhesive sheet over the frame to determine its proper orientation.

    • Use features such as the camera cutout and notches along the top and bottom edges to visualize how the adhesive will lay in the frame.

  35. nWxfQEe2YclLysmZ
    nWxfQEe2YclLysmZ
    fHOF5SsiFmGYNepv
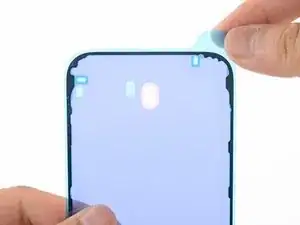
    • Grab the tab in the corner of the adhesive sheet and peel the liner to expose a third of the adhesive.

    • The exposed adhesive is very sticky. Don't let it touch anything until you're ready to apply it to the frame.

    • If your adhesive has multiple liners, peel the liner that exposes the side that sticks to the frame.

  36. jjejh2P66hhtW1iB
    jjejh2P66hhtW1iB
    GCO4Qdqwg6axaNuZ
    ratdQGFeJaVIO33Z
    • Carefully align the exposed edge of the adhesive strip with the corresponding edge of the iPhone's frame.

    • Once the adhesive is pressed into place, you can't reposition it—you'll have to remove it and start over with new adhesive.

    • When it's correctly aligned, gently press the exposed adhesive strip onto the frame.

  37. 1NdEetlt6ad5A2vH
    1NdEetlt6ad5A2vH
    OCVVoq542sXrkCiR
    UbTfk4LDxiLBP5Q2
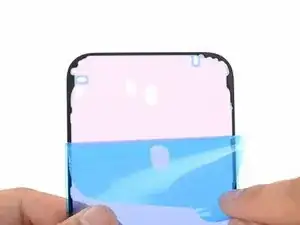
    • Continue peeling away the liner from the adhesive, gently pressing the adhesive into place.

    • If you've correctly aligned the adhesive, the edges will fall perfectly into place.

    • If your adhesive is slightly misaligned, gently pull the long edges into alignment with the frame.

    • If the adhesive begins to crease or wrinkle, remove it and start over with fresh adhesive.

    • If you don't have another set of adhesive strips handy, it's okay to temporarily put your iPhone back together and use it normally without any adhesive. Just keep in mind that your iPhone's water resistance will be compromised until you replace the adhesive.

  38. OYW2lPaWeIEZp6Hi
    OYW2lPaWeIEZp6Hi
    nuIP3MSTJYnfJNXH
    • Use a spudger to press the adhesive around the entire perimeter of your iPhone.

    • Work around the fragile grounding clips. If you bend one out of place, gently bend it back with your fingers or tweezers.

    • Don't press too hard, or you'll stretch and deform the adhesive.

  39. KYKNIIwEX2IZF6Db
    KYKNIIwEX2IZF6Db
    fZPesPBDaeLan1aQ
    5QKx1vaQxODmbLap
    • Use a spudger or your fingers to lift the pull tab connected to the large front liner. The pull tab is often in a corner of the liner.

    • Use the pull tab to peel off the large front liner from the adhesive.

    • At this point, you may still have liner covering the perimeter, which prevents the adhesive from accidentally sticking to anything while you're reassembling your iPhone. Don't remove these small release liners just yet.

  40. hhhm2YNMoGVNgWKm
    • Prop up the back glass along the right edge of your iPhone.

  41. 2TXDSDxhCuRiJfgy
    • Use your finger or the flat end of a spudger to press and connect the back glass connector onto the logic board.

  42. tAZYQOdEKvXtuNAr
    • Use your finger or a spudger to press and connect the battery press connector onto the logic board.

    • This is a good point to test your repair before sealing up your iPhone. Power on your iPhone and make sure it works as expected. Power it back down and continue reassembly.

    • If your iPhone doesn't turn on, connect it to a power source and try again.

    • If you've replaced the logic board and the screen fails to turn on, you'll need to follow the screen guide to manually connect the display connector.

  43. eEjEYuIa1OilWwQB
    • Align the back glass connector cover by its screw holes and lay it in place.

  44. J3dGhqULtB4caZPB
    • Use a tri-point Y000 driver to install the four screws securing the back glass connector cover:

    • Two 1.3 mm‑long screws

    • Two 1.0 mm‑long screws

  45. 5LGgPkWnNgecQgPc
    • Align the battery connector cover by its screw holes and lay it in place.

  46. ds5VBgVbnQyGPrB4
    • Use a tri-point Y000 driver to install the three screws securing the battery connector cover:

    • Two 1.3 mm‑long screws

    • One 1.0 mm‑long screw

  47. TOKZSNJdglCrCeMd
    TOKZSNJdglCrCeMd
    kQLalaji64gE3ZER
    • Use your fingers or a spudger to peel away all perimeter liners, exposing the adhesive.

    • As you remove the liners, make sure nothing touches the exposed adhesive.

    • Check the frame and back glass for any stray liners and remove them. There should be no liners remaining.

  48. Jgxmu4jG2EdZsHsk
    Jgxmu4jG2EdZsHsk
    kNalw2xiBbdU453K
    WwnZtDo2SJJjoAI4
    • Lower the back glass onto the frame, beginning with the top edge.

    • If you feel resistance, a perimeter clip may have bent out of place and is being crushed by the frame. Look at the point of resistance and gently straighten any bent clips.

    • Press along the edges of the iPhone until the back glass sits flush against the frame.

  49. nXCKwaiCCHx2quJs
    • Use a hair dryer, heat gun, or an iOpener to heat the back glass perimeter until it's slightly too hot to touch.

    • The heat softens the adhesive and helps create a better bond.

  50. AsgQEGCYUVjThFkS
    AsgQEGCYUVjThFkS
    VGlvDepjIGCaFCvl
    • Use your fingers to firmly squeeze around the perimeter of the iPhone.

  51. 3rTnQilHbLEwG1KJ
    3rTnQilHbLEwG1KJ
    edStNaensJ2KQgsP
    • Place your iPhone screen-side down on a clean, flat work surface.

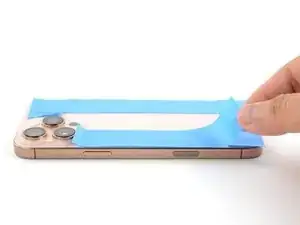
    • Lay a strip of tape around the perimeter of the back glass to protect the finish.

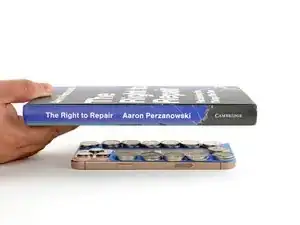
    • Stack coins around the perimeter of the back glass until you create a wall that's as tall as the rear camera protrusions.

    • Alternatively, you can use vise clamps around the perimeter of your device to set the new adhesive.

  52. Gbahi6pjtJUgg4lt
    Gbahi6pjtJUgg4lt
    qL6iF6ShEJ4FcfEw
    • Place 3-4 heavy books squarely on top of your iPhone.

    • The coins may leave a slight impression on the bottom book cover, so don't use anything valuable.

    • Leave the books in place for about 30 minutes.

    • The pressure will help activate the adhesive.

  53. 5INSdODr1jIMTOAT
    5INSdODr1jIMTOAT
    Nks3xV3FOwdgkAf2
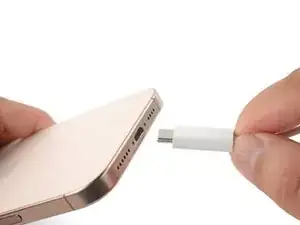
    • Use a P2 pentalobe driver to install the two 7.4 mm-long screws on either side of the charge port.

Conclusion

Take your e-waste to an R2 or e-Stewards certified recycler.

Repair didn’t go as planned? Try some basic troubleshooting, or ask our Answers community for help.
Arthur Shi

Member since: 03/01/18

282916 Reputation

0 comments