Introduction

Back glass installation steps for the iPhone 16 Pro Max.

  1. 5wHZbNxDMwo3Rjtc
    5wHZbNxDMwo3Rjtc
    UypEI6nYYBnqm6cy
    KA3JennaLQmbf2DA
    • Work around the fragile grounding clips as you're cleaning the frame. If you bend one out of place, gently bend it back with your fingers or tweezers.

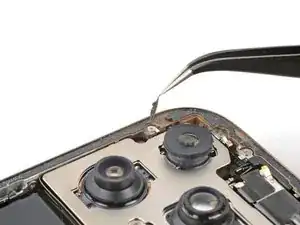
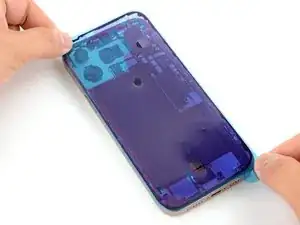
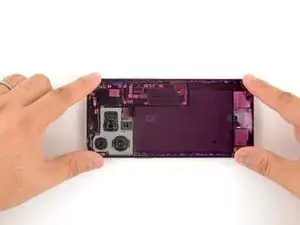
    • Use blunt nose tweezers or your fingers to remove large pieces of adhesive from the frame perimeter.

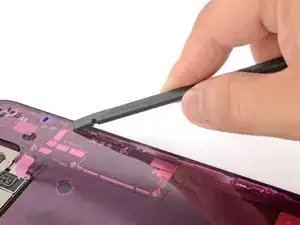
    • Use a spudger to scrape the adhesive residue off of the frame.

    • If the adhesive feels stubborn, apply some heat using a hair dryer or heat gun and try again.

  2. UehHJ3emCJAhkgYi
    UehHJ3emCJAhkgYi
    mmelEfmRgdCskQWO
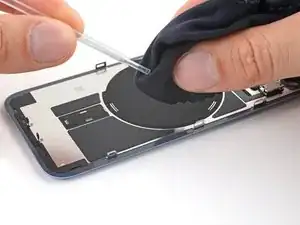
    • If you're reusing your back glass, apply a few drops of highly-concentrated isopropyl alcohol (over 90%) to a microfiber or lint-free cloth and wipe around the perimeter to prepare the surface for new adhesive.

  3. RqxSQ2LX3i4OrSY2
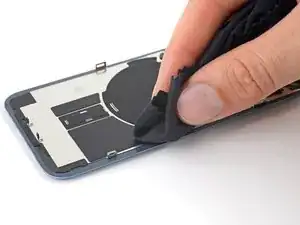
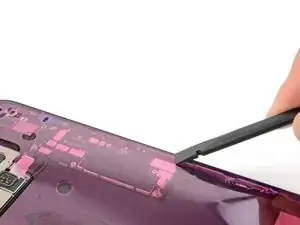
    • Wrap a lint-free cloth or a coffee filter over the point of a spudger and apply a few drops of highly-concentrated isopropyl alcohol (over 90%) to it.

    • Wipe in one direction along the perimeter of the frame to clean the adhesive residue.

    • Take your time doing this. A clean frame allows replacement adhesive to lay evenly, ensuring a better bond.

  4. XDNERJkJ3MONPrlC
    • Lay the adhesive sheet over the frame to determine its proper orientation.

    • Use features such as the camera cutout and notches along the top and bottom edges to visualize how the adhesive will lay in the frame.

  5. nWxfQEe2YclLysmZ
    nWxfQEe2YclLysmZ
    fHOF5SsiFmGYNepv
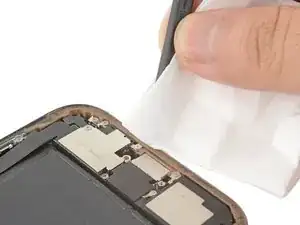
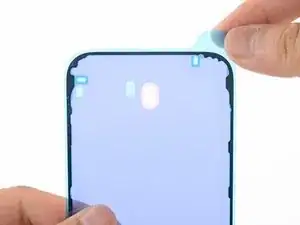
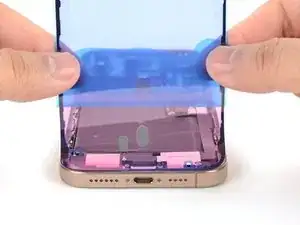
    • Grab the tab in the corner of the adhesive sheet and peel the liner to expose a third of the adhesive.

    • The exposed adhesive is very sticky. Don't let it touch anything until you're ready to apply it to the frame.

    • If your adhesive has multiple liners, peel the liner that exposes the side that sticks to the frame.

  6. jjejh2P66hhtW1iB
    jjejh2P66hhtW1iB
    GCO4Qdqwg6axaNuZ
    ratdQGFeJaVIO33Z
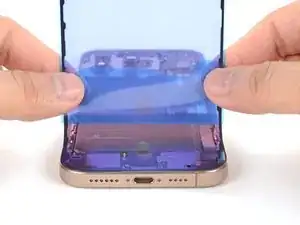
    • Carefully align the exposed edge of the adhesive strip with the corresponding edge of the iPhone's frame.

    • Once the adhesive is pressed into place, you can't reposition it—you'll have to remove it and start over with new adhesive.

    • When it's correctly aligned, gently press the exposed adhesive strip onto the frame.

  7. 1NdEetlt6ad5A2vH
    1NdEetlt6ad5A2vH
    OCVVoq542sXrkCiR
    UbTfk4LDxiLBP5Q2
    • Continue peeling away the liner from the adhesive, gently pressing the adhesive into place.

    • If you've correctly aligned the adhesive, the edges will fall perfectly into place.

    • If your adhesive is slightly misaligned, gently pull the long edges into alignment with the frame.

    • If the adhesive begins to crease or wrinkle, remove it and start over with fresh adhesive.

    • If you don't have another set of adhesive strips handy, it's okay to temporarily put your iPhone back together and use it normally without any adhesive. Just keep in mind that your iPhone's water resistance will be compromised until you replace the adhesive.

  8. OYW2lPaWeIEZp6Hi
    OYW2lPaWeIEZp6Hi
    nuIP3MSTJYnfJNXH
    • Use a spudger to press the adhesive around the entire perimeter of your iPhone.

    • Work around the fragile grounding clips. If you bend one out of place, gently bend it back with your fingers or tweezers.

    • Don't press too hard, or you'll stretch and deform the adhesive.

  9. KYKNIIwEX2IZF6Db
    KYKNIIwEX2IZF6Db
    fZPesPBDaeLan1aQ
    5QKx1vaQxODmbLap
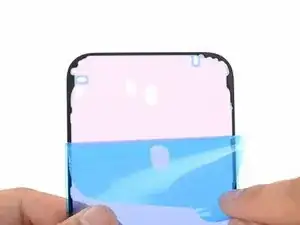
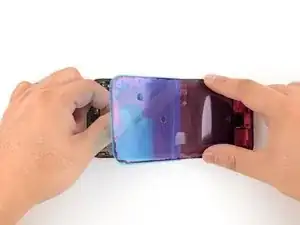
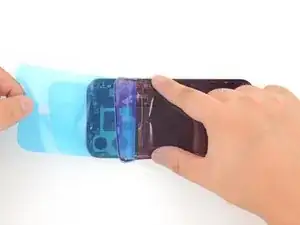
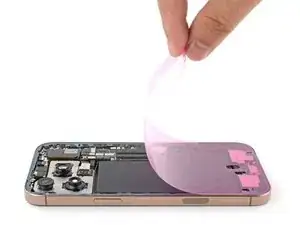
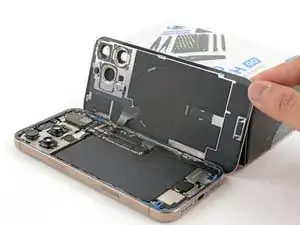
    • Use a spudger or your fingers to lift the pull tab connected to the large front liner. The pull tab is often in a corner of the liner.

    • Use the pull tab to peel off the large front liner from the adhesive.

    • At this point, you may still have liner covering the perimeter, which prevents the adhesive from accidentally sticking to anything while you're reassembling your iPhone. Don't remove these small release liners just yet.

  10. hhhm2YNMoGVNgWKm
    • Prop up the back glass along the right edge of your iPhone.

  11. 2TXDSDxhCuRiJfgy
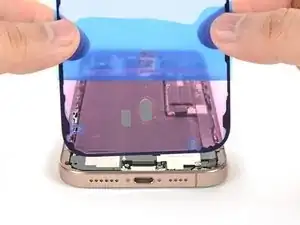
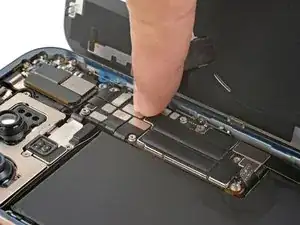
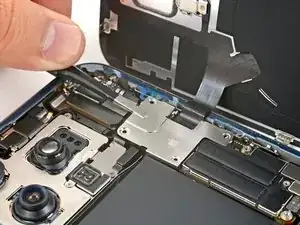
    • Use your finger or the flat end of a spudger to press and connect the back glass connector onto the logic board.

  12. tAZYQOdEKvXtuNAr
    • Use your finger or a spudger to press and connect the battery press connector onto the logic board.

    • This is a good point to test your repair before sealing up your iPhone. Power on your iPhone and make sure it works as expected. Power it back down and continue reassembly.

    • If your iPhone doesn't turn on, connect it to a power source and try again.

    • If you've replaced the logic board and the screen fails to turn on, you'll need to follow the screen guide to manually connect the display connector.

  13. eEjEYuIa1OilWwQB
    • Align the back glass connector cover by its screw holes and lay it in place.

  14. J3dGhqULtB4caZPB
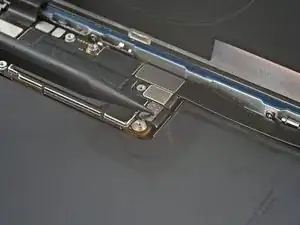
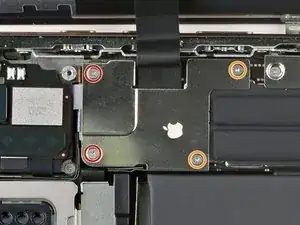
    • Use a tri-point Y000 driver to install the four screws securing the back glass connector cover:

    • Two 1.3 mm‑long screws

    • Two 1.0 mm‑long screws

  15. 5LGgPkWnNgecQgPc
    • Align the battery connector cover by its screw holes and lay it in place.

  16. ds5VBgVbnQyGPrB4
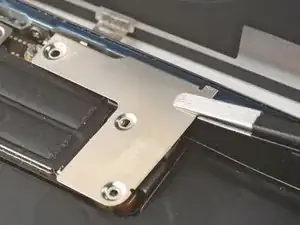
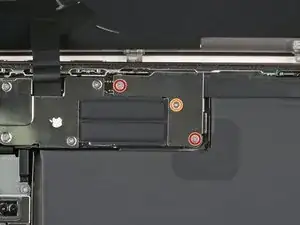
    • Use a tri-point Y000 driver to install the three screws securing the battery connector cover:

    • Two 1.3 mm‑long screws

    • One 1.0 mm‑long screw

  17. TOKZSNJdglCrCeMd
    TOKZSNJdglCrCeMd
    kQLalaji64gE3ZER
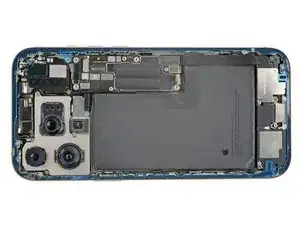
    • Use your fingers or a spudger to peel away all perimeter liners, exposing the adhesive.

    • As you remove the liners, make sure nothing touches the exposed adhesive.

    • Check the frame and back glass for any stray liners and remove them. There should be no liners remaining.

  18. Jgxmu4jG2EdZsHsk
    Jgxmu4jG2EdZsHsk
    kNalw2xiBbdU453K
    WwnZtDo2SJJjoAI4
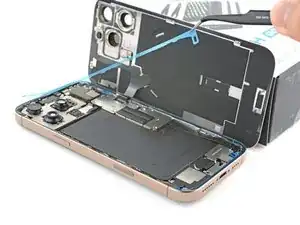
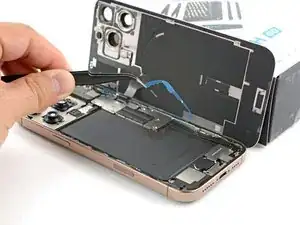
    • Lower the back glass onto the frame, beginning with the top edge.

    • If you feel resistance, a perimeter clip may have bent out of place and is being crushed by the frame. Look at the point of resistance and gently straighten any bent clips.

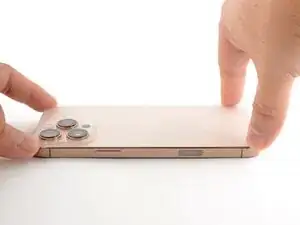
    • Press along the edges of the iPhone until the back glass sits flush against the frame.

  19. nXCKwaiCCHx2quJs
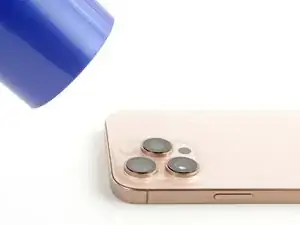
    • Use a hair dryer, heat gun, or an iOpener to heat the back glass perimeter until it's slightly too hot to touch.

    • The heat softens the adhesive and helps create a better bond.

Arthur Shi

Member since: 03/01/18

282916 Reputation

0 comments