Introduction
Steps to remove the logic board for the iPhone 16 Pro Max.
Includes its own earpiece speaker steps (instead of the prereq) because this version has the mmWave antenna attached to the earpiece speaker. The earpiece guide has the mmWave removed, causing a visual discrepancy.
-
-
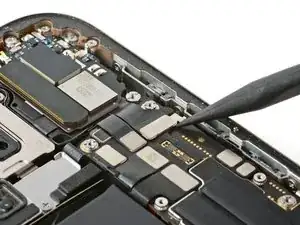
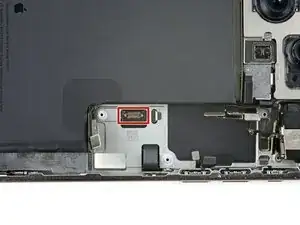
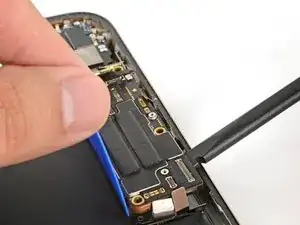
Use the point of a spudger to pry up and disconnect the earpiece speaker and 5G mmWave antenna press connectors.
-
-
-
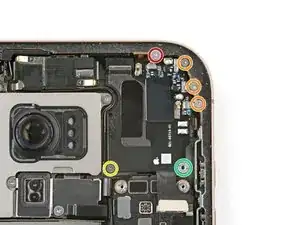
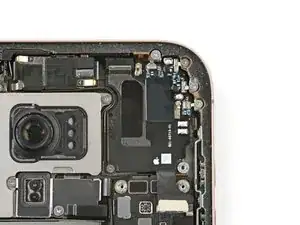
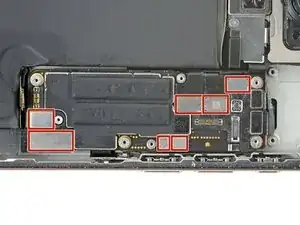
Remove the six screws securing the earpiece speaker:
-
One 2.4 mm‑long Phillips screw
-
Three 1.3 mm‑long Phillips screws
-
One 1.6 mm‑long Phillips screw
-
One 3.3 mm‑long standoff screw
-
-
-
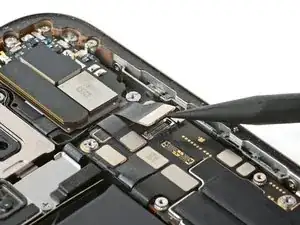
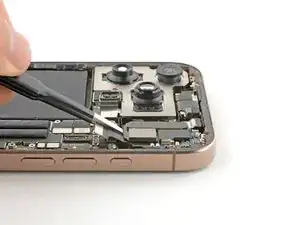
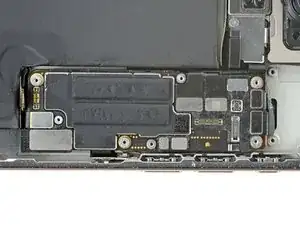
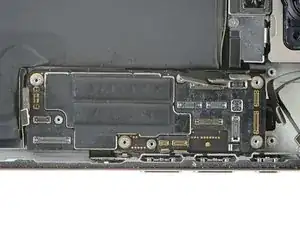
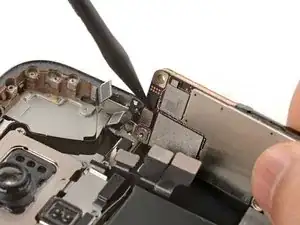
Use a spudger to pry up and disconnect the seven silver press connectors from the top of the logic board.
-
-
-
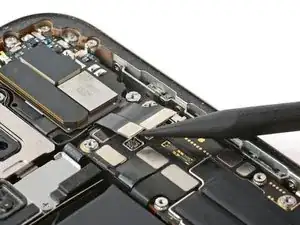
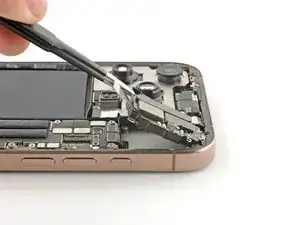
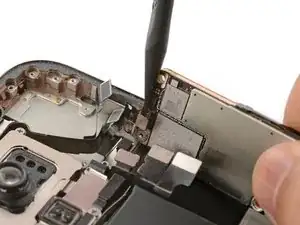
Use a spudger to pry up and disconnect the three black press connectors from the logic board.
-
-
-
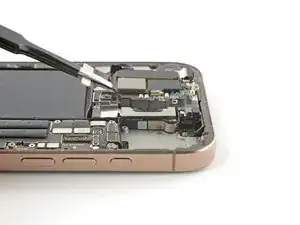
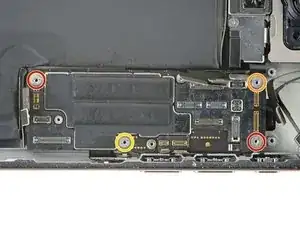
Use a standoff driver to remove the four screws securing the logic board:
-
Two 4.5 mm‑long screws
-
One 3.4 mm‑long screw
-
One 4.2 mm‑long screw
-
-
-
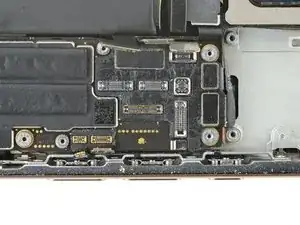
This image shows the display connector underneath the logic board. The next two steps show how to disconnect this connector from the bottom of the logic board.
-
-
-
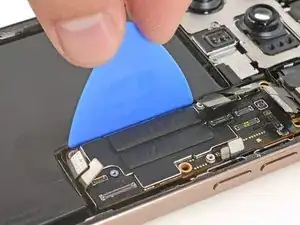
Insert the flat edge of an opening pick between the battery and the left edge of the logic board. Hold the pick in place with your fingers.
-
Insert the flat end of a spudger underneath the right edge of the logic board.
-
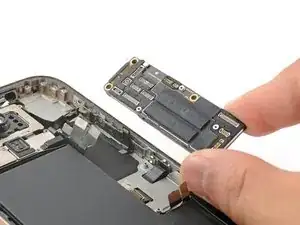
Gently pry with the spudger to lift the logic board and disconnect the display connector.
-
-
-
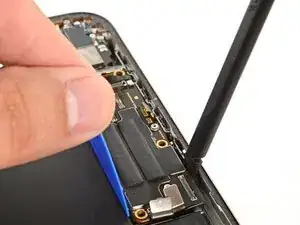
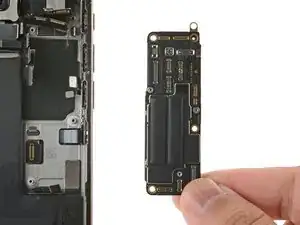
Flip the logic board over, being careful not to strain the connected cable.
-
Use the point of a spudger to pry up and disconnect the front sensor connector from the bottom side of the logic board.
-