Introduction

  1. oWZXYSZydykU13AA
    oWZXYSZydykU13AA
    owClZZr5jXYwXYOB
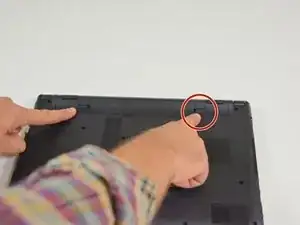
    • Start by unlocking the right locking latch.

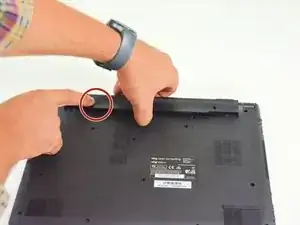
    • Then, by simultaneously unlocking the left latch, lift the battery out of its socket.

  2. tLcemoZlaePG13gi
    tLcemoZlaePG13gi
    GCCOsArHFjWxZlPE
    6uZ6cOhNWBGU6trg
    • Unscrew the circled screws in green and red

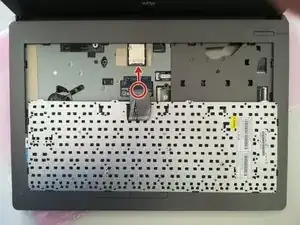
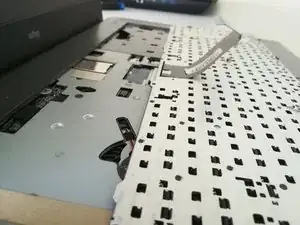
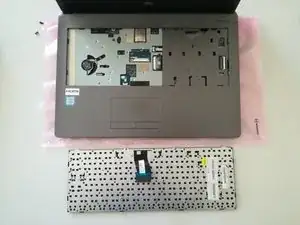
    • Put the computer in the position of the second image while pushing a paper clip into the hole of the screw circled in green until you hear a click
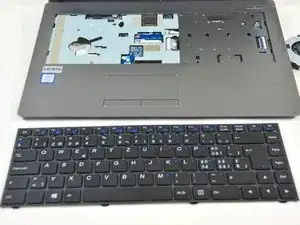
    • Lift the keyboard

    Dans l'image, le capot inférieur est encore en place, mais dans la réalité, il aura été enlevé avant, pour laisser accès libre aux vis de fixation, en appuyant doucement au centre, cela va d'éclipser le clavier.

    Pascal Kotté (PaKo) -

    Bonjour,

    Sur ce modèle il n'est pas nécessaire d'enlever le capot inférieur pour enlever le clavier.

    Felice Suglia -

  3. qyiAmHEFYnaRrjiU
    qyiAmHEFYnaRrjiU
    ILs4Whkvwvv5KrOu
    5Mp6J3wc5COKWrBL
    • Disconnect the connector circled in red in the direction of the arrow

    La clavier se remet en posant sur l'avant les 2 cales (côté utilisateur) en premier, puis pivoter la clavier depuis l'avant pour abaisser l'arrière, et clipper sur la partie arrière et les côtés.

    Pascal Kotté (PaKo) -

Conclusion

To reassemble your device, follow the instructions in reverse order.

Felice Suglia

Member since: 15/06/13

31564 Reputation

0 comments