Introduction

This guide will explain the process of tearing down the LG Extravert 2. Since it is old and simple, it's not too hard to disassemble.

  1. pJtsQWVVj4BqoSV5
    pJtsQWVVj4BqoSV5
    WmZxQZrOmEDpqDVE
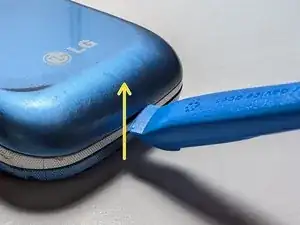
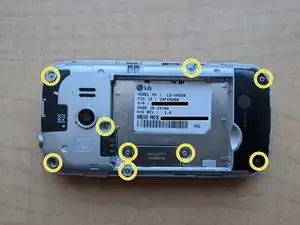
    • Use the opening tool or your fingernail to take off the back cover, by placing it in the indent at the bottom of the phone, and pulling up.

  2. aR3nIV1xnl26mJJD
    aR3nIV1xnl26mJJD
    eVNyGNXTSDGftrHs
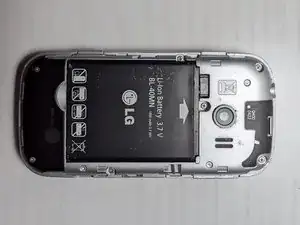
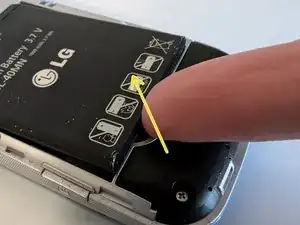
    • To remove the battery, use your opening tool or fingernail again, and place it in the indent in the plastic. Pull up and lift out the battery.

    • Please be careful with the battery! Do not bend, puncture, light it on fire, or get it wet!

  3. TeO6fUueBpMhwrcZ
    TeO6fUueBpMhwrcZ
    XhDPSxbW1HivG2pV
    • Remove the 9 back screws with a Phillips #000 screwdriver.

  4. sIytJ4qZfIbLSNvS
    sIytJ4qZfIbLSNvS
    uJZVfUFpYV1pGGvs
    • Not to be confused with the back panel!

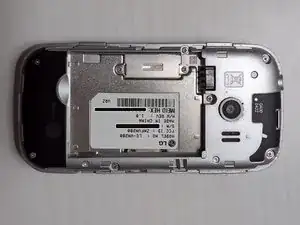
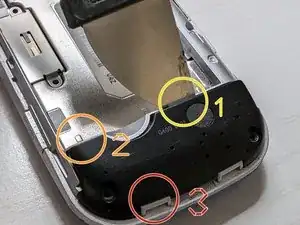
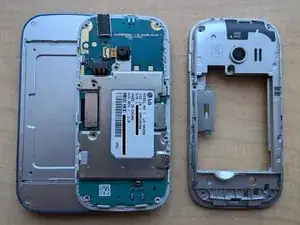
    • To remove the bottom black plate, insert a jimmy in the center, between the back panel and the black plate, and lift up to separate it partially. Then, do the same thing on the left side of the phone. Finally, do it again on the left bottom side, and the plate should pop out.

  5. kFvfADvWBpBjgsie
    kFvfADvWBpBjgsie
    CniNI6VfeuW2w1ca
    K32tCxtum3s2SooA
    • Not to be confused with the black panel!

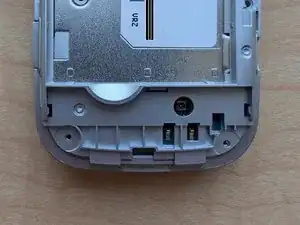
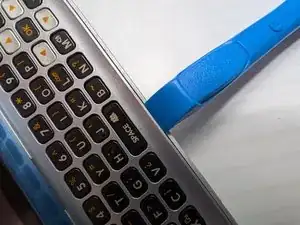
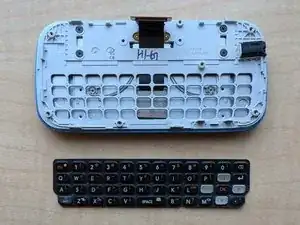
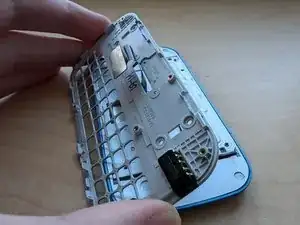
    • To remove the plate, flip over the phone, and slide out the keyboard. Press down on the panel, outside of the keyboard, and part of it will pop out, where pressure was applied. Repeat this process around the keyboard, and the back panel will fall off.

  6. mWWAatMgJO2qlWkw
    mWWAatMgJO2qlWkw
    LNDSwrk36d1soEhB
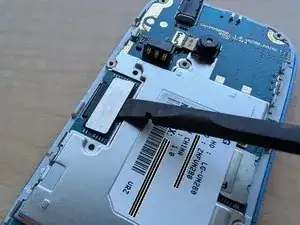
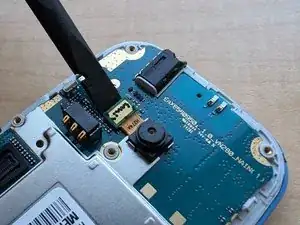
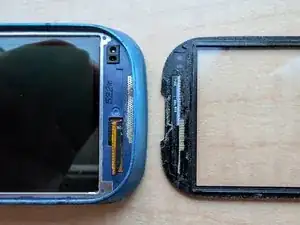
    • Insert the spudger tool in between the cable connector and the motherboard, and pry up to disconnect the cable.

  7. gZPeADadIQWv6OiX
    gZPeADadIQWv6OiX
    4CpoW423wfsptxmE
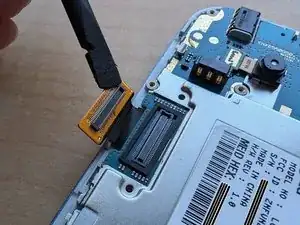
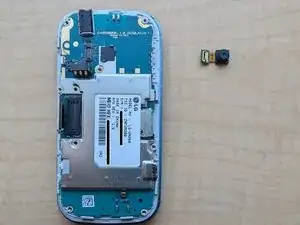
    • Like the step before, use the spudger tool to pry the camera connector off of the motherboard. There should be no glue or anything holding the camera down, other than the connector.

  8. IFSFVNDsqTVnbMHV
    IFSFVNDsqTVnbMHV
    kLtGKiZNdVFMFioM
    • Pry the motherboard away from the plastic shell, by inserting the spudger at the top-left of the phone (next to the headphone jack), and lift up.

  9. ZLWXDPfcCMvGLuoT
    ZLWXDPfcCMvGLuoT
    xG6Y54tIYFehWLkU
    • As with the last 3 steps, use the spudger to lift out the keyboard membrane.

  10. 22rrHUWBVsMl1LbN
    22rrHUWBVsMl1LbN
    3HHpvdKCFVL3LKs5
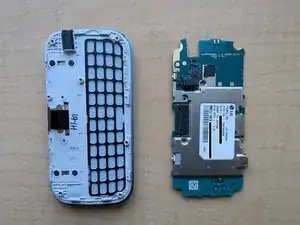
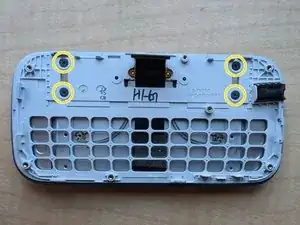
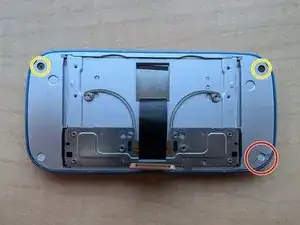
    • Using a Phillips #000 screwdriver, unscrew the 4 screws holding the keyboard shell into the sliding mechanism.

  11. WNxsQTU1nLaPBrvl
    WNxsQTU1nLaPBrvl
    TgElBkVkp5SEdOip
    DYSqtIO1LajSYe5J
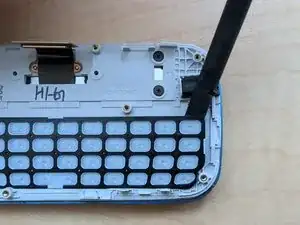
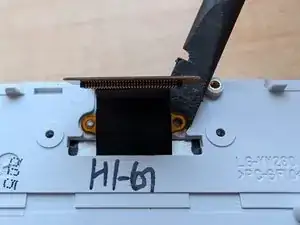
    • First, use the spudger to remove the ribbon cable from the shell. There should be a little bit of glue holding it in. Once it's been lifted up, remove the plate by lifting it, and remove the ribbon cable from the hole in the plate.

  12. WQvJg1HWvfO6sEOO
    WQvJg1HWvfO6sEOO
    AxkwOxhnWO6fX1Y4
    • Please do not try to disassemble the screen assembly. There are screws, as shown, but they do not really hold in the screen's back plate. It is fused to the front plate, which I learned the hard way (I cracked it a little bit, highlighted with the red circle).

    • Do not try to remove the screen bezel either, as it is the digitizer, and has a cable connected to the inside of the assembly, which, again, you cannot get in to. I also was not careful with that and found out the hard way, as shown in the second image.

    • If you would like to replace the screen, please buy another screen assembly, and follow this guide in reverse.

susbaconhairman skribbler

Member since: 21/10/22

648 Reputation

0 comments