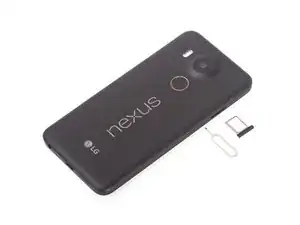
Introduction

For the official iFixit teardown of the Nexus 5X, click here.

Come to blog of Witrigs to see more detailed steps about LG Nexus 5X spare parts replacement.

  1. 1PYFI5iKNYBEMZhp
    1PYFI5iKNYBEMZhp
    CtjIsVVPtHrucQXA
    • Remove SIM card tray.

  2. YUBSjuIpiRfA1OEK
    YUBSjuIpiRfA1OEK
    6Xs4NY3mSfFGMIGW
    puR4HNMTUZCs6okC
    • Use guitar picks to loosen clips securing rear cover and remove back cover.

    • A handy notch is also available for back panel removal.

  3. VaqbYnMZfXUMMMCf
    VaqbYnMZfXUMMMCf
    eRkOXdvRxdEdx4Mu
    ssP66cQNdVqsMryJ
    • Twist off 10 Phillips screws together.

    • Pry up bottom half and upper half of middle frame.

    • Clips securing midframe exists, be careful to pry up it.

    What kind of screws are these? I’ve lost my original ones, are they a standard sort that I can buy more of?

    Andrew Lorimer -

  4. 1RpCMCF3HXViUxGb
    • Here is the whole middle frame.

    • The bottom half includes loudspeaker. The top half comes with fingerprint scanner.

  5. 2NkdQboDgf2x2OMj
    2NkdQboDgf2x2OMj
    ABjW2MfiyG4UbSpR
    • A flexible clip is here. Loosen it and get the loudspeaker assembly only.

  6. ChdlvQc6ZmRFIcCJ
    ChdlvQc6ZmRFIcCJ
    UVSkhMtC5S2nPLtI
    BXYZGH2GHWd1cOCb
    • Tear tape firstly.

    • Loosen adhesive at both sides.

  7. PNW2wch5IailWUBl
    PNW2wch5IailWUBl
    SWncuWftOYEwQZ1S
    LCWPphqZ1qrphZZK
    • Release battery connector.

    • Pry up and remove battery ( Adhesive underneath is not strong).

  8. PIaTB2GuCQVV5hII
    PIaTB2GuCQVV5hII
    msWK2ty3MfajgsrK
    3Wr1XXJSyOH2E5qV
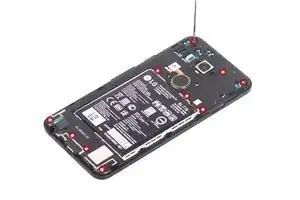
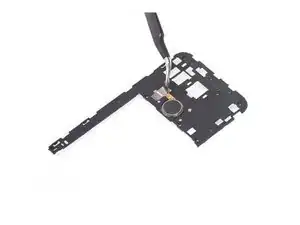
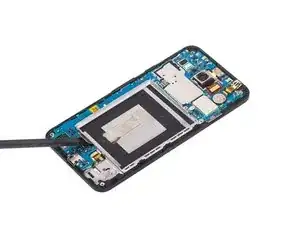
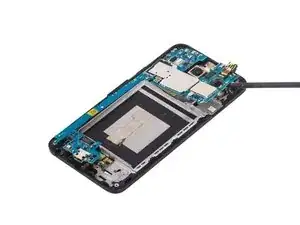
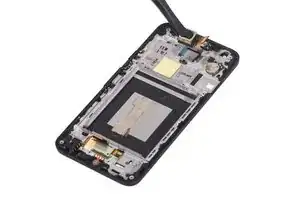
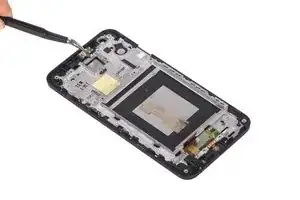
    • Loosen LCD screen connector and rear camera connector.

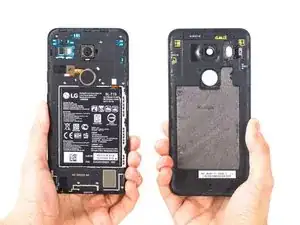
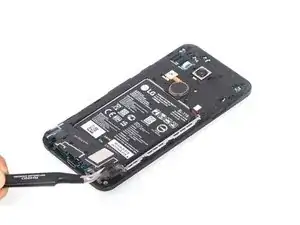
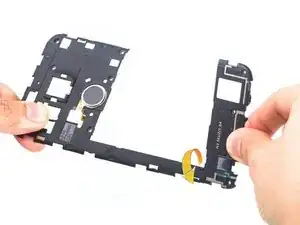
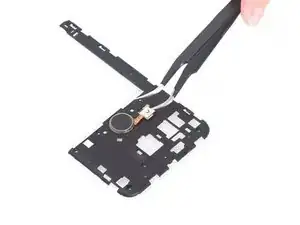
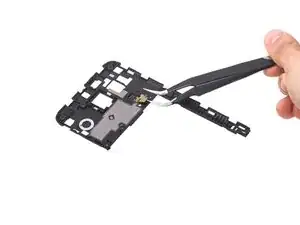
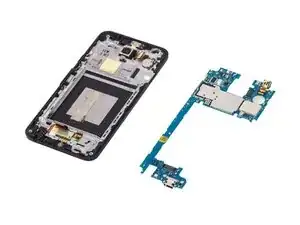
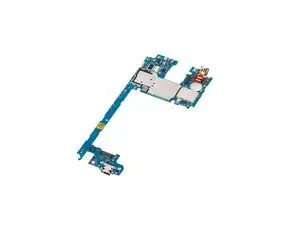
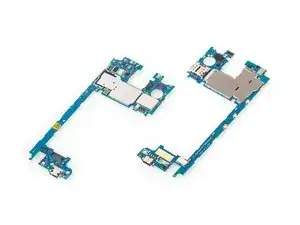
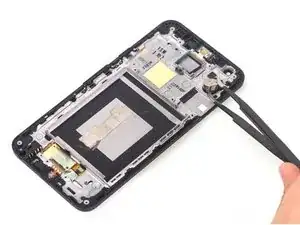
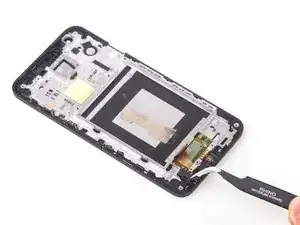
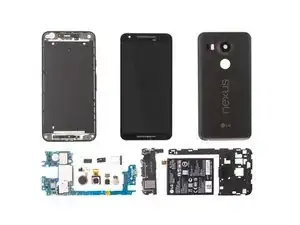
    • Pry up and remove motherboard assembly.

  9. DQG4txH62x1LFN1Z
    DQG4txH62x1LFN1Z
    2GeTYm4LgRoPTHE1
    • Release front camera connector and remove it.

  10. K6wPlDleNyL3hWbo
    • Here come with motherboard only.

  11. ugVUgeO6mYHoN54V
    ugVUgeO6mYHoN54V
    qHp6Kx5VaLnHrDRp
    dY1Viv2yKMHhgQNM
    • The adhesive underneath rear camera is strong. Be careful to pry up and remove it.

  12. W6xCL2Kw2iQHhfSf
    W6xCL2Kw2iQHhfSf
    BB4gtyFIYAwLMwya
    • Adhesive underneath vibration motor is a little bit strong. Pry it up carefully.

  13. 1RGBpm2jSUt4tbKM
    1RGBpm2jSUt4tbKM
    13rUATkL1tKXYJZD
    pmeMwKtNX1JLc4J4
    • Tear tape securing earpiece.

    • Use tweezers to pry up earpiece.

  14. D5Kv5KO5wI1wlQwY
    D5Kv5KO5wI1wlQwY
    X6fpZQpNItUYVLro
    • Remove headphone jack.

  15. RByX1GQO1HdEaE3t
    RByX1GQO1HdEaE3t
    Sn2ERFKFglIaUlWa
    b3sAKyuBQQEwM6Mf
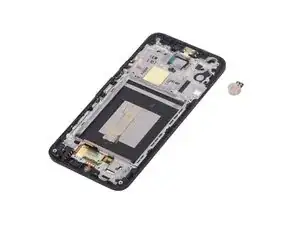
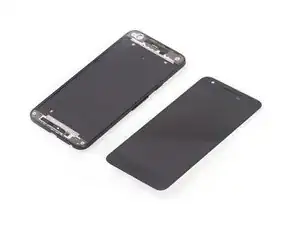
    • The sticker underneath LCD with digitizer is a little bit strong, so use heat gun to soften it for a few minutes.

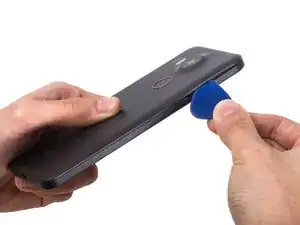
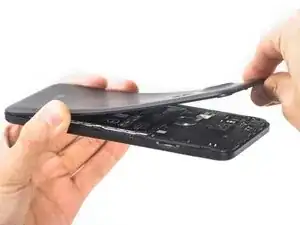
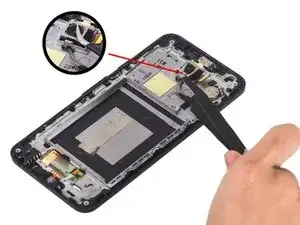
    • With the help of suction cup and guitar picks, remove LCD screen carefully.

  16. yFGI1cxUsrXalhJy
    • Done.

Witrigs

Member since: 24/11/15

70169 Reputation

3 comments

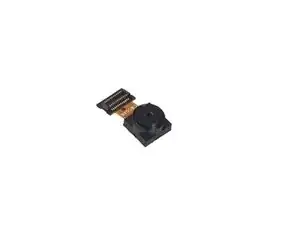
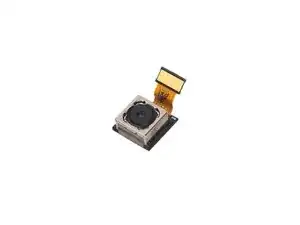
Where is the camera's microphone placed? I replaced my camera module and now I hear noises when shooting video. May it happen because I haven't glue it back? It happens even while the phone is static, but video is fine.

lioraviram42 -

I suggest that you can take it off and put some new adhesive on the backside of rear camera, and then see what happened.

Witrigs -

Um. You have a teardown that is not the iFixit official teardown, but has the same title, and links to your offsite blog/YT channel? Isn't that a bit misleading?

I think you should rename this Guide so as to not create confusion with the iFixit article with the same title. My 2¢.

David Spalding -