Introduction

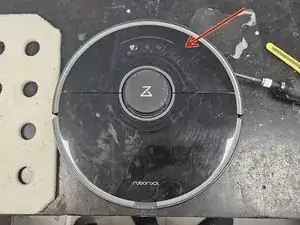
This is just a general teardown guide for the robotic vacuum cleaner Roborock S7.

  1. 5GkZrdBJlEOR52JY
    5GkZrdBJlEOR52JY
    r6VkLuJZ6ObYQt5t
    • Begin by removing the front half of the top cover.

    • It is held on by relatively loose latches. They will come free with some force.

    • Do not bend the plastic cover too much. It has some flexibility, but if bent too much, it could deform or snap.

    • Continue by removing the back half of the top cover.

    • Once removing the screws and the plastic bits, it will just pop out.

  2. TOiBioXDNwWEoZLj
    TOiBioXDNwWEoZLj
    1vteBTGHsrj2e1xx
    6nBrhI3qfBWafFoV
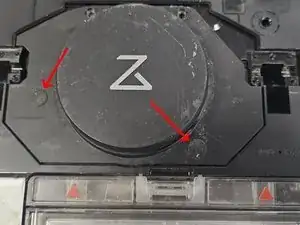
    • Remove the rubber caps covering the 2 screws.
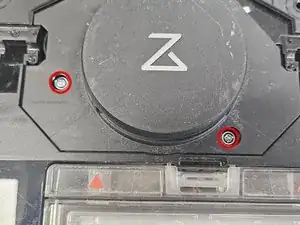
    • Remove the screws.

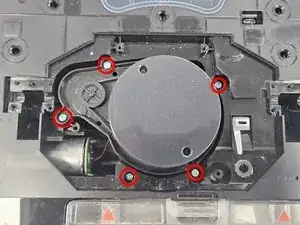
    • Remove the LiDAR cage.

    • Remove the LiDAR screws, then remove the LiDAR.

    • Based on the version of the robot, you might see one of 3 different iterations of the LiDAR. One, that is noticeably smaller, is connected via cable, whereas the other 2 are simply connected by a connector.

  3. cKNIv32LupvppPhe
    cKNIv32LupvppPhe
    6ZW2ZKYs2rJvLXx6
    TeNZKlIeg2NVFAhQ
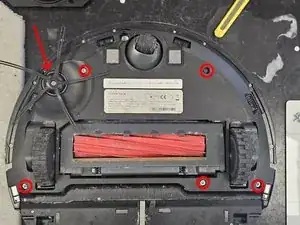
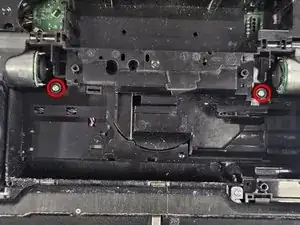
    • Remove the 5 screws and side brush, then remove the bottom panel.

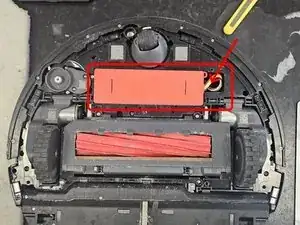
    • Remove the battery. Pull it up and over from left to right, then disconnect the connector.

    • Be careful with the connector. I've had cases where people had torn them off by yanking at the cable instead of pressing on and pulling the connector.

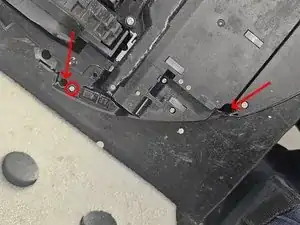
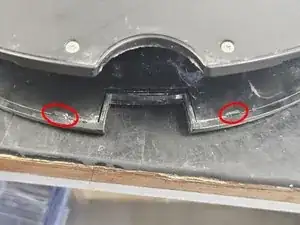
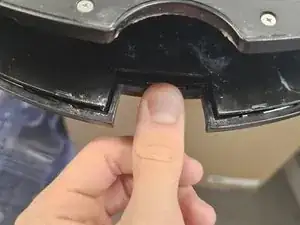
    • Remove the marked screws, then remove the top cover of the bumper, then the bumper itself.

    Be careful of the LED embedded in the bumper (on « Max » version I think). 1cm cable to disconnect from the chassis before removing the bumper !

    Guillaume PELESE -

    Hello!

    The LED cable you're referring to is only present in the S7 MaxV model (the one with the camera).

    I plan on creating a separate teardown of it once I get the time.

    DegenFixer -

  4. ASXb3bvcoiRS2NPp
    ASXb3bvcoiRS2NPp
    CnHNnWb1OZvcyeJR
    pRxmPupBc4f1XiTG
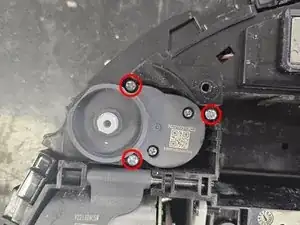
    • Continue by removing the side brush motor.

    • Move further below, then remove the screws. The 2 holes marked by arrows have screws within them. The smaller screws are PH1 and the bigger are PH2. After removing the screws, remove the side panel.

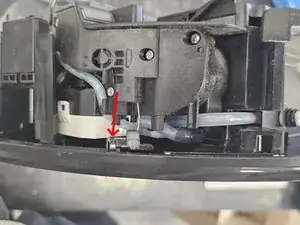
    • Remove the wire from the plastic housing. Angled tweezers recommended.

  5. UZcx2IVKIVFft1vB
    • Shhh, she's sleeping.

  6. Jk2PJAREtwYX4RXf
    Jk2PJAREtwYX4RXf
    XeRFfVjSS5hhY3Wy
    ruYHnyO6amJF6eY6
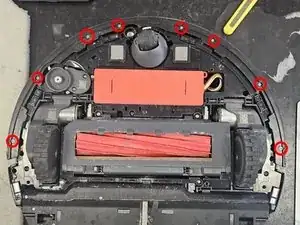
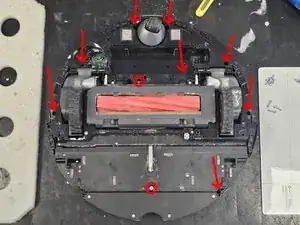
    • Remove the screws marked in image 1.

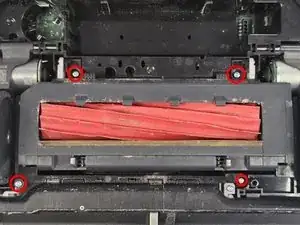
    • Now remove the screws in image 2, then remove the main brush assembly. There is no need to remove the brush cover or the brush itself. You simply pull it out.

    • Remove the 2 screws hidden by the main brush assembly.

  7. MQNpYbjvHENKm5kr
    MQNpYbjvHENKm5kr
    2AoxMkZ4RjQLVAcb
    • Unlatch these 2 latches.

  8. IWDH4XkfbTESVyN3
    • And voila, it's open.

DegenFixer

Member since: 18/09/24

4477 Reputation

0 comments