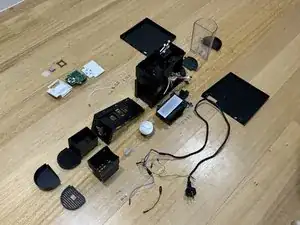
Introduction
-
-
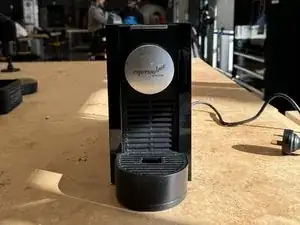
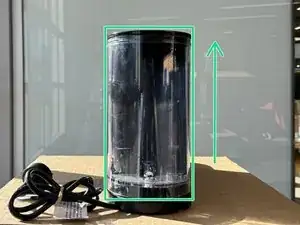
Piccolo Black Coffee Capsule coffee machine(3200g) for home use.
-
Powered by electricity from the power point supplied through the power cable.
-
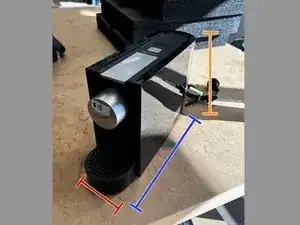
Width: 110mm
-
Length: 367mm
-
Height: 217mm
-
-
-
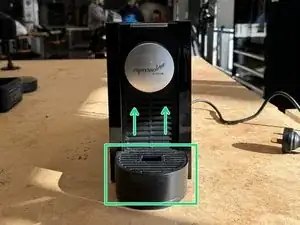
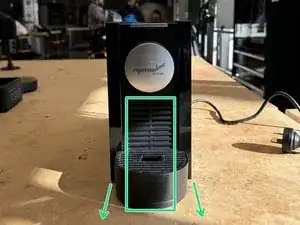
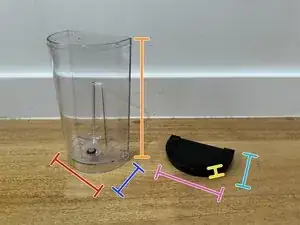
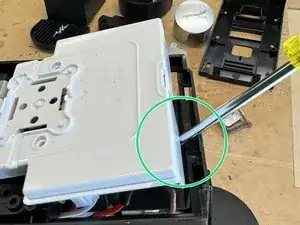
We will remove the drip tray. Lift it in a vertical motion.
-
Separate the Perforated drip tray cover from the tray.
-
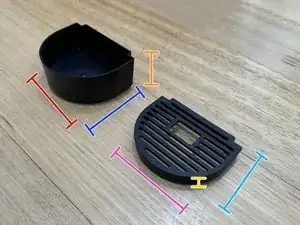
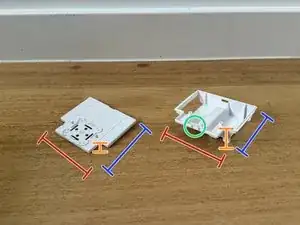
Drip tray(38g) Width: 93.6mm
-
Drip tray Length: 75.7mm
-
Drip tray Height: 37.5mm
-
Perforated drip tray cover(14g) Width: 89.9mm
-
Perforated drip tray cover Length: 71.6mm
-
Perforated drip tray cover Height: 13mm
-
-
-
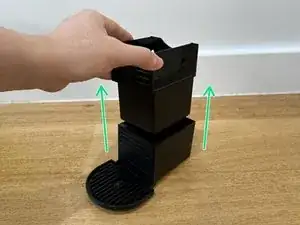
Slide the Capsule tray out of the main body.
-
Wiggle the Used capsule container out of the capsule tray in a vertical direction.
-
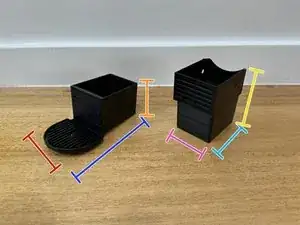
Capsule tray(77g) Width: 91.9mm
-
Capsule tray Length: 166mm
-
Capsule tray Height: 73.3mm
-
Used capsule container(99g) Width: 72mm
-
Used capsule container Length: 93mm
-
Used capsule container Height: 107.8mm
-
-
-
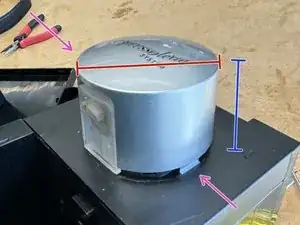
Turn the machine around to the back, and lift the water tank up.
-
Separate the lid from the water tank.
-
Water tank(178g) Width: 107.2mm
-
Water tank Length: 72.9mm
-
Water Tank Height: 194.3mm
-
Lid(30g) Width: 109.8mm
-
Lid Length: 75.6mm
-
Lid Height: 15mm
-
-
-
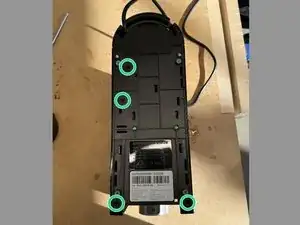
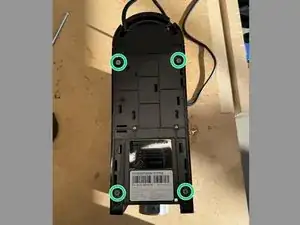
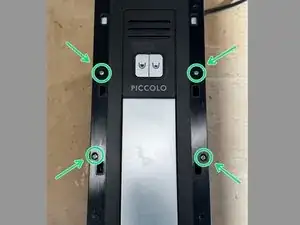
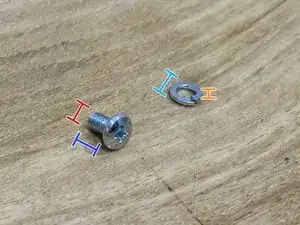
The bottom is held by 4 round head Phillips head screws and 4 round head triangle screws. We will be unscrewing the Phillips head screws first.
-
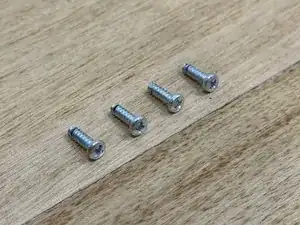
Unscrew the bottom four screws with a Phillips head screwdriver.
-
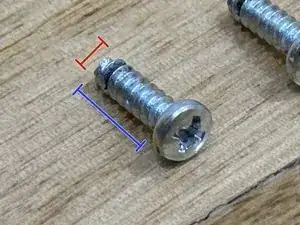
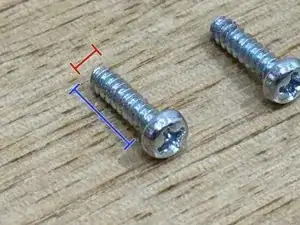
Screw(<1g) Diameter: 3.3mm
-
Thread length: 11.7mm
-
-
-
We will remove the 4 rubber feet. This step requires snipe nose pliers. Hold the corner of the rubber feet and gently pull it out.
-
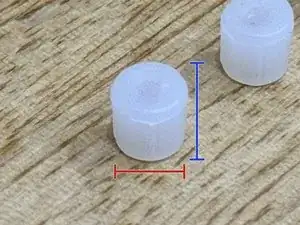
Feet(<1g) Diameter: 7mm
-
Feet Height: 7mm
-
-
-
The side panels are held by 2 screws and 2 snap fit slots on each side. This step only requires a flathead screwdriver as the screws have been removed from the prior steps.
-
We will first remove the protective cover on the right side of the machine near the water tank. Use the flathead screwdriver to pry the cover out.
-
Then we will remove the left and right panels of the machine. Insert the screwdriver into the shown slots, push down, and pry it outwards.
-
Side cover(L:149g/R:147g) Width: 17.5mm
-
Side cover Length: 239mm
-
Side cover Height: 218.5mm
-
-
-
4 roundhead Phillips head screws and two snap-fit slots hold the top cover.
-
Remove the top cover by starting with undoing the 4 screws on the top using a Phillips head screwdriver.
-
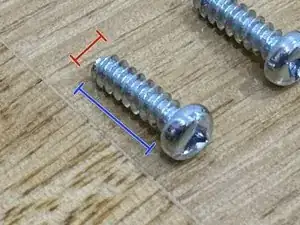
Screw(<1g) Diameter: 2.9mm
-
Thread Length: 11.5mm
-
Apply force from each side of the dispensing head cover and pull the part out. If not, pry it out with a flathead screwdriver.
-
Head cover(21g) Diameter: 60.3mm
-
Head cover Height: 50.3mm
-
-
-
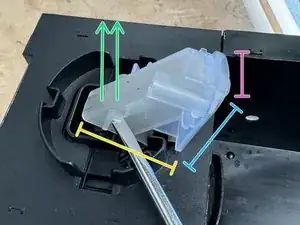
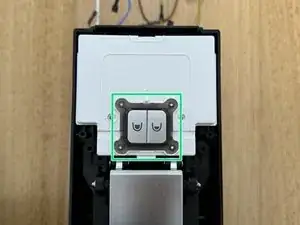
Use a flathead screwdriver to wedge the Dispensing head out of place.
-
Dispensing head(8g) Width: 27.8mm
-
Dispensing head Length: 39.3mm
-
Dispensing head Height: 50.7mm
-
Use a flathead screwdriver to push the snap-fit tab out of place. Once done properly, the whole Top cover should come off.
-
Top cover(92g) Width: 104.6mm
-
Top cover Length: 216mm
-
Top cover Height: 97.5mm
-
-
-
Once the top cover is off, remove the Dispense button on the mainboard. Lift the button casing, remove the button, and the membrane.
-
Membrane(<1g) W x L x H: 35.1mm x 31.3mm x 4.8mm
-
Dispense button(<1g) W x L x H: 27.9mm x 23.2mm x 6.3mm
-
Dispense button frame(<1g) W x L x H: 43.3mm x 37.4mm x 6.2mm
-
-
-
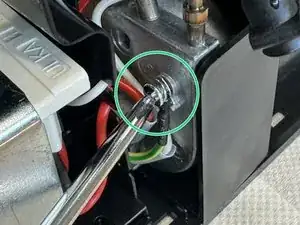
Use a Phillips head screwdriver to unscrew 2 screws holding the mainboard to the body.
-
Screw(<1) Diameter: 3.3mm
-
Thread Length: 15.7mm
-
-
-
Use a flathead screwdriver to wedge the mainboard out. Once the mainboard is out, pull the snap-fit tab and separate the casing.
-
Mainboard casing top(18g) Width: 95.5mm
-
Mainboard casing top Length: 84.3mm
-
Mainboard casing top Height: 13.6mm
-
Mainboard casing bottom(25g) Width: 98.9mm
-
Mainboard casing bottom Length: 85.7mm
-
Mainboard casing bottom Height: 35.8mm
-
Mainboard(56g) W x L x H: 90.6mm x 79.6mm x 29.5mm
-
-
-
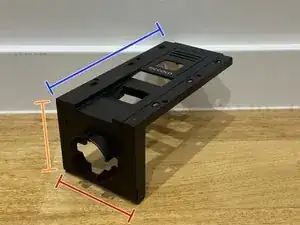
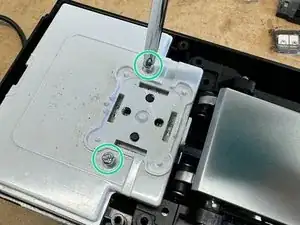
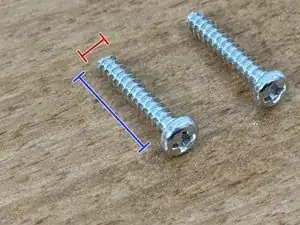
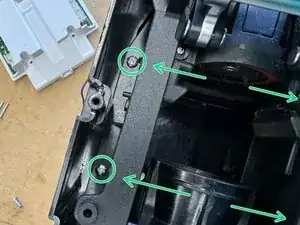
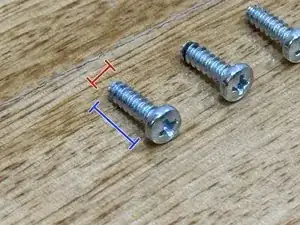
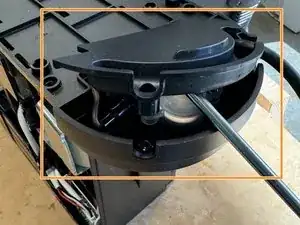
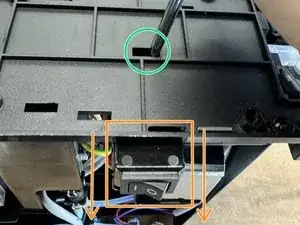
The Press mechanism is fixed to the main body with 4 Phillips head screws.
-
Use the Phillips head screw driver to unscrew 2 screws from each side.
-
Screw(<1g) Diameter: 3.3mm
-
Thread Length: 11.6mm
-
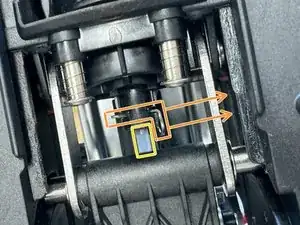
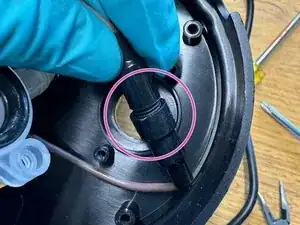
Pull the pin out using a snipe nose plier.
-
Then separate the hose from the press using a snipe nose plier.
-
-
-
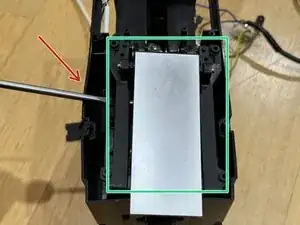
Use a flat head screwdriver to wedge the press out of the main body.
-
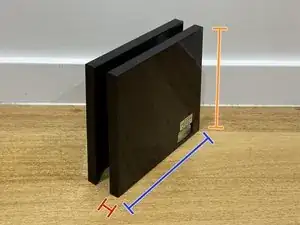
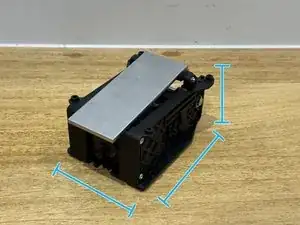
Press mechanism(498g) W x L x H: 89.8mm x 132.2mm x 72.3mm
-
-
-
The Power cord is routed deep into the machine. To pull it apart, we need to take multiple steps. Start by removing the bottom cord cover held by 2 Phillips head screws.
-
Screw(<1g) Diameter: 2.9mm
-
Thread Length: 11.5mm
-
Use a flathead screwdriver to wedge the cover open.
-
-
-
The Power cord is secured by a polycarbonate piece held by 2 Phillips head screws. Start by unscrewing them using a Phillips head screwdriver.
-
Screw(<1g) Diameter: 2.9mm
-
Thread Length: 11.5mm
-
Bottom cord cover(17g) W x L x H: 104.5mm x 64.3mm x 21.3mm
-
-
-
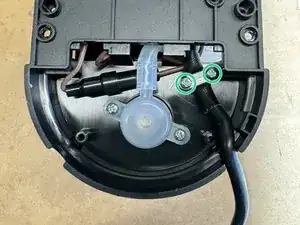
The yellow/green cable from the power cord is connected to the water heater with a Phillips head screw. Remove the screw using a Phillips head screwdriver. When removed properly, it will detach along with a washer.
-
Screw Diameter: 3.8mm
-
Thread Length: 6.7mm
-
Washer(<1g) Diameter: 7.5mm
-
Washer Height: 1.7mm
-
-
-
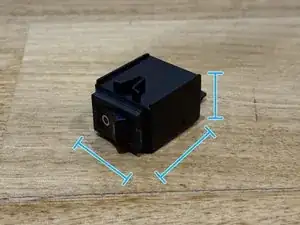
Remove the main power switch to access the wires connected to it. Use a flathead screwdriver to push the snap-fit tab outwards.
-
Pull the brown cables out of the switch using a snipe nose plier.
-
Main power switch(8g) W x L x H: 25.7mm x 50mm x 22.8mm
-
-
-
Follow the brown cable back to the bottom, and use your hands to unscrew the plastic cap.
-
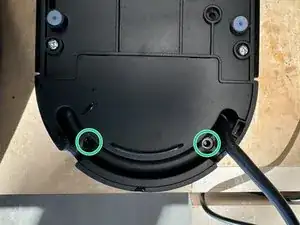
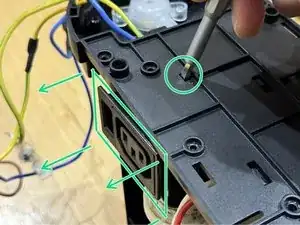
The Power outlet is attached to the main body with a snap-fit connection. Use the flathead precision screwdriver to push the slot outwards.
-
-
-
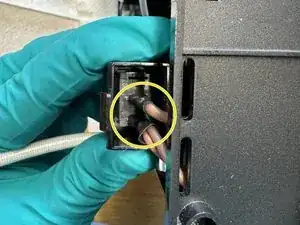
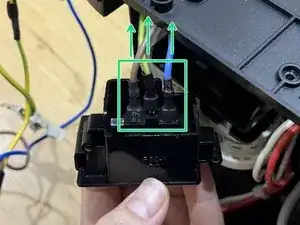
Pull the three cables out of the power outlet using a snipe nose plier.
-
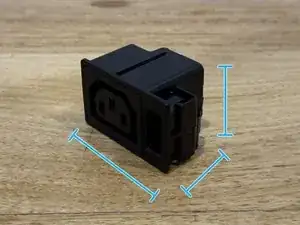
Power outlet(25g) W x L x H: 60.4mm x 34.1mm x 32.2mm
-