Introduction

For iFixit's official teardown of the iPhone 5s, click here.

For the most up-to-date instructions for home button replacement, click here.

  1. LsTO5YEDxWK1c5IW
    • Remove both screws from both sides of the lightning connector

  2. iWBxupOyCQVgc4Qh
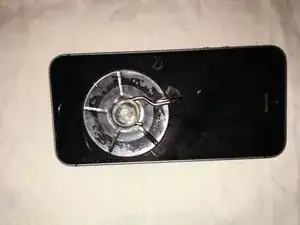
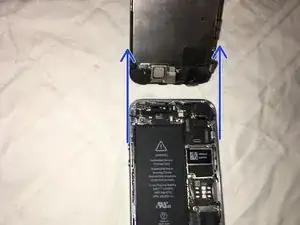
    • Use a single suction cup to lift the front panel.

    • Press the suction cup onto the screen. Make sure its right above the home button.

  3. VnOKCp3u2RaneaMs
    • When lifting the front panel up, you want to be mindful of the clips and cables that connect it to the rest of the phone. Make sure you take this step slow and only lift the screen enough to detach the cables that it's connected to.

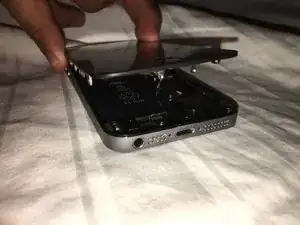
    • While pushing one side of the iPhone down, pull the suction cup up a little bit just enough to separate the home button from the bottom part of the phone.

    • With a tool, pry one side of the iPhone up, to separate the clips.

  4. 6FyFsZYNvH1HiPeG
    • This is how the iPhone should look after it's pried open.

  5. Bh4dHnhD2myVqMMs
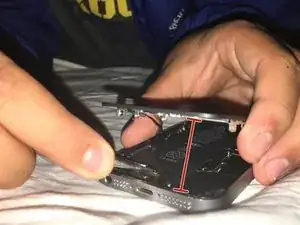
    • This step is risky and delicate. Make sure that you don't open the phone too far or the socket that the plug goes into. You want to be very careful not to damage the home button.

  6. jbs1fd5VDfYfACO1
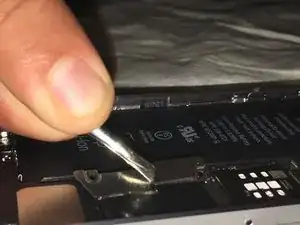
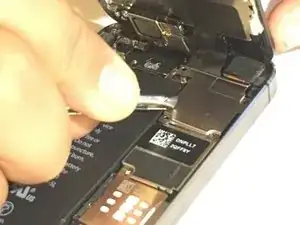
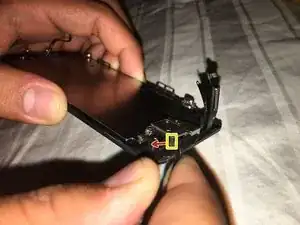
    • Use the tip of a tool to pry the home button cable out of the socket. Make sure you're not prying the whole socket, just the cable.

  7. 12OcHXW6Dyb4CPWx
    • Remove the two screws securing the metal battery connector bracket to the logic board.

  8. 2JfbiAaOyWXW2mlI
    • Remove the metal battery connector bracket from the iPhone.

  9. AevPqFhWVEuWIuWw
    • Use the end of a tweezer to gently pry the battery connector up from its socket.

  10. 3dhAEZeArKowaD5a
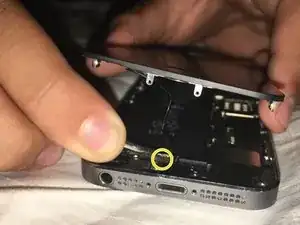
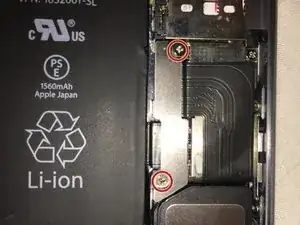
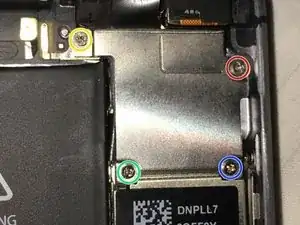
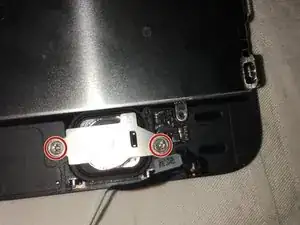
    • Remove the four screws securing the front panel assembly cable bracket. Make sure you keep track of which screws go where, because they are all different sizes.

  11. pQfXDlPDKHaOtALj
    • Remove the front panel assembly cable bracket from the logic board.

  12. yx4UknMCO3JJhuX5
    • Use the tip of the tweezers to disconnect the front-facing camera and sensor cable.

  13. 4qLNOPAK66MAoX12
    • While still supporting the front panel, disconnect the LCD cable connector.

  14. OucDCVNufiw5Psm1
    • Finally, disconnect the digitizer cable connector.

  15. b2uoBUmo3DgBElJ6
    • Remove the front panel assembly from the rear case.

  16. oqmh3KlFWw6lWIZK
    • Remove the two screws securing the upper component bracket.

  17. SDjyVKJBCIgSubUe
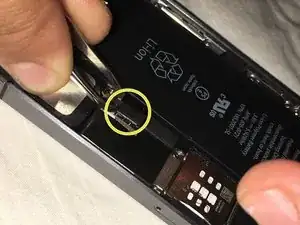
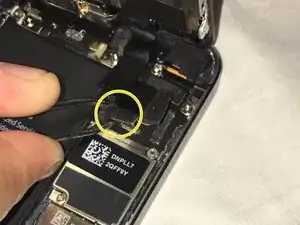
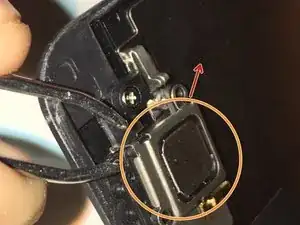
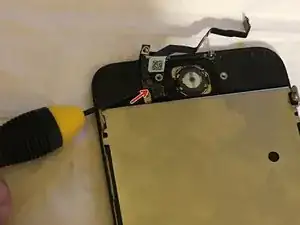
    • Move the clip carefully and slowly, near the bottom left corner of the earpiece speaker bracket, outwards from its original spot.

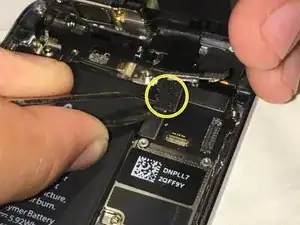
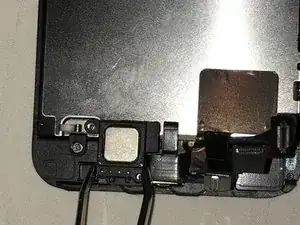
    • With a set of tweezers, shift the bracket to the left to unclip it.

    Nice guide, a little hard sometime to see what you are doing as you open a black iphone, but great guide!

    biffen skogman -

  18. UdXjX1mBHVc6viRi
    • Remove the bracket from the earpiece speaker.

  19. gAbmTyZi2WAhJJhg
    • Remove the earpiece speaker with a set of tweezers.

  20. 4dQrvZyfUchOHnUg
    • Unscrew the single screw securing the home button cable.

  21. FE22tFaZwltVA5rk
    • Remove the two screws from the home button bracket.

  22. TC2f5RhIfHQtXVWN
    • Remove the home button bracket from the display assembly.

  23. YfwpOS3oWhnKLkNI
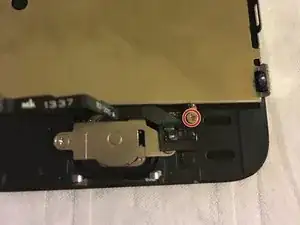
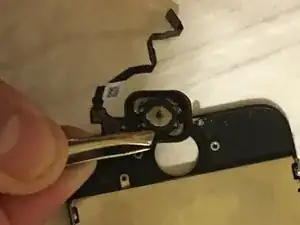
    • Wedge the tip of a tool underneath the home button cable assembly.

    • Gently work the tool underneath the cable to separate the home button cable from the front panel assembly.

  24. BY1yCTaBHJRTyxc2
    • Remove the home button assembly from the front panel.

    • THE END!!

Jeff Clark

Member since: 09/11/16

531 Reputation

One comment

Wow......Explained in a way that even no trained people can do....great to come in contact with this app even let tho

Pallav Bhattarai -