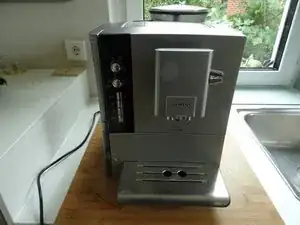
Introduction
In these machines, the ceramic valve controls the entire flow of liquid. If it no longer works properly, various faults can occur: No coffee, no steam, no hot water... You can remove the valve and replace it. Sometimes the valve body has a leak.
Note: some pictures come from an older model, but this should not affect the repair
''These instructions can also be used with other Siemens/Bosch models - the models have a similar structure.
Parts
-
-
Remove all attachments such as water tank, pulp drawer, brew group.
-
Remove the coffee container lid and take out all the coffee beans.
-
-
-
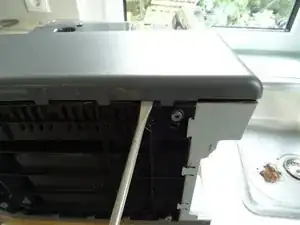
Lay the machine on its side with the water tank side facing up.
-
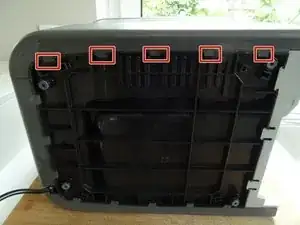
The side panel is essentially held on the ground by five strong catches. Pry up the pegs with a strong prying tool. It's pretty difficult and you need a lot of strength.
-
If the catches are loose, you can pull the side panel away from below. But it's still stuck in other places.
-
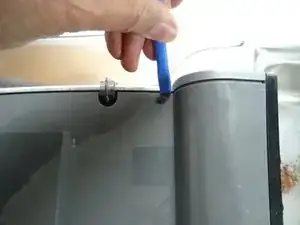
Use a plastic tool to pry the top cover up a few millimeters and lift off the side panel. Most of the time it's still stuck, especially at the front edge, you have to pull hard.
-
-
-
You may need to pry the front edge with a plastic tool.
-
Lift the side panel off, but don't remove it completely yet. It is still connected with a silicone tube.
-
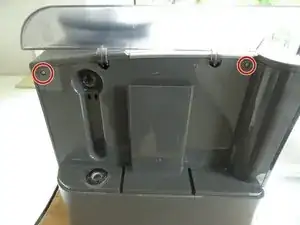
The water tank lid is located at the top of the side panel. Lift it up off the hinges.
-
-
-
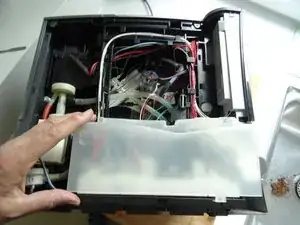
Remove the cover over the electronics.
-
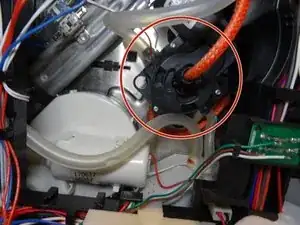
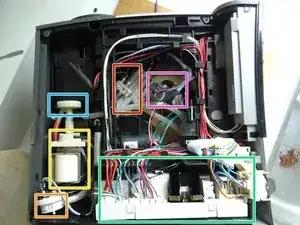
The second picture shows the most important components:
-
heater
-
Ceramic valve/Brew valve (depending on model)
-
electronics
-
pump
-
mute
-
flow meter
-
-
-
The ceramic valve is located in the middle of the appliance above the expansion chamber.
-
To remove it, cables and hoses must be disconnected. The valve is secured on the opposite side with three screws.
-
You can work easier if you remove the screws first. Proceed to the next step.
-
-
-
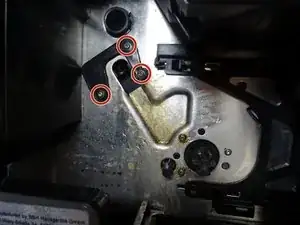
Remove the three Torx T10 screws on the opposite side.
-
Remove the black plastic retaining plate.
-
-
-
Place the machine on its side so that you can easily reach the main circuit board.
-
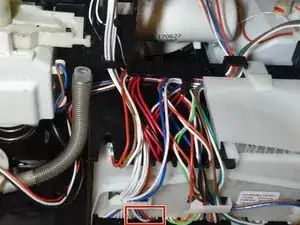
Trace the cables from the ceramic valve. Blue-Red-Red-White. The plug must be disconnected from the main circuit board. (second plug from the left)
-
Lift the main circuit board out about 1 cm and pull off the plug.
-
-
-
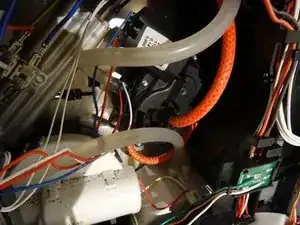
Note where the hoses are connected to (photo!) and disconnect them:
-
The two transparent hoses are unpressurized, the left one leads to the inlet for adding air to the milk frother, the right one to the expansion chamber to drain residual water.
-
The other three red hoses are pressure hoses, they are attached with a sleeve to push over, which is sometimes very tight: be careful, the connection can break off. (This does not matter if the valve is defective anyway):
-
The center hose comes from the pump.
-
The left pressure hose leads to the brew group.
-
The right-hand pressure hose to the milk frother/hot water outlet.
-
-
-
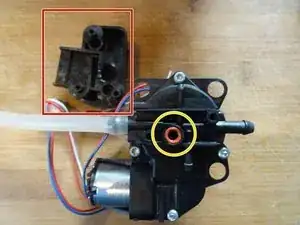
Here is the removed ceramic valve. The valve is not very easy to repair, you will most likely have to replace it.
-
Unscrew the mounting plate and transfer it to the spare part
-
Replace the docking seal straight away, you won't be able to get to it that easily.
-


Work through the steps in reverse order to reassemble your device.
2 comments
First off, thanks for providing a how to. I have a question though, how do you actually remove the red pressure pipes out of the ceramic valve I've tried pulling, twisting... praying... but nothing seems to work, I'm worried about applying too much pressure. Do you have a tip for me ^_^
Just replying to my own question. To get the red hose of, you have to move the black tube compressor (the black thing that spins that the tube goes through) back further down the tube, away from the ceramic value. Once you do this, you should be able to pull the red tube off the ceramic value. but, be warned, it's a b%"£("" and does require a bit of force, you can also rip the connectors from the ceramic value, which won't be a problem, is you're replacing it anyway.