Introduction

As time goes on your battery life may diminish. This guide will show you how to get to the battery, take it out, and replace it on the EasySMX X15.

  1. ETCpglrFyB2Wa4hg
    ETCpglrFyB2Wa4hg
    NtmOiiYrVXTjJ1uy
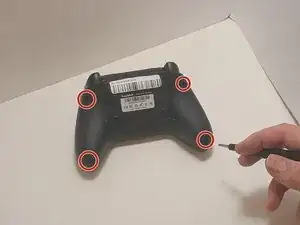
    • Use a Phillips #00 screwdriver to remove the four 9 mm screws from the bottom of the EasySMX X15.

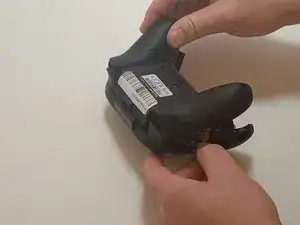
    • Use an opening tool to gently pry between the seams of the controller to separate the lower and upper casings.

    • Be gentle when separating the lower casing from the upper casing to avoid breaking any of the plastic snap tabs.

  2. Mg4BUkyZIKxTH5ZG
    Mg4BUkyZIKxTH5ZG
    1yMmhIiUuPkfPm32
    lDDKoyL1a2ERJ5vU
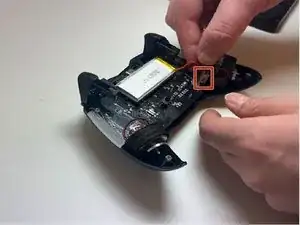
    • Push on alternating sides of the connector to disconnect the red battery cable from the board.

    • If that doesn't work, use a pair of tweezers to firmly grip the sides of the connector and pull straight away from the socket. Hold the tweezers closer to the connector to get a better grip.

    • Pull from the tab, not the cables, to avoid damaging them.

  3. FYB2IhtWXJhKy1tQ
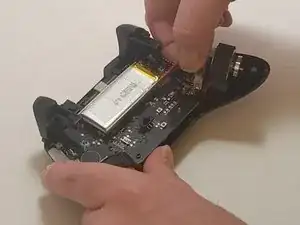
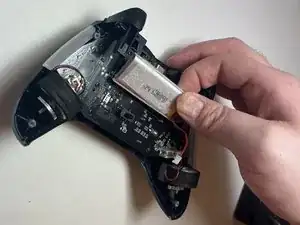
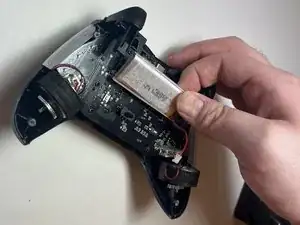
    • Use a spudger to pry the battery loose from the controller.

    • The battery is glued onto the control board, so it may take a bit of work to release it from the adhesive.

    • Remove the battery.

    • Don't bend or pierce the battery. If the battery is swollen, follow the guidelines outlined in this article.

Conclusion

To reassemble your device, follow these instructions in reverse order.
ShawnDetiveaux

Member since: 09/09/24

637 Reputation

0 comments