Introduction

The only problem with electronics is that over time they deteriorate. In some cases, they just get slow and freeze, and sometimes components stop working completely. If you are an owner of a Lenovo Ideapad this guide can be of use to you. This guide is applicable to both the 300-15IBR and 15ISK. Both laptops have similar builds so this guide can be used for both. In this guide, we use the Ideapad 300-15IBR.

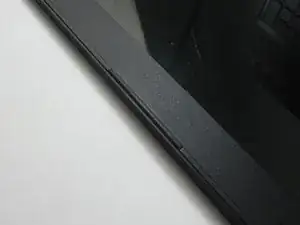
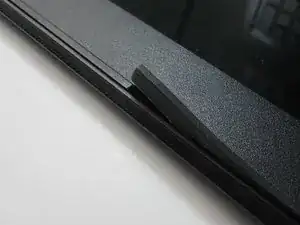
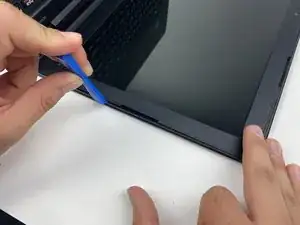
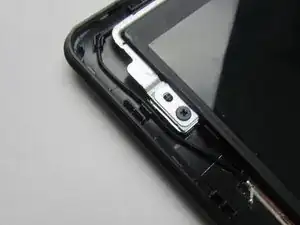
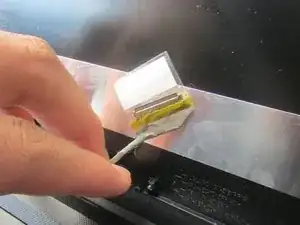
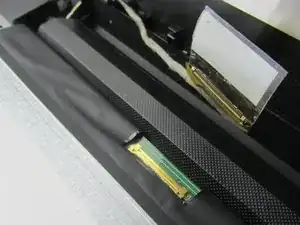
Before beginning the repair, ensure that the laptop is completely shutdown and has no electric charge left in the screen. The screen is one of the most fragile parts of a laptop therefore you need to have to utmost care when operating around the screen. Take caution when removing any and all components from the face of the screen, as damage is easily incurred when mishandled. There are also fragile parts that are connected to the screen such as the ribbon strip that is connected to the bottom of the screen. Take care to remove these items gently to avoid damage.

  1. iAWcvqWHOvUTbZHe
    iAWcvqWHOvUTbZHe
    GtNXis2sRvGHPMGf
    MCRIZJHEkdydiESH
    • Carefully remove the laptop screen impact strips using the plastic spudger

    • Ensure impact strips are removed in one piece with even pressure.

  2. KRmNtrrKDPOj1RDJ
    KRmNtrrKDPOj1RDJ
    Uq2MnINsWFUn4Uvk
    • Carefully remove the plastic bezel from the computer screen using a plastic spudger.

    • Loud cracking noises will occur. Do not be alarmed.

    • Ensure the bezel is removed with even pressure. Failure to remove evenly can result in broken components.

  3. lJRmUDXQWmvOvISQ
    lJRmUDXQWmvOvISQ
    djjxowLoNTIKCaAc
    WhuayF5tXKIXGCUU
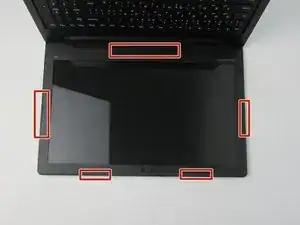
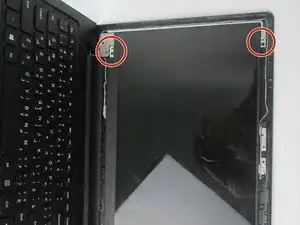
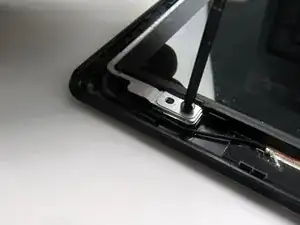
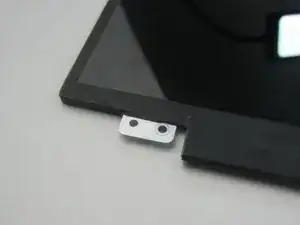
    • Using the Phillips screwdriver, remove four 0.8 mm Phillips screws at each mounting point of the screen.

    • If you have a magnetic bowl, utilize it to keep track of the screws.

  4. piDJt3TohGRZZEiv
    piDJt3TohGRZZEiv
    RjZBfRGqyxNmkUq4
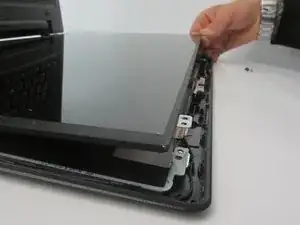
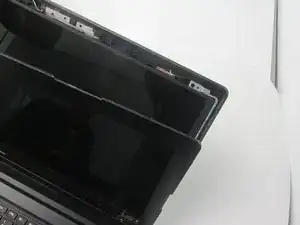
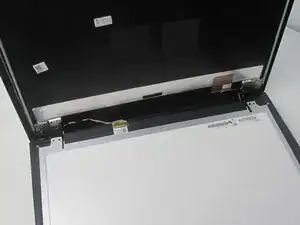
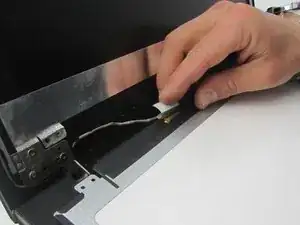
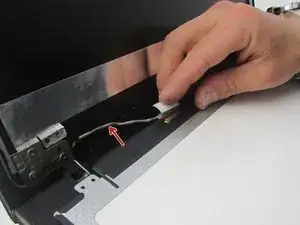
    • Carefully separate screen from case, ensuring ribbon strip at the bottom doesn't become disconnected.

  5. YQatp2UFRfNn4kUX
    YQatp2UFRfNn4kUX
    pnJOGvQaRWeTfCQn
    JqJaxxAdP3wcEBxH
    • Gently separate the ribbon strip connector from the back of the screen.

    • If possible, carefully peel the sticker off laptop housing without separating it from the connector.

    • Take caution to ensure the ribbon strip is disconnected with even pressure and the sticker above it has no contact with case.

  6. 1sPRPW5UWku13eGV
    1sPRPW5UWku13eGV
    CdcgC6OMY5YrLccQ
    UMHLupyUu2p3CPmb
    • Replace screen with new LCD screen and gently reconnect the ribbon strip.

    • Ensure that the ribbon strip maintains contact with the channel it is laid in.

Conclusion

To reassemble your device, follow these instructions in reverse order. Be sure to test whether the screen works before putting the plastic bezel back just in case.

Benjamin Liu

Member since: 23/01/20

133 Reputation

0 comments