Introduction

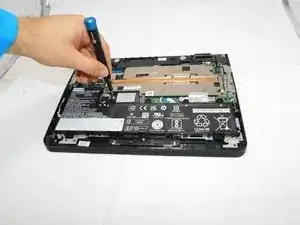
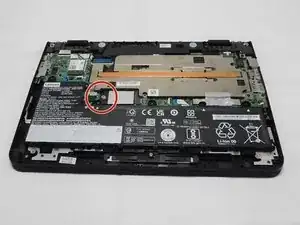
Storage space is essential to any computer device, but once that means of storage has been either filled to capacity or been damaged, saving and storing your data can become an issue. The issue lies here in the SSD and can be easily replaced for this laptop model with the following steps below.

  1. ZHTUPIQVMYqcH4PF
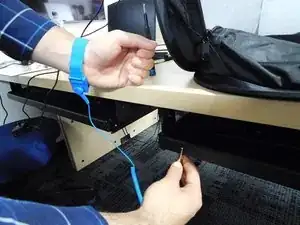
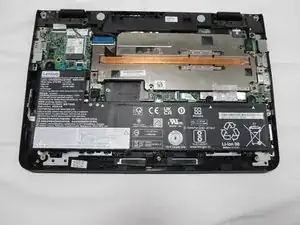
    • Start by putting on your anti static wrist strap and connecting it to a stationary and stable object, like a desk.

    • This safety strap serves as a precaution to prevent any electrical static you might have on your body from transferring to the laptop's internal components and damaging the hardware.

    • Reminder to have this safety strap on you at all times during the process

  2. PULHlNLCOIjRx1IF
    PULHlNLCOIjRx1IF
    MPC6lqCk43A1ZlHL
    loNf1g3XXayL1BjN
    • Use a T5 Torx screwdriver to loosen and remove all eight bottom cover screws.

    • If you're having issues removing the back cover of the case, be sure to use the opening pick to pry the case open carefully.

  3. tSrUSKn6ZmqKOUlR
    tSrUSKn6ZmqKOUlR
    y4bTBXDFXOUGvPXt
    • Locate the SSD on your device and remove the 2.3 mm screw using a Phillips #00 screwdriver.

    • Place the loose screw somewhere safe and store for reassembly.

  4. olkH2sQlY11EPXuZ
    olkH2sQlY11EPXuZ
    OEFQi2KPJqHwiEnO
    2yYWkhnINKCTiWyy
    • Pull the SSD out of its slot in the motherboard. It might require to wiggle it a little.

Conclusion

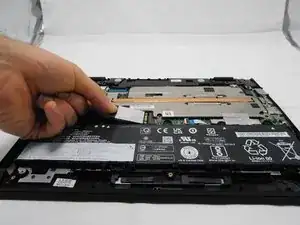
To reassemble your device, follow these instructions in reverse order.

David Beltran Heredia

Member since: 02/02/24

229 Reputation

0 comments