
Introduction
The shell or case of the Little Tikes Tobi 2 Interactive Karaoke Machine serves as the outer protective cover of the device, shielding all the delicate internal components from potential damage caused by external sources. It acts as the first line of defense, ensuring that the circuitry, circuit board, screen, buttons, and other sensitive parts remain safe and intact. The shell is made of durable materials such as plastic, metal, or a combination of both, designed to withstand impacts, dust, moisture, and general wear and tear that may occur during daily use.
Before you begin this repair, make sure that your Little Tikes Tobi 2 Interactive Karaoke Machine is off and the batteries are removed.
Parts
-
-
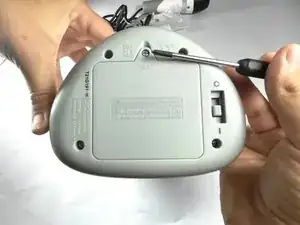
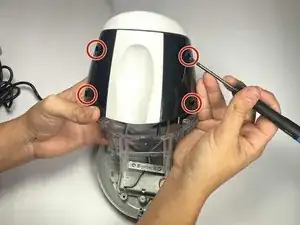
Use a Phillips screwdriver to remove the single screw that is holding the cover to the battery compartment.
-
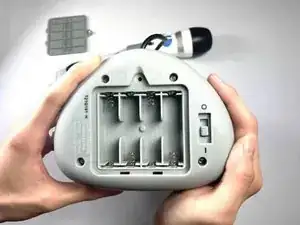
Use a spudger to carefully pry off the battery cover.
-
-
-
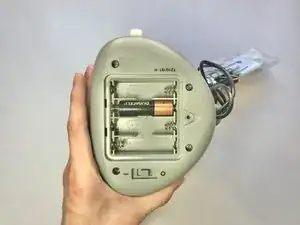
To easily pop out a battery, use your thumb to push the battery from the flat side down toward the coil and pull the battery outward.
-
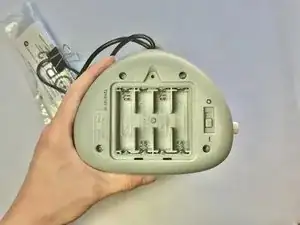
Remove all four batteries.
-
-
-
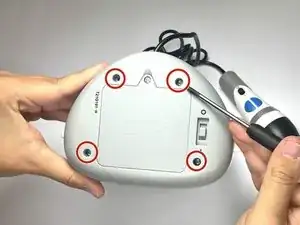
Use a Phillips screwdriver to remove four screws from the base of the device.
-
Remove the bottom of the karaoke machine.
-
-
-
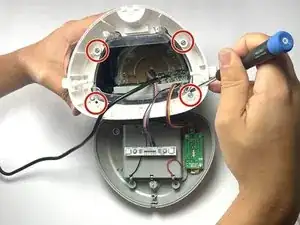
Use a Phillips screwdriver to remove the four screws from the exterior black plastic part of the case.
-
Use a spudger to disassemble the case.
-


To reassemble your device, follow these instructions in reverse order. Take your e-waste to an R2 or e-Stewards certified recycler.
