Introduction

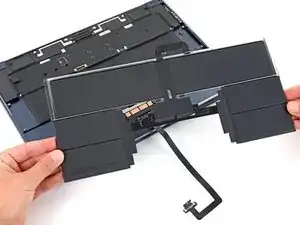
Use this guide to replace a worn-out, malfunctioning, or dead battery in your MacBook Air 15" 2024.

If your battery is swollen, take appropriate precautions.

  1. VHSwxVAfVpRANEEM
    VHSwxVAfVpRANEEM
    RdBOkhEeNyU2yrQh
    f3YY51OXlJcifhAq
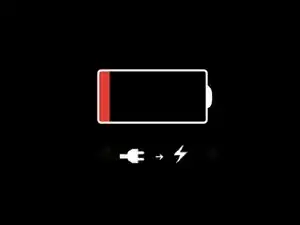
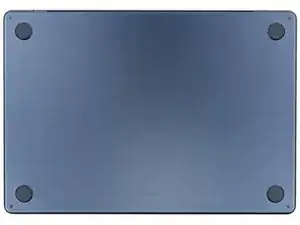
    • Allow your MacBook's battery to drain below 25% before starting this repair—a charged battery may catch fire if damaged.

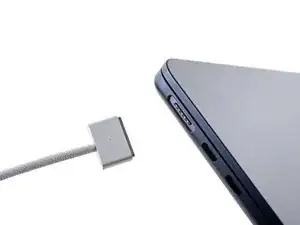
    • Unplug all cables and fully power off your MacBook.

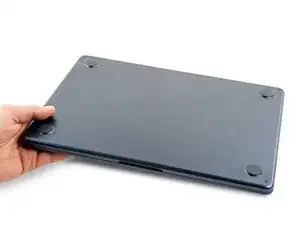
    • Close the display and lay your MacBook upside down. Keep your laptop closed until you've physically disconnected the battery.

  2. VLe1AqG1xhVfa22F
    VLe1AqG1xhVfa22F
    MSqb2Idxp2QYIk6B
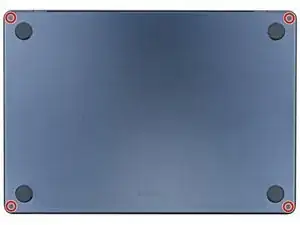
    • Throughout this repair, keep track of each screw and make sure it goes back exactly where it came from.

    • Use a P5 pentalobe screwdriver to remove the four 6.4 mm‑long screws securing the lower case.

  3. OLHZMoIOgBUBInCQ
    OLHZMoIOgBUBInCQ
    oW1DXmHu2xTSOAUg
    npMpHdfBbNnIjgXL
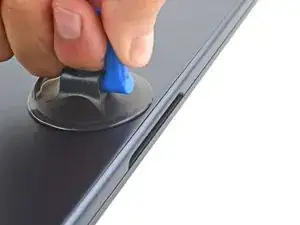
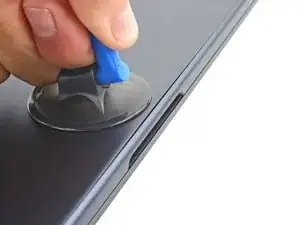
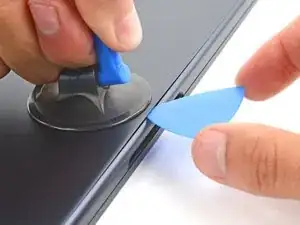
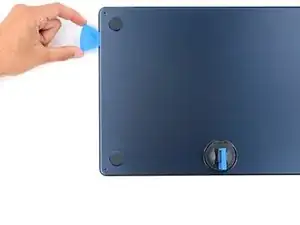
    • Apply a suction handle to the center of the lower case's front edge.

    • Pull up on the suction handle to create a gap between the lower case and the frame.

    • Insert an opening pick into the gap.

  4. icfXdnPCDqSNIpIL
    icfXdnPCDqSNIpIL
    sXYsTZUJmWdPIOBO
    FsveCnI6mB4o6vdZ
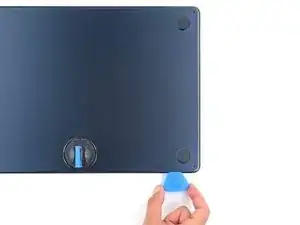
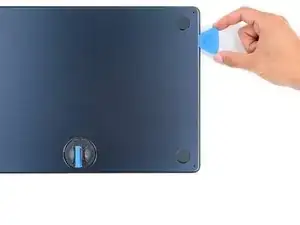
    • During the next two steps you'll feel and hear six snapping clips release. If a clip doesn't release, insert your opening pick farther and try again.

    • Slide the pick to the bottom right corner to release the first clip.

    • Slide the pick around the corner and up the right edge to release the next two clips.

    It is possible to break these off of the lid if you do not understand how they lock. They lock by pressing the lid straight down onto the body, not from the side. If I did it again I would find the clip, and just twist the tool to pull the two halves directly away from each other.

    Geoff Baker -

  5. aOleJq3qgpdhKrNc
    aOleJq3qgpdhKrNc
    ljfTrGXwPbBtFYvF
    3JqJtEyXMAB4RNYM
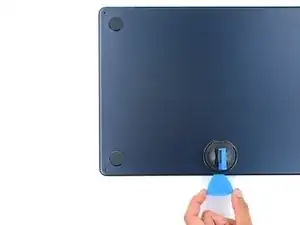
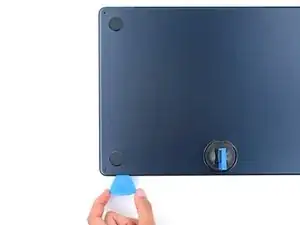
    • Insert the opening pick in the original gap created with the suction handle.

    • Slide the opening pick to the bottom left corner and up the left edge to release the three remaining snapping clips.

  6. yUmINYLGDWUvLWTY
    yUmINYLGDWUvLWTY
    HoTdfbFiP5TOXsTJ
    DN2rEokJGdNDZsQk
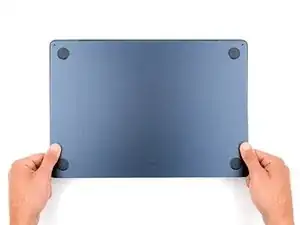
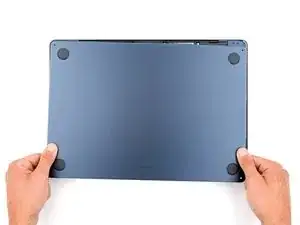
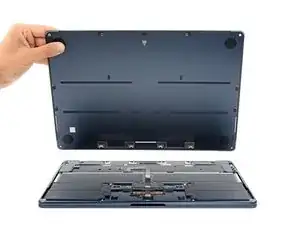
    • Four sliding tabs along the back edge of the MacBook firmly secure the lower case. Separating these tabs requires a lot of force—consider using gloves to protect your hands from the sharp edges of the lower case.

    • Keep the lower case flat to the frame and firmly slide it straight away from the back edge, one corner at a time, to disengage the sliding tabs.

    • Don't pull up until the cover is completely separated.

  7. UNtWUTpBg4ocEXT4
    UNtWUTpBg4ocEXT4
    44XcoVjlMduNTrDf
    BATrXQ5vhaJNbZqC
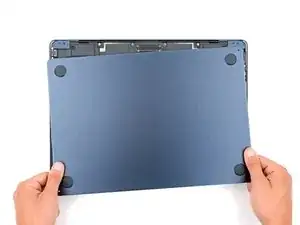
    • Remove the lower case.

    • During reassembly:

    • Set the lower case in place and align the sliding tabs with the screw heads they slide over. Press down and slide the lower case toward the back edge to engage the tabs—it'll stop sliding as the tabs engage.

    • When one side is engaged, it may push the other out of alignment. Check both sides as you push, there should be no gap along the back edge.

    • Once the lower case is flush with the frame, press down firmly along the perimeter to engage the six snapping clips.

    • You'll hear and feel a distinct click as each clip snaps into place.

  8. P2xxSwq3pQFSde6I
    P2xxSwq3pQFSde6I
    2aJ3AgWMLtqjwJrs
    dRRIdlQLRyRbLycf
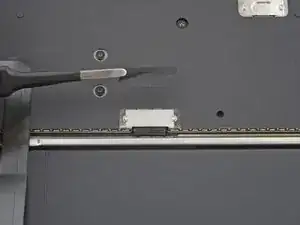
    • Use blunt nose tweezers or your fingers to remove the piece of tape covering the battery connector cover.

    • During reassembly, use the leftover adhesive to secure the tape to the cover.

  9. ytD4SCgCAxXVt24f
    ytD4SCgCAxXVt24f
    cejWTHjtXGxlUdlk
    ZBvCsV2PVr1eRnd1
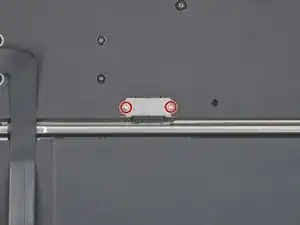
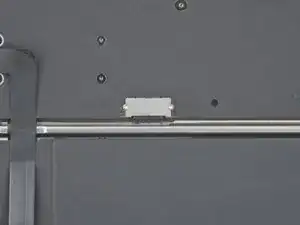
    • Use a 3IP Torx Plus screwdriver to remove the two 1.5 mm‑long screws securing the battery connector cover.

    • Remove the cover.

  10. mBoddjL4FMGvHdAK
    mBoddjL4FMGvHdAK
    SxTDekgXBIIXKMgD
    • Use an opening pick to pry up and disconnect the battery connector.

    • To reconnect a press connector, align it over the socket and gently press down on one side until it clicks into place, then press down on the other side. It might take a few tries to align the connector.

  11. sauZMAYWojBrwBjW
    sauZMAYWojBrwBjW
    tMpetYevVNjXJgYV
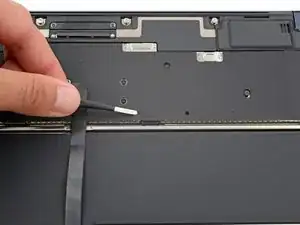
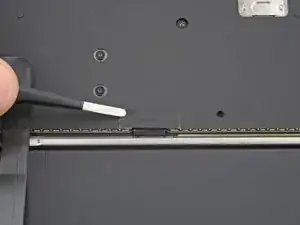
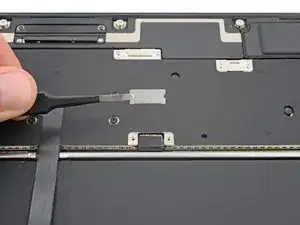
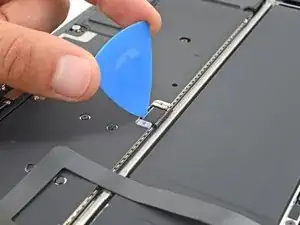
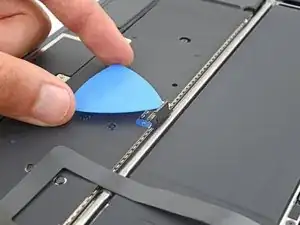
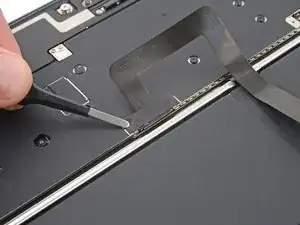
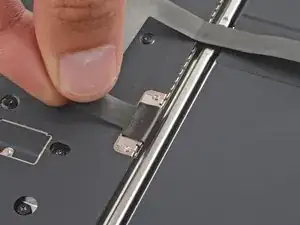
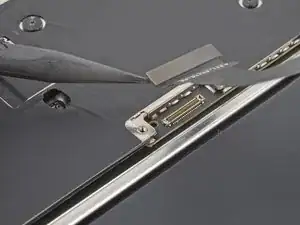
    • A small piece of black tape hides two trackpad cable cover screws.

    • Use tweezers or your fingers to remove the tape from the trackpad cable.

    • During reassembly, use the leftover adhesive to secure the tape to the cover.

  12. OHehkGT4BcGACkcQ
    OHehkGT4BcGACkcQ
    TMMcQtaRDpB2wGXv
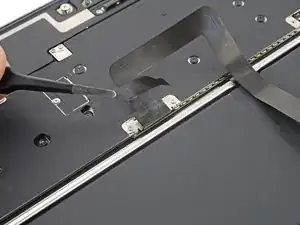
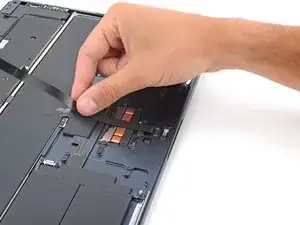
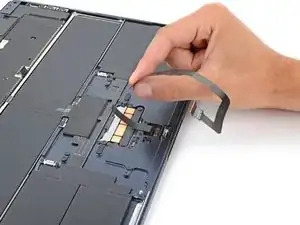
    • Light adhesive secures the trackpad cable to its metal cover.

    • Pull the trackpad cable away from its cover to separate the adhesive securing it.

    • During reassembly:

    • Use the leftover adhesive to secure the trackpad cable to the cover. If the cable doesn't stick, use double-sided tape to secure it.

    • If you have a replacement trackpad cable with adhesive pre-installed, remove the liner and press the cable into place.

  13. vYusBNNFXAcsMFmT
    vYusBNNFXAcsMFmT
    gCqE5BhBYQFRcuNb
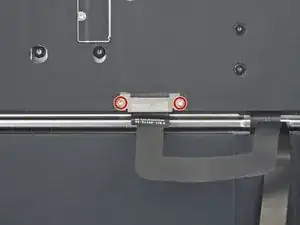
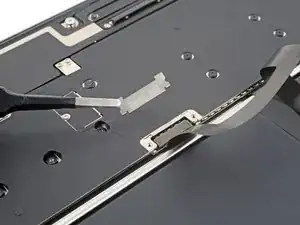
    • Use a 3IP Torx Plus screwdriver to remove the two 1.5 mm‑long screws securing the trackpad cable cover.

    • Remove the cover.

  14. QB5xLmoPmoirWDOQ
    QB5xLmoPmoirWDOQ
    OWWJTLBHXEqsGFPS
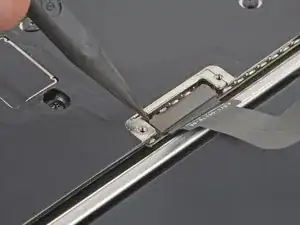
    • Use the point of a spudger to pry up and disconnect the trackpad cable press connector from the logic board.

  15. 3NPXt5WQOV5KBFGH
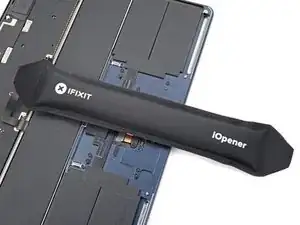
    • Two small strips of adhesive secure the trackpad cable to the frame.

    • Heat an iOpener and apply it to the trackpad cable for two minutes to soften the adhesive securing it to the frame.

    • You can also use a hair dryer—but extreme heat can damage the battery, so proceed with care.

  16. nxE51Fl2P1raMw6G
    nxE51Fl2P1raMw6G
    BtoWbXgjVpaupUgC
    CYtTESvGjvwIyXLP
    • Pull the trackpad cable toward the bottom of the MacBook to separate it from the frame.

    • During reassembly:

    • Use the leftover adhesive to secure the trackpad cable to the cover. If the cable doesn't stick, use double-sided tape to secure it.

    • If you have a replacement trackpad cable with adhesive pre-installed, remove the liners and press the cable into place.

  17. salx6iYcpLci4jtd
    salx6iYcpLci4jtd
    iUy2nNNCt3UuFdRc
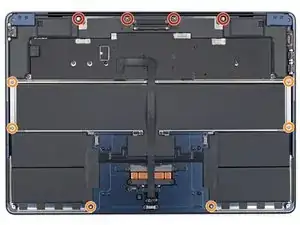
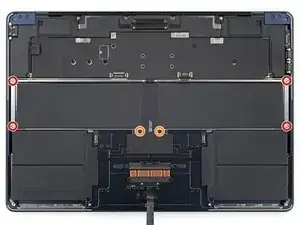
    • Use a 3IP Torx Plus screwdriver to remove the six screws securing the battery tray:

    • Four 4.6 mm‑long screws securing the upper edges

    • Two 2.5 mm‑long screws securing the center

  18. t2cxg6beh6Gsxnuy
    t2cxg6beh6Gsxnuy
    ZSQbRa55HaJCe1OO
    1wggHRM4jGjeHXpi
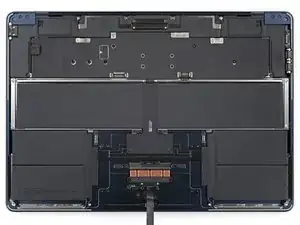
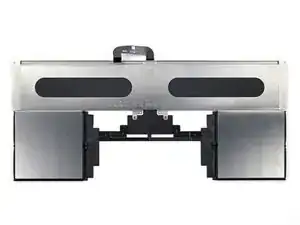
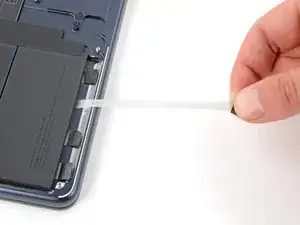
    • The MacBook's battery cells are adhered to a metal tray as a complete assembly.

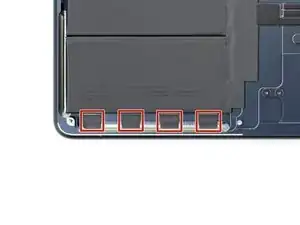
    • The metal battery tray—not the actual cells—is secured to the frame by eight stretch-release adhesive strips on the bottom left and right edges of the MacBook.

  19. 2yYuJSIIwVlTVBnK
    2yYuJSIIwVlTVBnK
    4qmvl4DeBtqB3PPC
    f5wKXZbrOZhGFZ5T
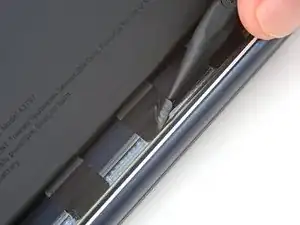
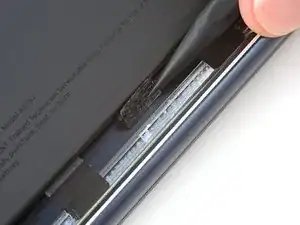
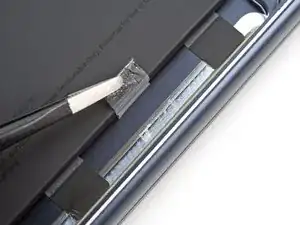
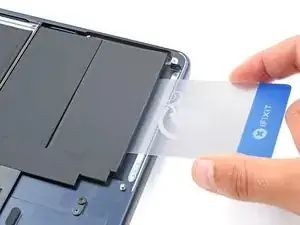
    • Use the point of a spudger and tweezers to separate and peel up the eight pull tabs.

    • Don't pull on the tabs yet.

  20. xFLrogblrUv6QHbJ
    xFLrogblrUv6QHbJ
    QPAeL4etwmKgTjrl
    HlGCNMvOF5UivxTa
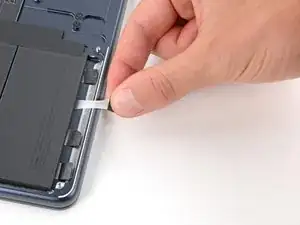
    • It takes time and constant tension to release the adhesive strips. Be patient and don't yank on them.

    • Don't let the strips touch the bottom edge of the frame—it's sharp and can easily cut them.

    • Use your fingers to slowly pull each strip out at a low angle, giving the adhesive plenty of time to stretch and detach.

    • Re-grip the strip closer to the battery as necessary and continue pulling—the adhesive will stretch a lot.

    • If a strip or its pull tab breaks off, use blunt nose tweezers to try to retrieve it from under the tray. If you can't reach it, move onto the next tab.

  21. 2VqXoRFKEw2HbaSM
    2VqXoRFKEw2HbaSM
    4YdSCZC3HA2NnStb
    • If you successfully removed all eight strips of adhesive, congratulations! Skip down two steps. If any of the strips broke and you weren't able to retrieve them, follow the next two steps to separate the remaining adhesive.

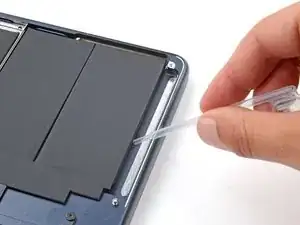
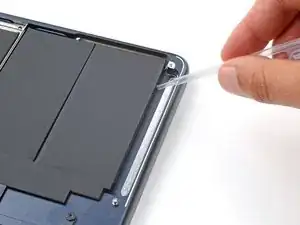
    • Apply a few drops of highly-concentrated isopropyl alcohol (over 90%) under the battery tray near the broken adhesive strips.

    • Wait one minute for the alcohol to soften the adhesive.

  22. oyZKuU1YAyHIU2Hm
    oyZKuU1YAyHIU2Hm
    P5heteTYivtmNPsH
    3ADAwW5qyFdluc31
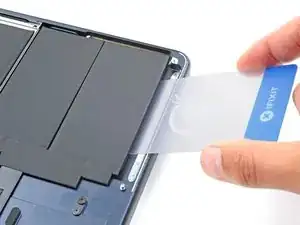
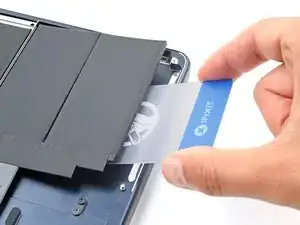
    • Make sure your plastic card is underneath the battery tray itself, and not between a battery cell and the tray. Don’t attempt to remove any battery cells from the metal tray.

    • Insert a plastic card underneath the battery's metal tray where the adhesive strip broke off.

    • Slide the plastic card completely under the battery tray and lift to separate any remaining adhesive.

  23. YWhgFJQDTpSSVlII
    YWhgFJQDTpSSVlII
    1EnCvj23Njc6JXuV
    ZwoNGnhXqnmbmTGR
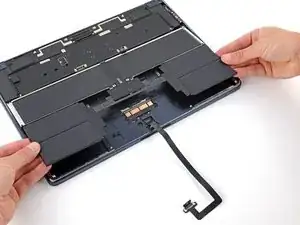
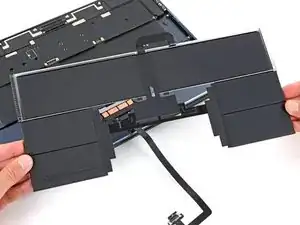
    • Lift the battery and pull it towards the bottom of your laptop so the battery cable slides out from under the logic board.

    • Remove the battery.

    • During reassembly:

    • Remove any remaining adhesive from the frame and clean up the residue with a few drops of isopropyl alcohol and a microfiber cloth.

    • Before removing any adhesive liners, place the battery in its recess and make sure it fits.

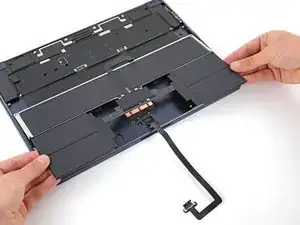
    • When installing a new battery, make sure you slide its cable under the logic board before securing the battery.

    • If your replacement battery comes with adhesive, remove the plastic liners and firmly press each cell into place.

    • If your replacement battery doesn't come with adhesive, secure it with stretch-release adhesive or double-sided tape.

Conclusion

To reassemble your device, follow these instructions in reverse order.

For optimal performance, calibrate your newly installed battery after completing this guide.

If you notice any unusual behavior or problems after installing your new battery, you may need to reset your MacBook's SMC.

Take your e-waste to an R2 or e-Stewards certified recycler.

Repair didn’t go as planned? Try some basic troubleshooting, or ask our Answers community for help.

Spencer Day

Member since: 14/09/22

95592 Reputation

One comment

2 Questions, please. Is this the same sequence on the 13" A3113? Also, can the battery be changed without removing the trackpad cable. If I remember correctly, mine appeared loose from the battery.

Thanks! Would love to see this in a video version. It is very helpful.
Purple Nurple -