Introduction

Use this guide to replace the freezer compartment ice room blower on your Samsung older French door refrigerator.

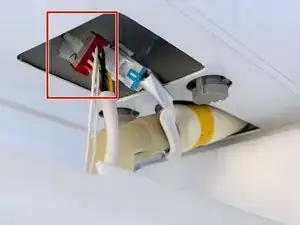
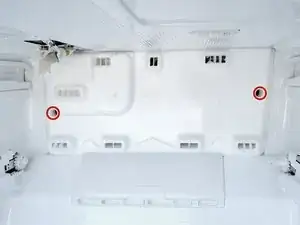
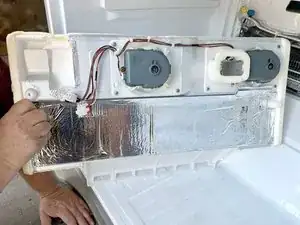
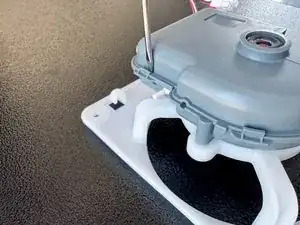
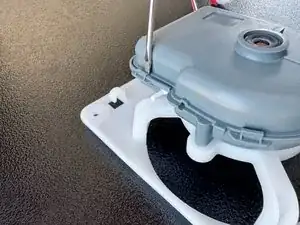
The freezer compartment ice room blower is found behind the evaporator cover in the freezer compartment and is mounted on the cover. It circulates cold air to the ice room in the fresh food compartment. This air cools the ice room where the through-door dispensing ice maker is located.

If the ice room blower fails, either from ice jamming it or because it fails itself, the temperature in the ice room will rise, and the refrigerator will not produce ice for through-door dispensing.

This guide will work for many Samsung refrigerator models. The photos in this guide are from a Samsung RFG298HDRS refrigerator. If you have a different model, you may encounter minor disassembly differences, but the overall repair process will be the same.

  1. SaOfLbkeAxgmho5g
    • Unplug your refrigerator before you begin your repair.

    • If you are testing or repairing the following items, you may also need to shut off and disconnect the water supply:

    • Condenser fan motor

    • Compressor motor and thermal overload device

    • Water supply valve assembly

  2. vAeEjnKWJmKiaSLh
    vAeEjnKWJmKiaSLh
    jJD6R3IZCMXaREVE
    • Open the freezer drawer.

  3. i1y4E1iChFswDEtO
    i1y4E1iChFswDEtO
    Eb56MQbmsrtVIheL
    WoJjBq42gHggIQKS
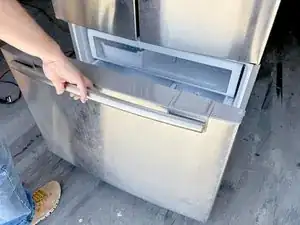
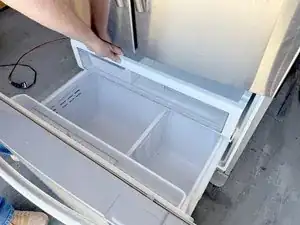
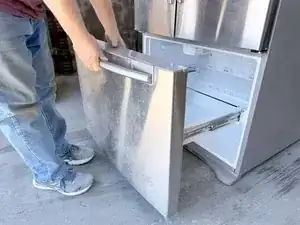
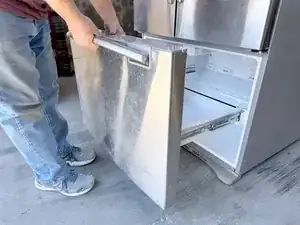
    • Pull out the upper freezer drawer.

    • Lift the front edge of the drawer.

    • Remove the drawer by lifting it up and out of the freezer compartment.

  4. XVAaafUjyZY3KNC2
    XVAaafUjyZY3KNC2
    kqWNxpGsZ4FxP6pr
    rEViTXoNAFxXLBsS
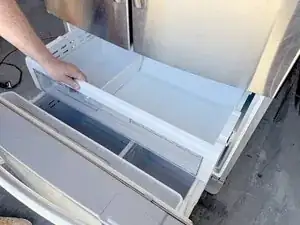
    • Unclip the basket hinge retainer by tilting the rear edge up and remove it from the drawer rail.

    • Release the small drawer basket and lift it up and out.

  5. XDDu2F3awuFIsQd5
    • Lift the drawer basket out of the drawer frame and remove it.

  6. aJXVeAlsiGpeH6yK
    aJXVeAlsiGpeH6yK
    Yjp34gQGf4lQYZCe
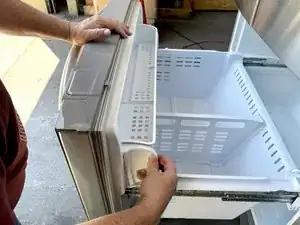
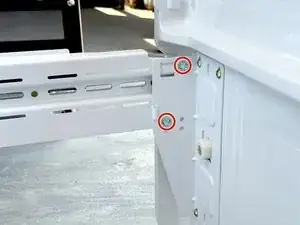
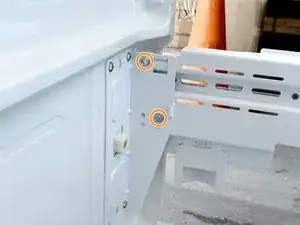
    • Use a 3/8" socket wrench, box wrench, or open end wrench to remove the bolts securing the drawer front to the right drawer slide.

    • Repeat the process for the left drawer slide.

  7. AUFqGfNQBYb4RFnS
    AUFqGfNQBYb4RFnS
    pKDCmrnLeYbBoPlg
    ClMDLOTV1AQnjHjN
    • Lift the drawer front upwards to free it from the drawer slides.

    • Remove the drawer front.

  8. dcbpQZXMoqgqYfYi
    dcbpQZXMoqgqYfYi
    rhP3mAhkK3BEuYrj
    f5GfTrMuYIgNnF1L
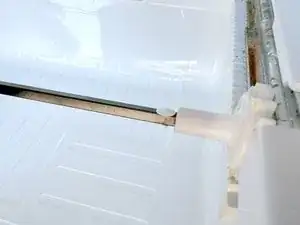
    • Rotate the slide connector rod until you can access the retaining pin.

    • Use a pair of long nose pliers to squeeze the retaining pin shank to release it.

  9. bXoiYxFbiivGLkRZ
    bXoiYxFbiivGLkRZ
    u3qHjcNp6NSuO3IC
    • Pull the retaining pin out of the hole.

    • Slide the connecting rod to the right to free the left end of the rod.

    • Remove the rod by lifting it upward and sliding it back to the left.

  10. ZFPtRMywJLyCLlOv
    ZFPtRMywJLyCLlOv
    gpoPEF1SwDYHIdXo
    • Use a #2 Phillips driver to remove the retaining screws.

    • Two views of the same screws are shown for clarity. There are not four screws.

  11. YKgDtJKoWPdKHUf6
    YKgDtJKoWPdKHUf6
    1GZtZaehDZFMADPY
    • Pull the icemaker forward parallel to the top of the freezer.

    • This will release the icemaker from the freezer top.

    • Reposition the icemaker and hold it in one hand to prepare to disconnect it.

  12. JYVlfGdxmBYL5fjQ
    JYVlfGdxmBYL5fjQ
    YlyQa1lnnUBAChsO
    evTenfwF5RDAsJpL
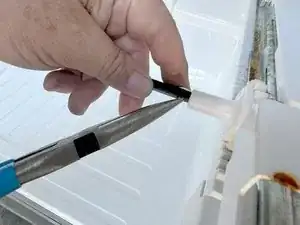
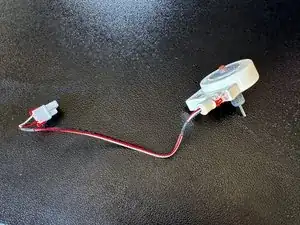
    • Grasp the icemaker connector (the one to the front) and squeeze the release tab.

    • Pull the connector out from the socket.

  13. rwNJPSQP2GQcJIr5
    rwNJPSQP2GQcJIr5
    ZSJGbtlrViGxpp44
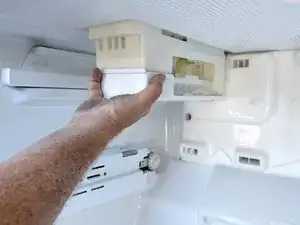
    • Remove the ice maker.

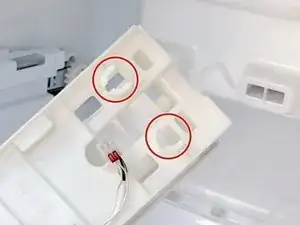
    • This view shows the slots that the mounting studs on the freezer top for reference when reassembling.

  14. fYqBKVClN5YUcQ2o
    • Use a #2 Phillips driver to remove the screws securing the evaporator cover.

  15. KBmBLovBseFXxvwt
    KBmBLovBseFXxvwt
    xlVBffMUknUSdNjN
    DkHL3ZXMlRqwiGQR
    • Lift the evaporator cover from the bottom edge and tilt the edge toward you.

  16. fOgmRmooZeXNtbXb
    fOgmRmooZeXNtbXb
    WKaSMGVLUkk5hRvg
    • Reposition the evaporator cover to allow access to the connections to the right rear.

    • Don't try to remove the cover yet, as you need to first disconnect the electrical connections to it in the upper right rear of the freezer compartment.

  17. 1K25UBDRnqFDua1V
    1K25UBDRnqFDua1V
    NwyDHbnL1jYXU4mM
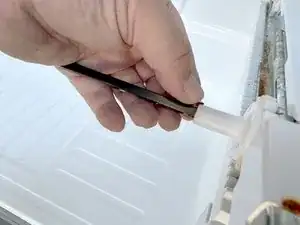
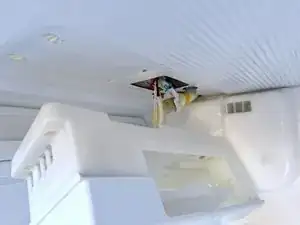
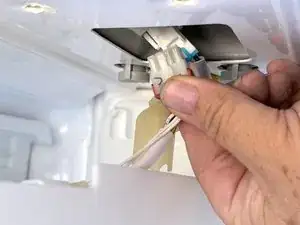
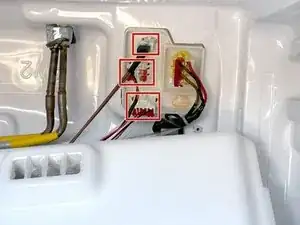
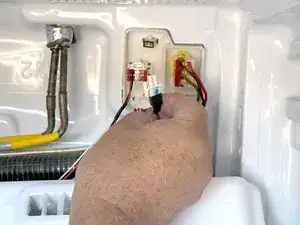
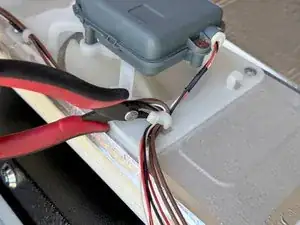
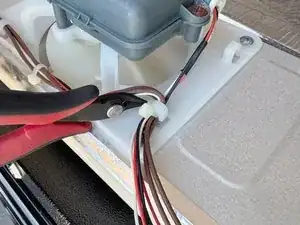
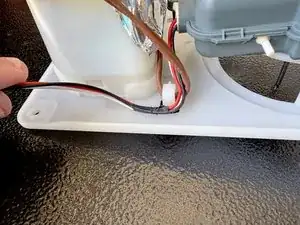
    • Disconnect the connectors by squeezing the release tab on the connector and pulling them free of the sockets.

    • Support the cover from below so there is not tension on the connections.

  18. SS4UtZqP1BTxs3od
    SS4UtZqP1BTxs3od
    6VXPkUCxUJ4NwoIr
    4nUjmWuutfnoGdBo
    • Finish disconnecting the connections while supporting the cover from below.

  19. NS2VkIRYFIYtD1fN
    • Remove the evaporator cover.

  20. xswpk3eEWDOjE2kG
    xswpk3eEWDOjE2kG
    bSyoKBjU5aYAdNTJ
    • Use a flush cutter to cut the cable ties securing the fan and blower wiring.

  21. aoOrNQAblFYA6gPU
    aoOrNQAblFYA6gPU
    jGHmgIJspWNeX1QI
    • Continue to cut the cable ties to free the fan and blower wiring.

  22. 2QuQxPNmUrITD4ZW
    2QuQxPNmUrITD4ZW
    sC5sGyFevORpv3rw
    VVZZW2jjZWuCOvoD
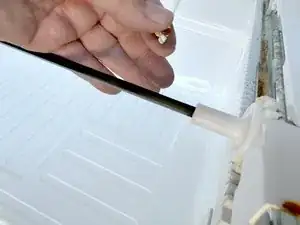
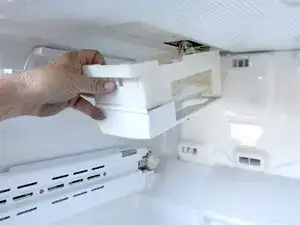
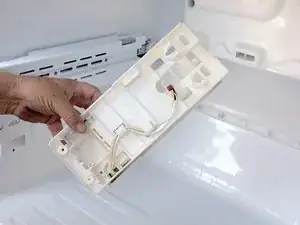
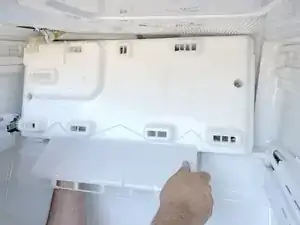
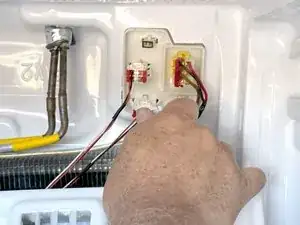
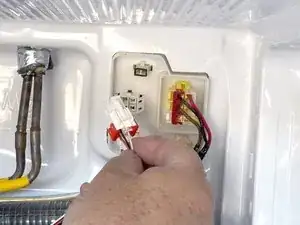
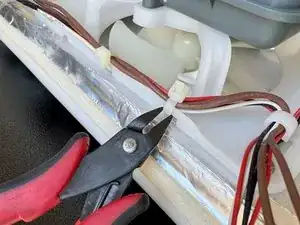
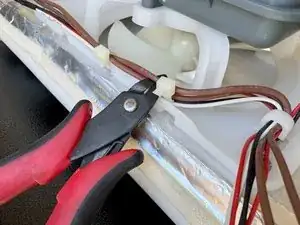
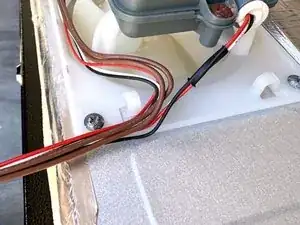
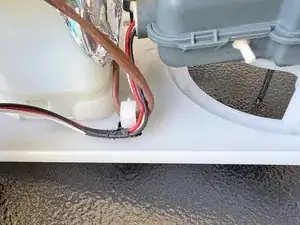
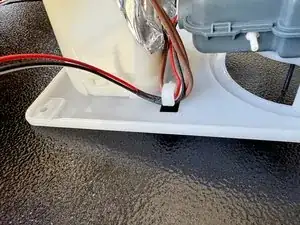
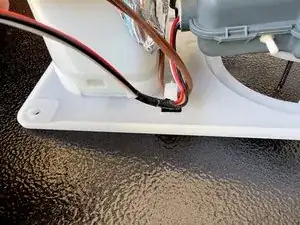
    • Remove the wiring from the wire hooks and clear it away to prepare for fan or blower removal.

  23. DfsnBLYcHOxgSFKd
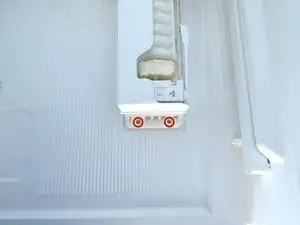
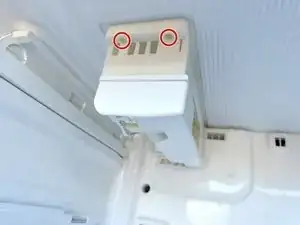
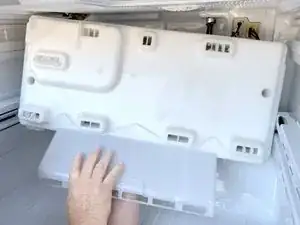
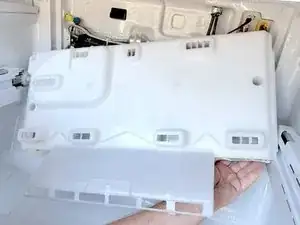
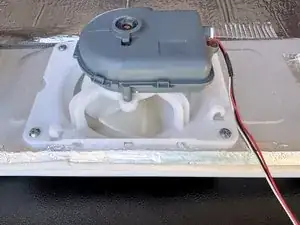
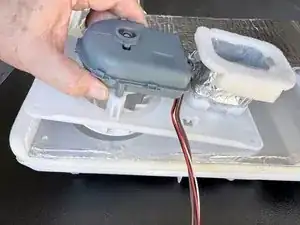
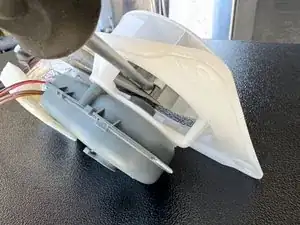
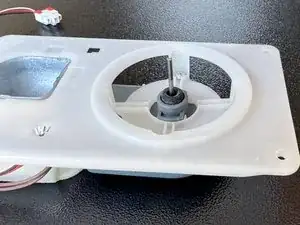
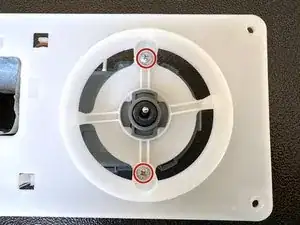
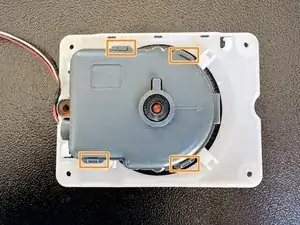
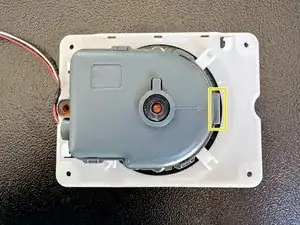
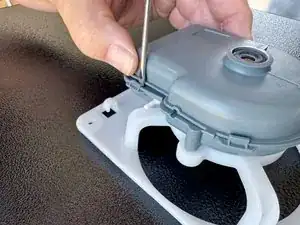
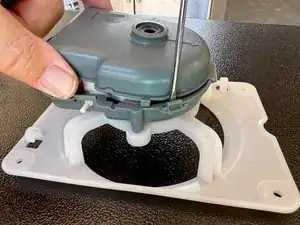
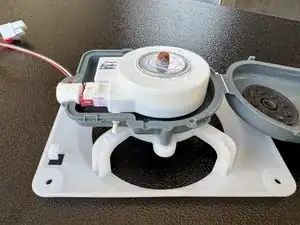
    • Use a #2 Phillips driver to unfasten the screws securing the ice room blower assembly to the evaporator cover.

  24. iuJDKjgULe3OycjE
    iuJDKjgULe3OycjE
    ldTfxPTfANpfvCXF
    AypmaBCrGPfECmxI
    • Lift the blower assembly off of the evaporator cover and remove it.

  25. ScRO51xDJNkkITXg
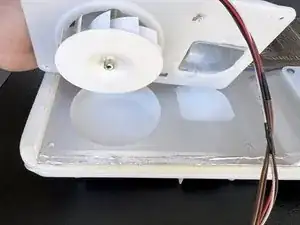
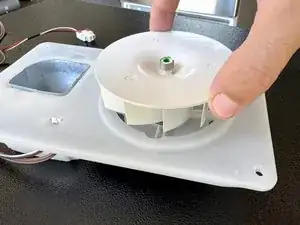
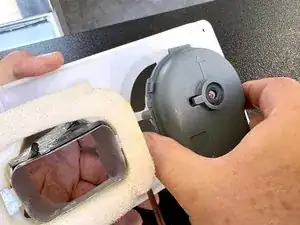
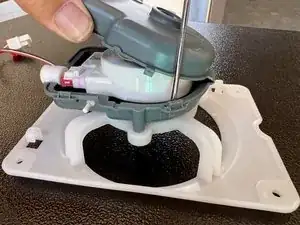
    • Turn the blower assembly motor side down.

    • Insert the long nose pliers in from the side on the motor side of the blower assembly and grasp the motor shaft.

    • Try to insert the pliers as far as you can without distorting or straining the blower assembly frame.

  26. WPredOgsoaC1ZcET
    WPredOgsoaC1ZcET
    iMyvtU6DRZDPLbDt
    nLXk3Tvcft4U2vjl
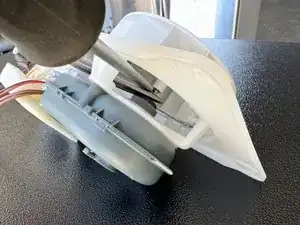
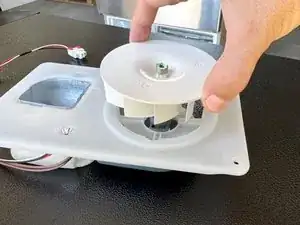
    • Insert a 1/4" straight blade screwdriver between the side of the pliers and the blower wheel hub.

    • You want the screwdriver blade to be as close to the motor shaft as possible.

    • Rotate the screwdriver to apply a prying force to the blower wheel hub and move it upwards on the shaft.

    • The frame of the blower assembly is not strong enough to use a straightforward upward prying motion from the blower wheel side of the assembly. You will likely damage the assembly if you do that.

  27. AYmdCPKQxqxcJsHY
    AYmdCPKQxqxcJsHY
    YZEGA1P5iO4BN1Qd
    PEZEKlG3PAXjCmlG
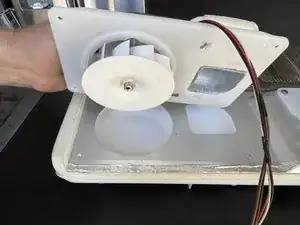
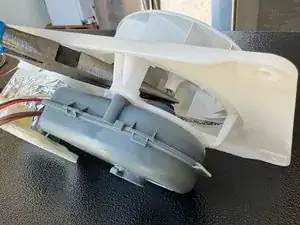
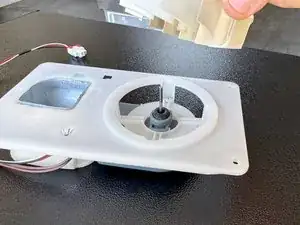
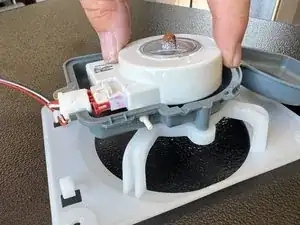
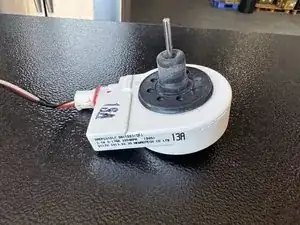
    • Pull the blower wheel straight off the motor shaft. Be prepared to support the fan assembly with your other hand (not shown for clarity).

  28. XOOpmV4RYJxuGyTn
    XOOpmV4RYJxuGyTn
    5pZV5HHTB3kbvqTR
    • You can choose to remove the motor while leaving the motor case attached to the blower assembly.

    • The blower assembly will not be as stable, as the motor shaft is longer and projects further on the blower assembly than on the fan assembly. So the assembly wobbles on the end of the shaft.

    • It can save a couple of steps but is likely a bit more difficult as it isn't as stable. Here's a link to the procedure. The motor arrangement is essentially identical.

  29. nyQlEPs1bAaNpVJB
    nyQlEPs1bAaNpVJB
    BwIgMieLVhbs4EdH
    XTSdbqWPKnOKufJu
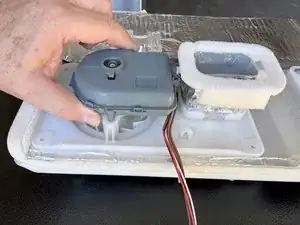
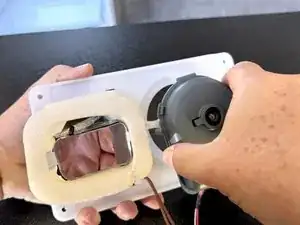
    • Turn the blower motor assembly over so the motor side is up.

    • Unhook the blower motor wires from the assembly.

  30. hVwDJD3NtooYQS6r
    • Use a #2 Phillips driver to unfasten the screws securing the blower motor case to the ice room blower assembly.

  31. dbS6ncyJQRwyEfBR
    dbS6ncyJQRwyEfBR
    xxAtvqipNrouU5gP
    a4RWfxtnnISKJHbh
    • Rotate the blower motor 90° counter clockwise to unlock it from the blower assembly frame.

  32. YC5MBTqkYutNNVOI
    YC5MBTqkYutNNVOI
    OuIIKvmLMci3IZlw
    glTFaUYHj4ccgINL
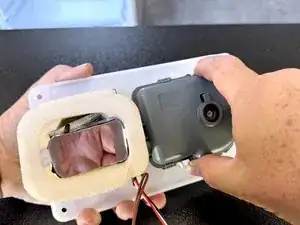
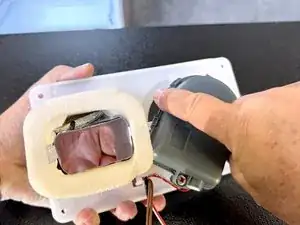
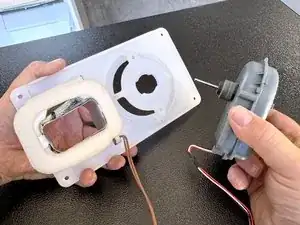
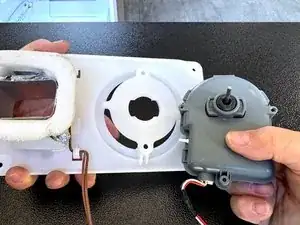
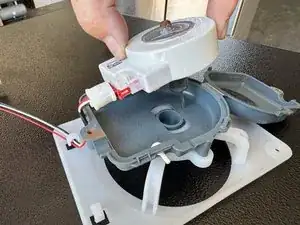
    • Grasp the blower motor case and pull it straight off of the blower assembly frame. Remove the blower motor case with the motor.

  33. FJ3dZ4OuxEZLqHFP
    FJ3dZ4OuxEZLqHFP
    ZSSDAFbDDtlfQcoR
    • Turn the blower motor case so the shaft points downward.

    • The following steps show the fan motor case being opened. The procedure is identical for the blower motor.

  34. 1JCLWWbOxiDZdWP6
    1JCLWWbOxiDZdWP6
    TxiTiac1QuGbPTPE
    rCAMpRya1K6tGgT2
    • Use a #2 Phillips driver to unfasten the Motor case closure screw.

    • Note the clip locations.

    • The motor case has a plastic hinge, so when you open it, allow it to swing open clamshell-style on the hinge.

  35. VWUhKBEAP62fjcxB
    VWUhKBEAP62fjcxB
    jwWEAFnngVLofhtE
    RBaSRU5ObjWiZNMO
    • Use a small flat-blade screwdriver to pry outward on the clip.

    • Lift the cover slightly upward to keep the clip from refastening.

    • Repeat these two items for each clip.

  36. sggb62W6akplamTp
    sggb62W6akplamTp
    UTYbINec24UvqMai
    vdOgvVIrH1scRS1S
    • When you release the last clip, swing the case open at the hinge.

  37. JipyArHDdcydnXFK
    JipyArHDdcydnXFK
    LFjbQnPoC13nMjTa
    • Lift the motor out of the motor case.

  38. sYFbWlWtr5uaTUOm
    sYFbWlWtr5uaTUOm
    xfpfwBFG15dhCsJp
    • The motors for the evaporator fans, the condenser fan and ice room blower are all variations of the same part number with different letter suffixes to indicate their role.

Conclusion

To reassemble your device, follow these instructions in reverse order.

Take your e-waste to an R2 or e-Stewards certified recycler.

Repair didn’t go as planned? Ask our Answers Community for help.

Bill Gilbert

Member since: 30/06/22

37443 Reputation

0 comments