Introduction
Every electronic device powered by batteries will eventually need a replacement, as batteries degrade over time with use. After a long time of use, the battery can begin to deteriorate losing functionality much like a phone after years of use. Symptoms of a deteriorating battery include shorter charge time, difficulty recharging, or complete failure. These are common signs of declining battery health. In this guide, we’ll walk you through replacing the battery located beneath the left ear pad. Be prepared to carefully navigate around the daughterboard during the replacement. Following these steps will ensure your device regains its optimal performance with a fully functional battery.
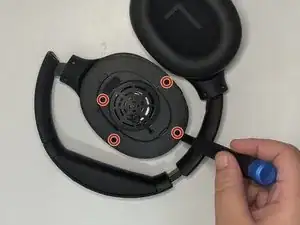
Each of the screws for this project are the same 6.3mm Phillips head screws.
-
-
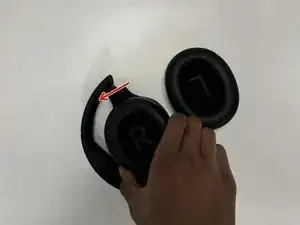
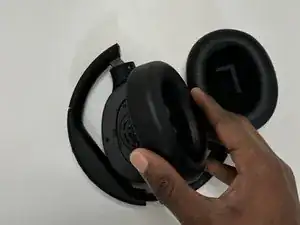
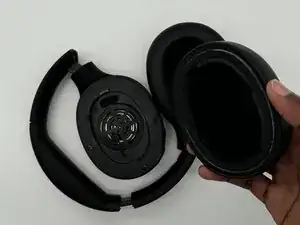
Firmly hold the headphone housing in one hand to hold the device steady and put the other hand on the ear pad you intend to replace.
-
-
-
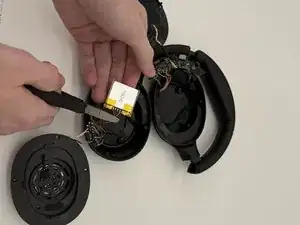
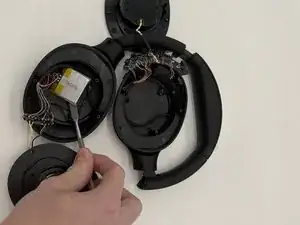
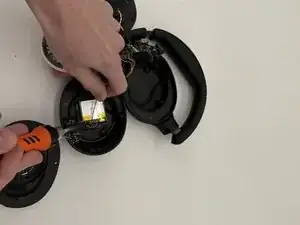
Take wire cutters and carefully snip the battery free, cutting as close to the battery as possible.
-


To reassemble your device, follow the above steps in reverse order.
For optimal performance, after completing this guide, calibrate your newly installed battery.
Take your e-waste to an R2 or e-Stewards certified recycler.
Repair didn’t go as planned? Try some basic troubleshooting or ask our Answers community for help.

This info was really useful, and helped me to investigate why the left speaker didn't work - sadly it appears to be a break in the wiring from right to left sides (the grey wire in the bundle - if I jumper it, I get sound, but I'm not sure if I can replace the whole cable bundle or somehow pull just one wire.....). The 90 degree bends where the wire enters each shell from the headband is a bad idea.
CCB -