Introduction

The talkback cable connects to your device in order to produce sound through your headset. The talkback cable may wear out after extensive use or damage. This guide will take you through the steps necessary to replace your gaming headset's talkback cable.

  1. YjfwYjtKDmjgxEAI
    YjfwYjtKDmjgxEAI
    kiHrBhtsJZM6xIHG
    4shF1cDMxJfnUDux
    • Remove the left ear pad by following the steps from the ear pad replacement guide. earpad replacement guide.

    • Use a spudger to pry up and remove the black plastic cover.

  2. hF4XK3GJDYO24qSr
    hF4XK3GJDYO24qSr
    42mWAjCMqfNAQXYj
    IXRBGjpibowZERZa
    • Use a Phillips screwdriver to remove the two 5 mm screws that secure the motherboard.

  3. F5KqbbkhZBqi55sv
    F5KqbbkhZBqi55sv
    EhR3CHcY1PTs5Nlr
    FCYhUIgbBVI1YPvH
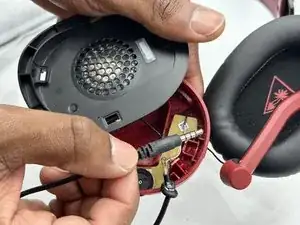
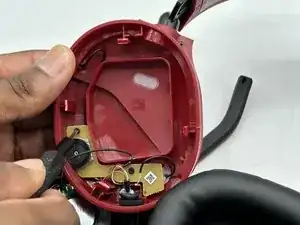
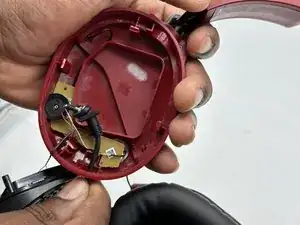
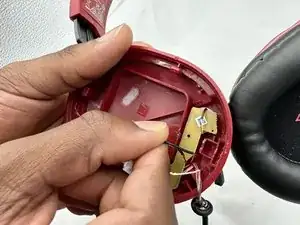
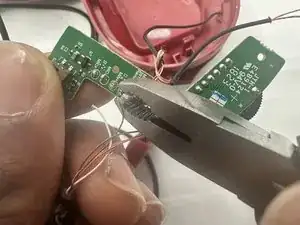
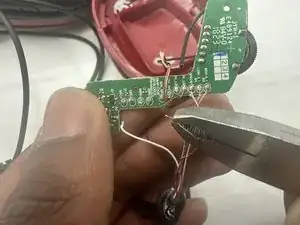
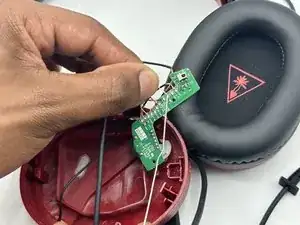
    • Cut the talkback cable below where it enters the speaker housing.

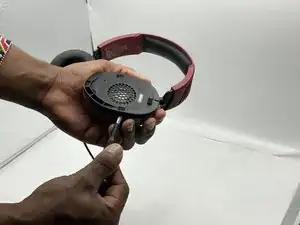
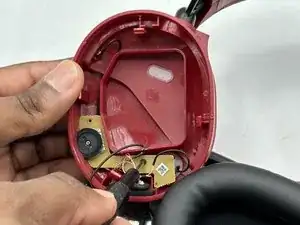
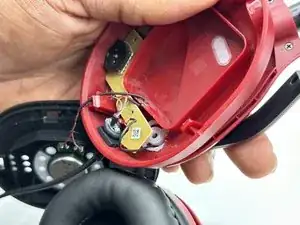
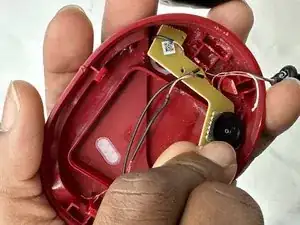
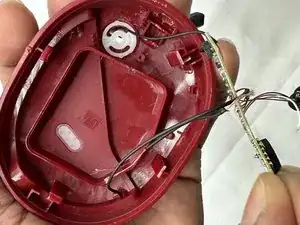
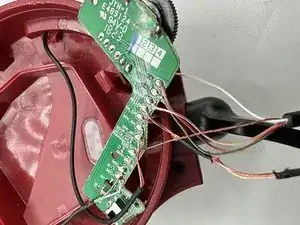
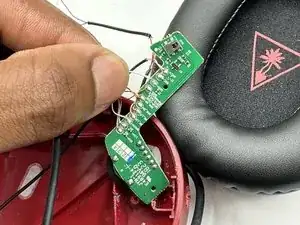
    • Remove the cut section of the talkback cable.

  4. JwtswPSTjILQXCkS
    JwtswPSTjILQXCkS
    sLWxw3sWgDZZxNYp
    Pwl1cbMIqTbYtRqL
    • You may need to move the speaker wire out of site so it will not block the motherboard.

    • Lift the motherboard up and out of the housing.

    • Take care not to strain the wires.

  5. jKEO1Gis1TOLrkOZ
    jKEO1Gis1TOLrkOZ
    XsgfWGVZMYASgPOy
    • Desolder all of the talkback cable motherboard connections.

  6. iunDMMwFKnvOjPxQ
    iunDMMwFKnvOjPxQ
    oZUHLWVLeouE21aM
    CctYKeAst3UYI3eZ
    • Feed the replacement talkback cable through the housing, then solder every wire onto the motherboard's connection points in the order they were initially found.

    • The purpose of each wire is designated in small text on the motherboard.

Conclusion

To reassemble your device, follow these instructions in reverse order.

Austin Hance

Member since: 05/02/24

588 Reputation

0 comments